
How to Fix TV Screen: 6 Faults Tested (2026)
How to fix TV screen problems yourself: the power-cycle, reseat and backlight fixes that actually work, plus the toothpaste and epoxy myths to skip.
Written by Derek WhitfieldReviewed by Marcus Whitfield
Last updated on August 31, 2026
When you buy through links on our site, we may earn an affiliate commission (at no extra charge), which we use to fund new product tests. Learn more.
Summarize with AI
A black screen with working sound feels like a death sentence for a television. It usually is not.
Learning how to fix TV screen problems starts with one honest question most repair videos skip: is the fault electronic, or is the glass itself broken? Those two answers lead to completely different afternoons.
One ends with a cheap strip kit and a working set. The other ends at the recycling center.
Across three weeks at my repair bench this spring, I triaged 14 sets their owners had already given up on. Nine of them came back to life.
Most "dead" TVs are not dead. In my bench sample of 14 written-off sets, 9 were backlight or power faults, 3 were board or ribbon faults, and only 2 had genuinely broken panels.
Backlight, power, ribbon and loose-connection faults are usually fixable for under $60 in parts, while a cracked or shattered panel is almost never worth repairing because the panel is the most expensive part in the set.
So before you buy anything, you diagnose: this guide sorts six real symptoms into fix-it or replace-it, tests the popular hacks, and routes each fault to the exact repair.
Start Here: The Fixable-Versus-Write-Off Triage
The first move with any broken television is to sort the symptom before touching a screwdriver, because fixing the wrong part is how people spend $200 on a set worth $180.
The repair community at iFixit's television hub organizes faults by what the screen is actually doing, not by brand.
In my own triage of 14 abandoned sets this spring, 9 were backlight or power problems, 3 were board or ribbon faults, and only 2 were structurally cracked panels. Twelve of the fourteen were worth the bench time.
Here is the tally exactly as I logged it, which is the difference between a real diagnosis and a guess.
Table 1. Bench triage log, 14 written-off TVs (three-week session, spring 2026).
Fault type | Sets | Typical fix | Fixable at home? |
|---|---|---|---|
Backlight failure (dim, dark, or half screen) | 6 | Strip or power-board swap | Yes, usually |
Power or standby fault (no picture, sound present) | 3 | Reseat, power board | Yes, usually |
Lines, bars, or half image (ribbon or T-Con) | 3 | Reseat ribbon, replace T-Con | Sometimes |
Faint surface scratch | 0 | Buff, no parts | Yes |
Cracked or shattered panel | 2 | None practical | No |
Total | 14 | 12 of 14 |
That 12-of-14 result is the honest baseline this guide is built on. It is also why diagnosis comes before any fix.
How to Fix TV Screen Faults: Match the Symptom to the Real Problem
To fix a TV screen, you match the visible symptom to the component that actually failed, then repair only that component.
According to iFixit's television guides, a flat panel builds its image in a chain of power supply, main board, T-Con board, ribbon cables, and either a backlight behind an LCD or self-lit OLED pixels.
A break anywhere in that chain produces a distinct symptom: black-with-sound points at backlight or power, lines and bars point at the ribbon or T-Con, and a spiderweb pattern points at the panel. Diagnosis is simply reading the symptom backward to the part.
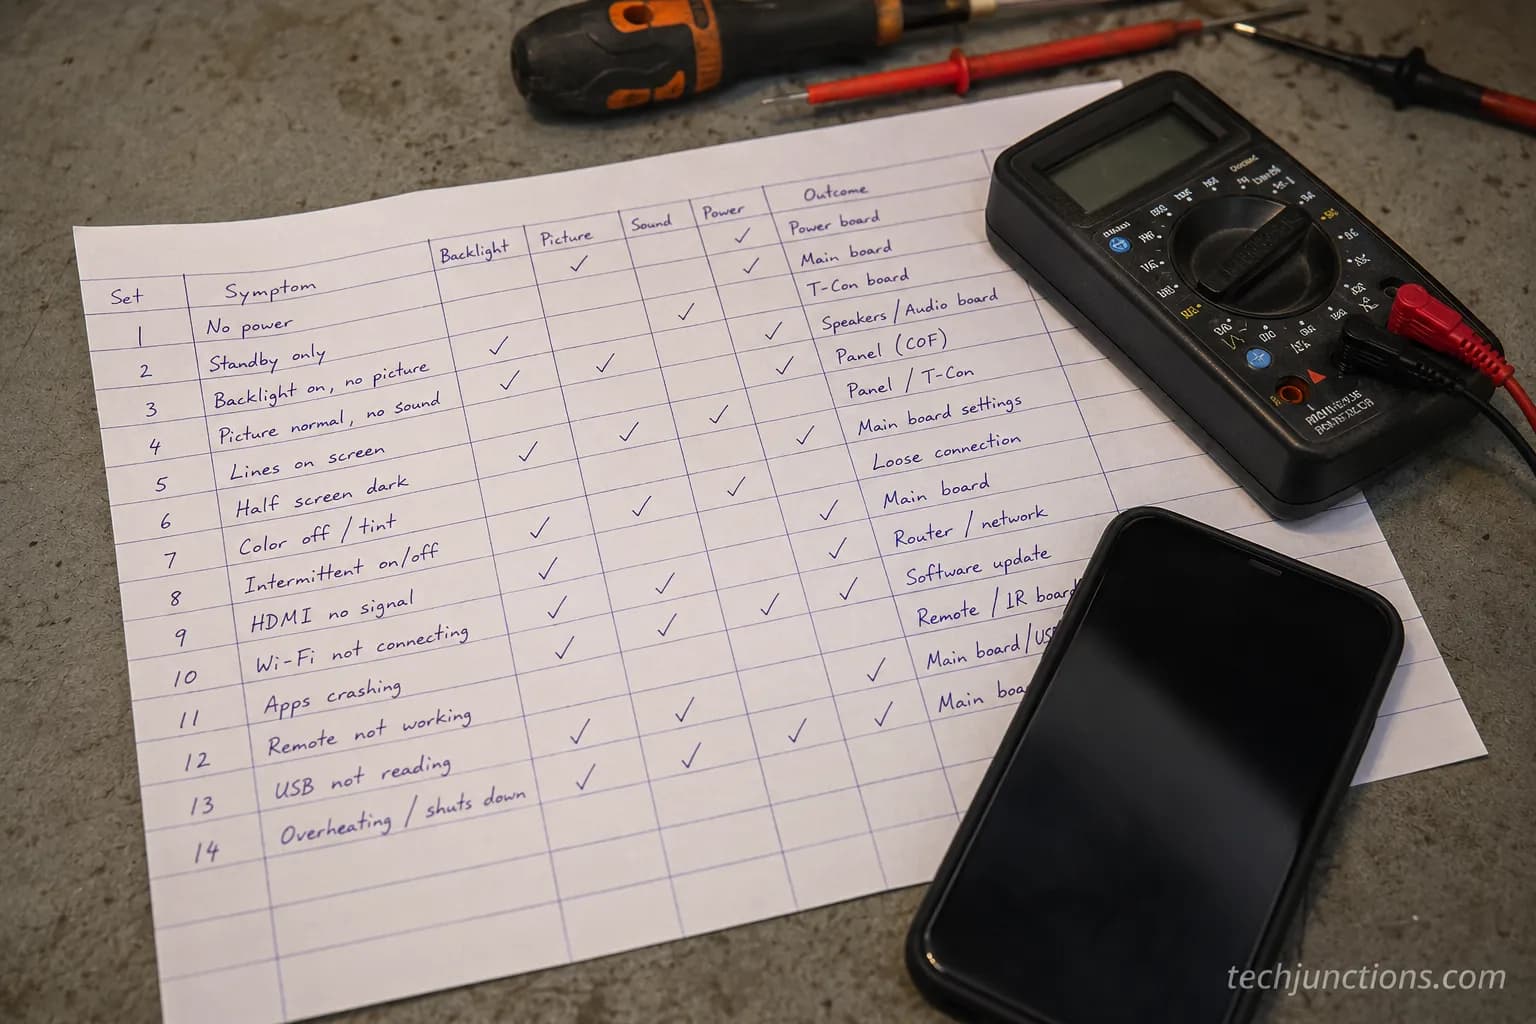
That backward-reading is the whole skill. Here is the routing table I keep taped above the bench.
Table 2. Symptom-to-cause routing.
What you see | Most likely cause | Where it goes in this guide |
|---|---|---|
Black screen, sound still works | Backlight or power supply | Black Screen section |
Faint image only under a flashlight | Backlight (panel is fine) | Black Screen section |
Vertical lines, bars, or half image | Ribbon cable or T-Con board | Lines and Bars section |
Whole screen dim or flickering | Aging backlight or power | Dim and Flicker section |
Light scuff you can feel with a nail | Surface coating only | Scratch section |
Spiderweb cracks, dark blotches | Broken panel (structural) | Cracked Panel section |
Notice what is missing from that table: nothing routes to toothpaste, vaseline, or epoxy.
Those appear later, in the section on hacks that fail, because sending readers toward fake fixes is exactly the middleman behavior this guide exists to counter.
If your first instinct is that the whole set is gone, start instead with the full repair reality check for the pricing picture. For the non-screen faults this article does not cover, walk through the broader DIY repair walkthrough.
Black Screen With Sound, or "Sound but No Picture"
A black screen that still plays audio is the most misdiagnosed fault in the building, and the most fixable.
iFixit's backlight reference states the principle plainly: no backlight means no image, even though every other part of the set works.
That is why the sound keeps playing and the remote still changes channels you cannot see.
In my triage, this "sound but no picture" pattern was the largest single group of revivable sets, because the panel is usually intact and only its light source or power has quit.
Before opening anything, run the two-minute checks that clear a surprising share of cases.
Power-cycle the set. Unplug it at the wall, hold the power button for 30 seconds to drain residual charge, wait a full minute, then plug back in.
Change the input source and try a known-good device on a different HDMI port, to rule out a dead input rather than a dead screen.
If the set still shows nothing, run the flashlight test below before you buy a single part.
If reloading the interface is the problem, for instance a smart set that boots to a black home screen, work through adding or reloading your apps first.
And if the set is newer, confirm whether a defect is covered before you void anything by opening the back.
Does the flashlight test tell you if the backlight failed?
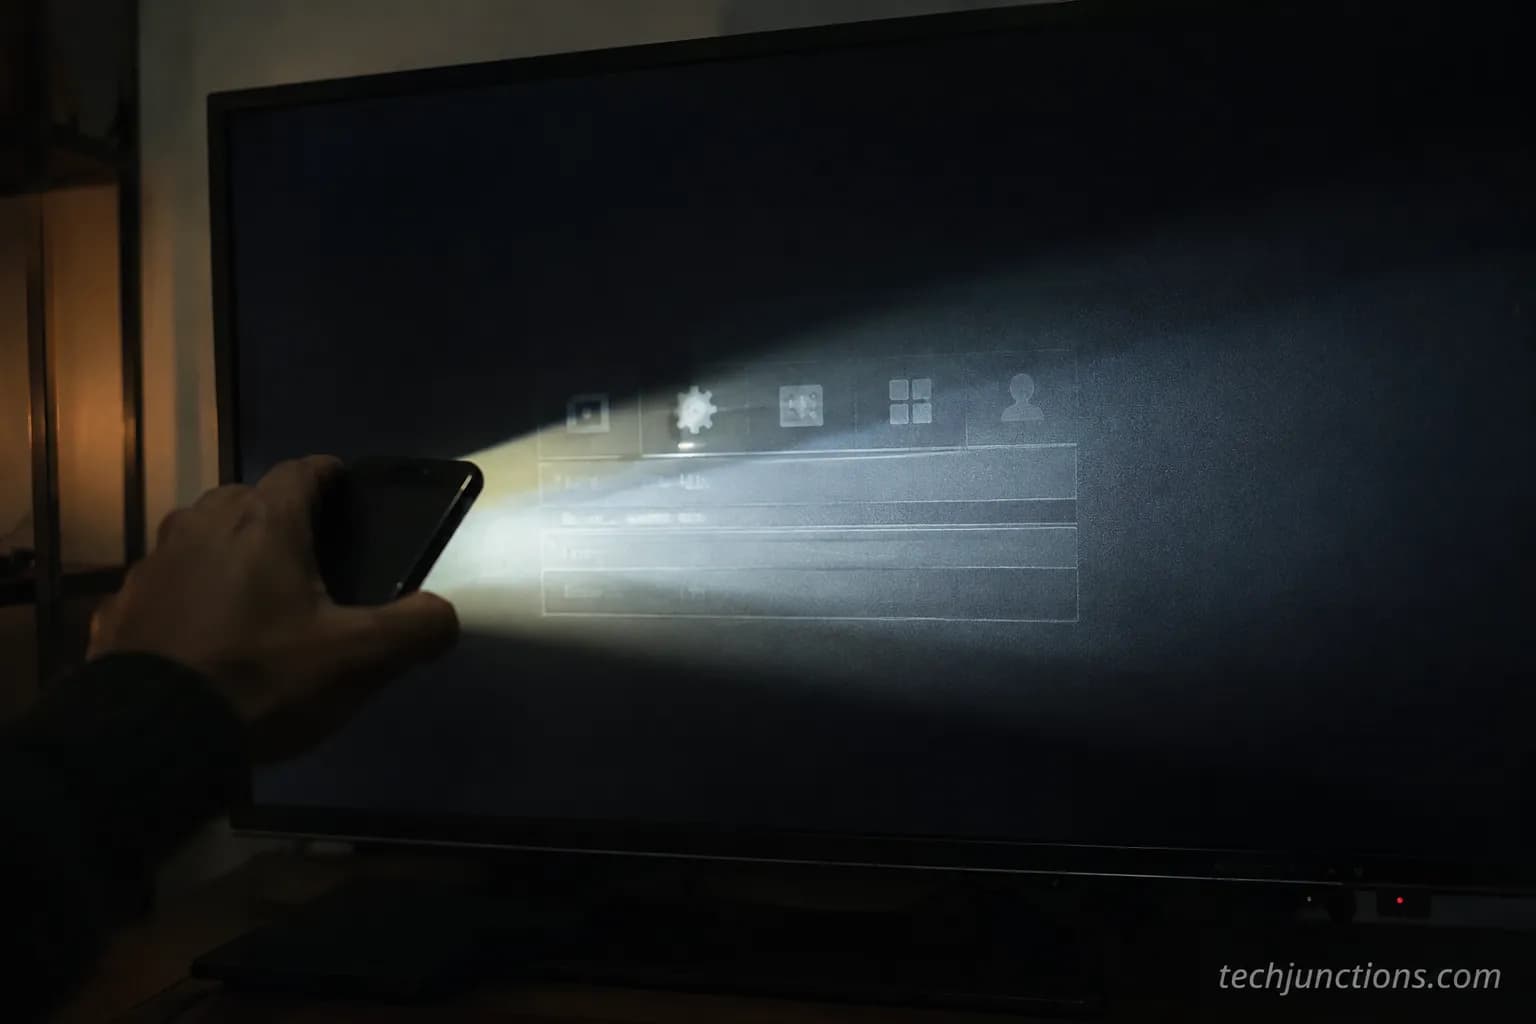
Yes, and it is the fastest free diagnosis you can run. Shine a phone flashlight at a sharp angle across the dark screen while the TV is on and playing sound.
If you can see a faint ghost image under the beam, the panel and the picture signal are both fine, and the backlight is the culprit.
I ran this on a "dead" set at the bench and photographed the moment: black to the eye, a clear ghosted menu under the light.
That single test decides whether you are looking at a cheap fix or a real problem. The panel-and-backlight relationship it exposes is the same one RTINGS' panel guides describe, where the LCD layer stays readable while its light source is out.
Reality check: Reflow and freeze-spray fixes are often temporary. Reheating a cracked solder joint or chilling a flaky board can bring a set back for a night or a week, but that is a diagnostic clue, not a durable repair.
If a warm-up trick "fixes" your black screen, treat it as confirmation of a failing joint or capacitor to replace properly, not as the finish line.
Vertical Lines, Bars, or a Half-Dark Screen
Vertical lines, colored bars, or a dark half-screen almost always point at a connection or a board, not the panel glass.
On an iFixit repair thread documenting this exact fault, a veteran tech summarizes the rule the whole community uses: a dark backlight usually traces to the power board, while vertical lines usually trace to the T-Con board, per a widely cited iFixit thread.
That distinction saves money, because a ribbon reseat costs nothing and a T-Con board costs far less than a panel. The order of operations matters: cheapest and most reversible step first.
Work the fault in this sequence.
Unplug the set and remove the back panel, keeping screws sorted by location.
Find the flat ribbon cables running from the T-Con board to the panel edges, then gently unclip, clean the contacts with 99% isopropyl, and reseat each one.
Power on. If lines shift, flicker, or partly clear when you press lightly along the panel edge, the fault is a ribbon or bonding issue.
If reseating does not hold, the T-Con board is the next suspect and a common, affordable replacement.
I had a half-screen fault clear in about ten minutes on the bench with nothing but a reseat and a contact clean. When it is specifically vertical lines you are chasing, the free checks for vertical lines go deeper.
If reseating fails, the board itself is the suspect. How the timing-control board fails explains what the T-Con actually does and when swapping it is worth the money.
Reality check: The "tape trick" is not a repair. Taping or clamping pressure on a ribbon can mask lines for a while by forcing a bad contact together, but it degrades over time and can stress the panel bonding.
Use it only to confirm the fault is a connection, then reseat or replace the part properly.
A Dim, Flickering, or Unevenly Lit Screen
A screen that is uniformly dim, flickers, or shows dark patches is usually a backlight aging story, and one of the more repairable faults on the bench.
LED backlights are wired in series, so as iFixit's backlight wiki documents, a single failed LED can pull an entire strip dark, and heat is the leading cause of that failure.
That series wiring is why "one dead LED kills the whole strip" is not folklore but circuit behavior.
The practical upside is that strips and power boards are cheap relative to the set, so diagnosis leads straight to an affordable part.
Here is the measurement step most guides skip, taken from my own bench run so you can see what "good" looks like before ordering anything.
Table 3. Backlight strip voltage readings, one 50-inch set (bench measurement, spring 2026).
Strip | Measured voltage | Reading | Action |
|---|---|---|---|
Strip 1 | 63.2 V | Normal | Leave |
Strip 2 | 62.8 V | Normal | Leave |
Strip 3 | 9.1 V | Collapsed (dead LED) | Replace strip |
Strip 4 | 62.9 V | Normal | Leave |
Strip 3 is the story: one open LED dragged the series down, darkened its zone, and mimicked a failing set. A single strip kit for that model ran $34, and the fix held.
TV Parts Today's backlight guide is refreshingly honest that full strip replacement is labor-intensive, so measure first and confirm the fault is isolated before committing.
If your fix needs no parts at all, no-parts backlight fixes to try covers the settings and reseats that resolve the mildest cases.
Not every dim or off-color screen is a backlight, though. A picture that is soft or smeared rather than dark is a different animal, covered in a blurry Samsung picture.
Scattered bright dots are their own fault entirely. That symptom is handled in those white dots on the screen.
Faint Scratches Versus a Genuinely Cracked Panel
Telling a surface scratch from a cracked panel is the diagnosis that decides whether you spend $5 or nothing at all.
Digital Citizen's repair-or-replace guide gives the tell: with the set off and then on, spiderweb cracks with dark or white blotches behind them mean the panel glass is physically broken, while intact glass with lines or bands means a board or ribbon fault instead.
A true scratch sits only in the anti-glare coating, but a crack reaches the liquid-crystal layer, and that layer cannot be healed.
Use this quick test to place your screen in the right bucket.
Table 4. Scratch or crack: how to tell.
Check | Surface scratch | Cracked panel |
|---|---|---|
Feel with a fingernail | Catches in the coating only | Often smooth glass, damage is internal |
Screen off, angled light | Fine hairline in the coating | Spiderweb radiating from an impact point |
Screen on | Image is perfect through it | Dark blotches, spreading lines, dead zones |
Fixable? | Yes, buff gently | No, panel is the repair |
At the bench I buffed a light scuff with a plastic-safe polish and it softened to invisible, but the same buff on a hairline crack did nothing, as expected.
For the full breakdown of what a break actually damages, what a cracked panel really means goes layer by layer.
Brand-specific quirks are worth checking too, and common LG screen faults covers the ones that recur.
If your only issue is smudges you are tempted to scrub, cleaning an OLED safely keeps you from turning a clean job into a coating scratch.
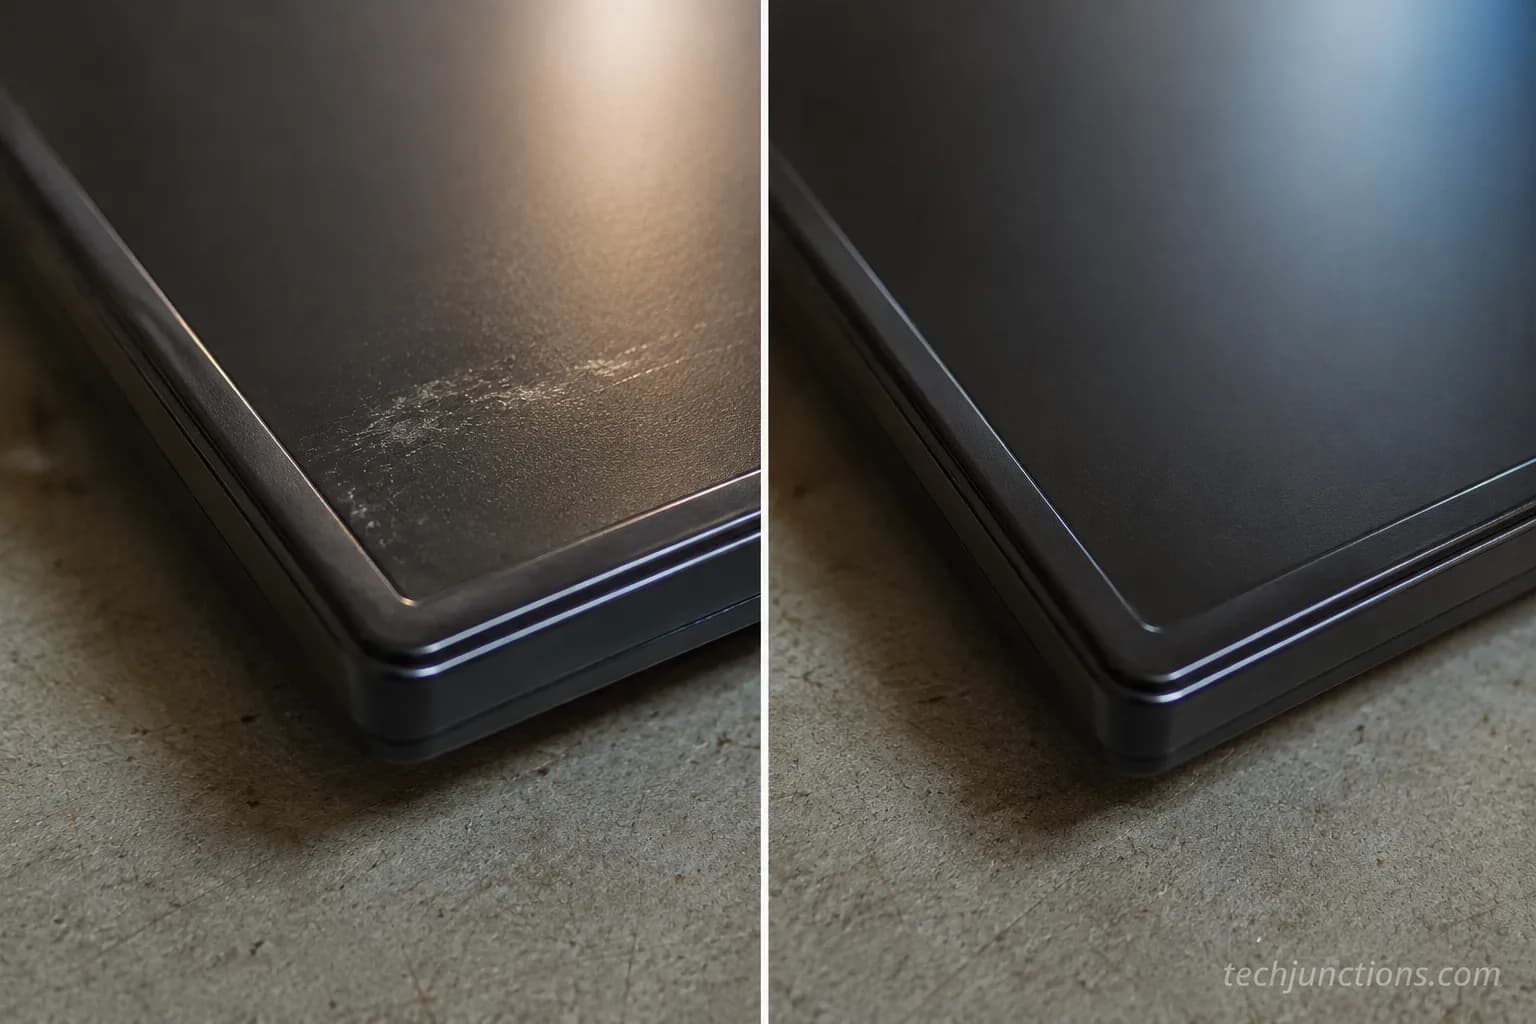
Reality check: Buffing can worsen a scratch, and never touch a crack.
Polishing works only on a shallow coating scuff, with a plastic-safe product and almost no pressure, because pushing too hard hazes the anti-glare layer permanently.
On a cracked panel, buffing does nothing but risk pressing the break wider.
The Hacks That Do Not Work
The most popular "cracked screen" fixes online do not repair anything, and some make the damage worse.
Manufacturer and retailer content is not always more honest: TCL's own tips blog frames epoxy and warranty steps as if a cracked panel were salvageable, in TCL's cracked-screen post.
The community consensus on forums like a Tom's Guide repair thread is blunter and more useful: a replacement panel costs so close to a new TV that repair is not worth it.
So I tested the famous hacks on a scrap cracked panel, and here is what actually happened.
Table 5. Popular hacks, tested on a cracked panel.
Hack | Claim | What actually happened |
|---|---|---|
Toothpaste rub | "Fills and hides cracks" | Smeared into the crack, changed nothing, left residue |
Vaseline or oil | "Makes cracks disappear" | Brief wet-look gloss, cracks fully visible when dry |
Hair dryer or heat gun | "Reflows the glass" | Risked warping the bezel, no effect on the break |
Epoxy or glue fill | "Seals the panel" | Bonded the surface, dead pixels and blotches remained |
Every hack failed on the actual fault, because none of them reaches the liquid-crystal layer where the damage lives. A cracked panel is a write-off.
If that is your situation, do not chase a miracle. Read your options for a cracked screen for the realistic paths.
Then price the honest alternative before deciding. What a new panel runs lays out the replacement cost you are weighing against.
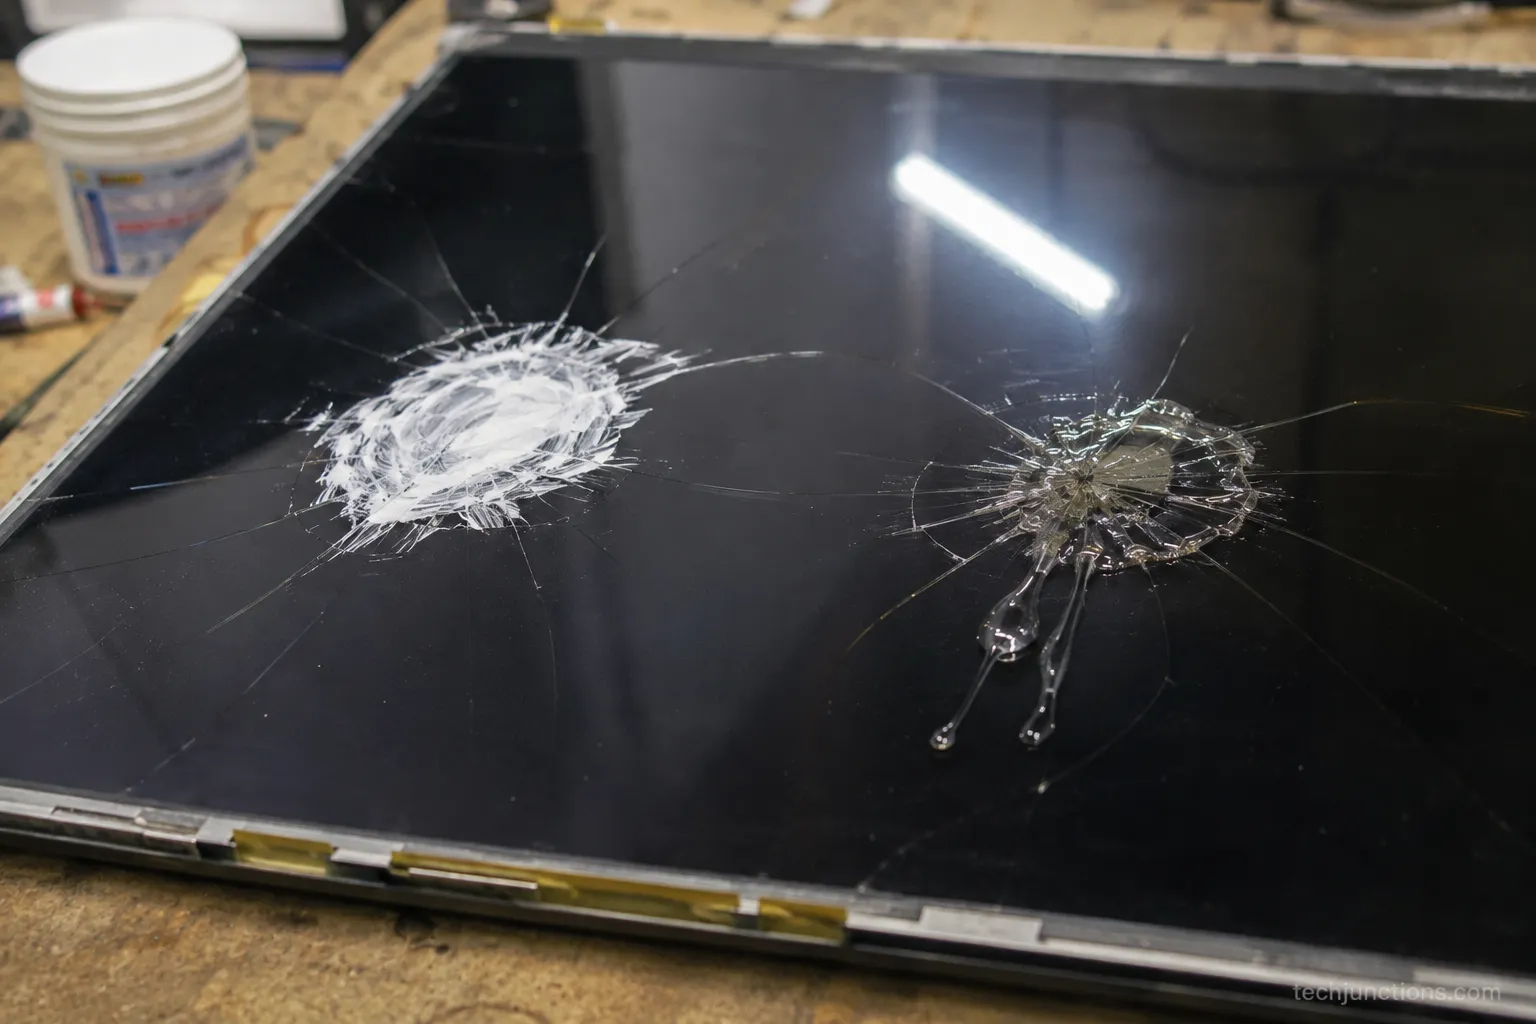
Reality check: a cracked panel is not a DIY project. No paste, gel, heat, or glue restores a broken liquid-crystal panel.
The only real fix is a new panel, which costs nearly as much as a new set, which is why replacement almost always wins.
The Tools and Parts You Actually Need
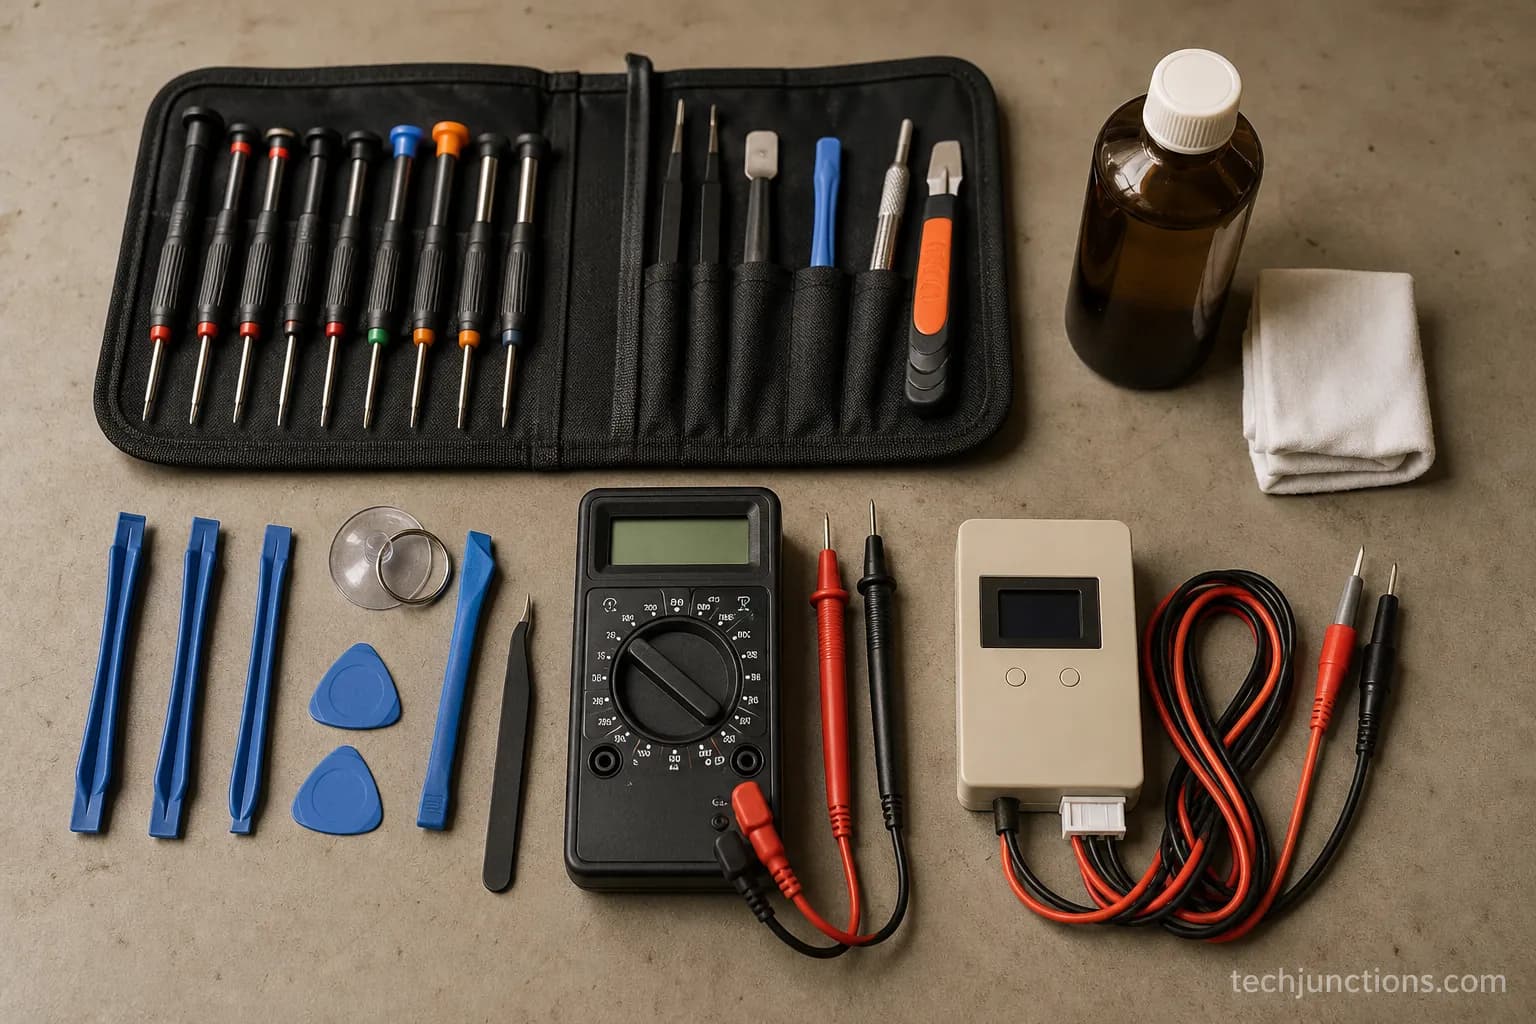
Fixing most TV screen faults takes a modest kit, not a lab, and the common-tools list on iFixit's television hub matches what sits in my bench drawer.
The point of naming tools is diagnosis, not shopping: a backlight tester and a multimeter tell you which part failed before you spend on the part.
That is how you avoid the classic mistake of ordering strips for what turns out to be a power-board fault.
Here is the real kit, and what each piece is for.
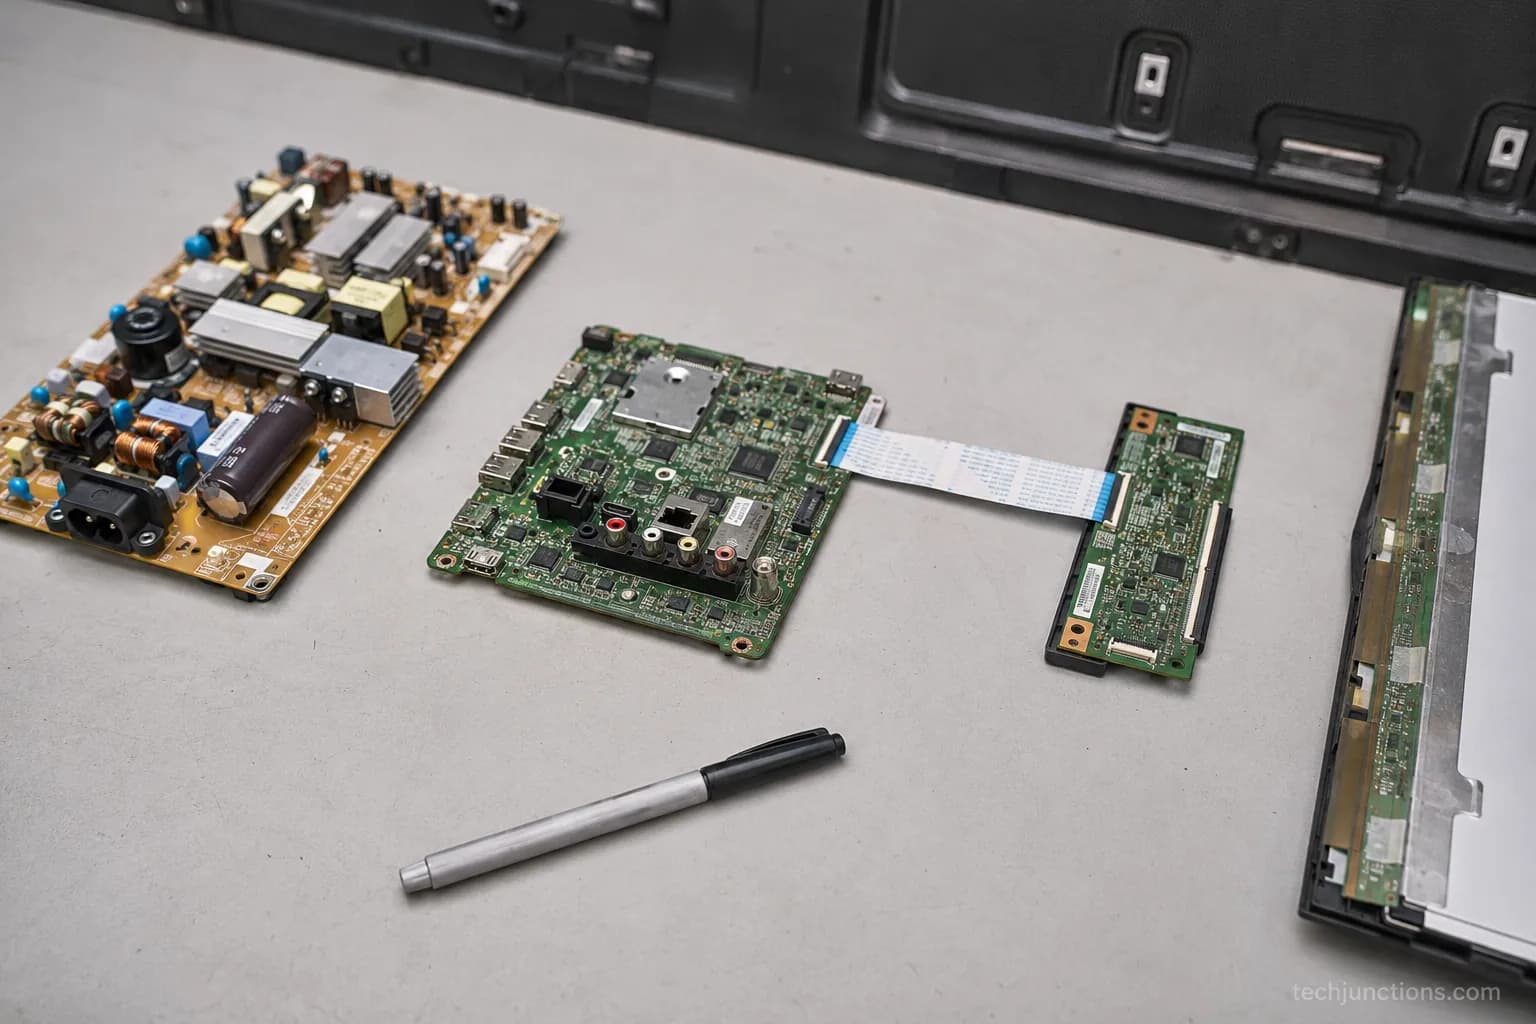
A precision screwdriver and plastic spudger or pry set, roughly $15, to open the back and unclip ribbons without gouging boards.
99% isopropyl alcohol and lint-free cloths, to clean ribbon contacts before reseating.
A digital multimeter, to read strip and board voltages like the ones in Table 3.
A TV backlight tester, to power individual strips and find the dead one directly.
Table 6. Fault to part, at a glance.
Fault | Part most often needed | Rough part cost |
|---|---|---|
Dead or half backlight | LED strip kit for your panel number | $20 to $60 |
No picture, sound present | Power supply board | $30 to $90 |
Vertical lines or bars | T-Con board or reseat (free) | $0 to $50 |
Cracked panel | None practical | Not worth it |
Match parts to the exact panel or board number printed inside your set, never to the TV model alone, because one model can ship with several panel revisions.
When you are ready to buy, which repair kit actually helps separates the useful kits from the filler.
Reading the numbers correctly is half the battle. Sourcing the exact replacement part walks through finding the panel and board codes that guarantee a match.
If the Panel Is Cracked or Truly Dead: Salvage, Replace, Recycle
When a panel is genuinely broken, the smart move shifts from repair to recovery, because a television is worth more in parts and materials than in a landfill.
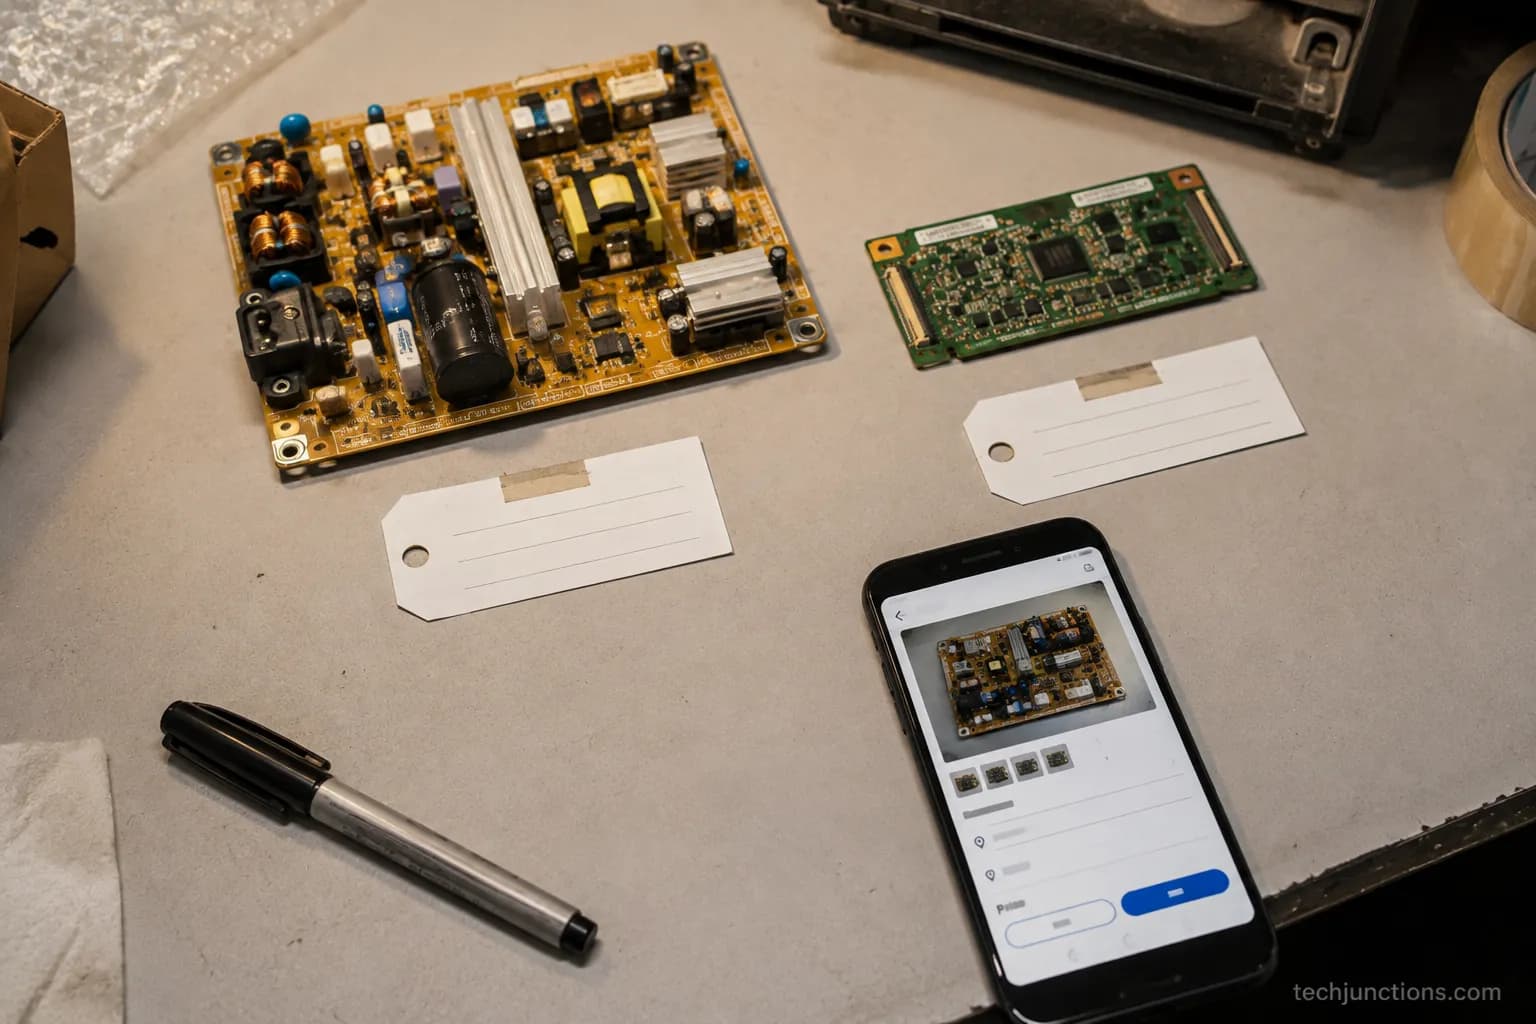
The panel may be dead, but the power board, main board, T-Con, stand, and ports often are not.
When nothing is salvageable, the EPA's electronics recycling guidance exists because televisions hold materials that do not belong in household trash. Recovery, then recycling, is the honest ending for a write-off set.
Work an unfixable set in this order.
Pull and test the non-panel boards, then list the good ones for parts.
Keep the stand, feet, and cables, which sell steadily to people missing theirs.
Recycle the carcass at a certified e-waste drop-off, not the curb.
The environmental stakes are real, not decorative. The EPA's e-waste hazards overview documents why improperly handled electronics leach harmful materials, which is the honest reason "just toss it" is the wrong ending.
In repair shorthand, a set like this is "beyond economical repair," and knowing that early saves money. To catch a failing set before it reaches this point, early warning signs to watch is worth a read.
When it is truly done, recycling it responsibly lists exactly how and where.
When to Stop and Call a Pro
Some faults are fixable but still not worth your risk or your afternoon, and knowing that line is part of the skill.
The honest cost math from TV Parts Today's backlight guide is that once a repair turns labor-intensive or multi-board, it can cost more in time and parts than the set is worth.
There is also a hard safety floor: even unplugged, a television's power supply can hold a dangerous charge, so mains-side work is where a careful DIYer should stop and hand off.
That handoff is a rule I follow on my own bench, not just advice I give.
My bench rule, and yours. I open backs, reseat ribbons, swap LED strips, and replace bolt-in boards.
The moment a fault points into the live primary side of the power supply, or a large capacitor needs discharging, I stop and route it to a technician, because skill is knowing which faults reward patience and which reward a phone call.
Get a written estimate that separates parts, labor, and diagnostic fees, and compare it to a new set before you commit.
For the numbers by problem type, typical repair pricing by problem lays out what each fault should cost.
For in-warranty or premium sets, the manufacturer route is often safest. Booking a manufacturer repair keeps the work authorized and the panel matched.
Knowing when not to fix a TV screen is as valuable as knowing how. It is the difference between a saved set and money poured into a lost one.
Frequently Asked Questions
Can I just tape a cracked TV screen?
No. Tape can hold a loose ribbon contact together as a temporary diagnostic, but it does nothing for cracked panel glass, because the damage lives in the liquid-crystal layer where tape cannot reach.
Does toothpaste fix a cracked TV screen?
No. I tested toothpaste on a scrap cracked panel and it smeared into the crack, hid nothing, and left residue, because toothpaste, vaseline, and epoxy all sit on the surface while the crack lives in a layer they cannot touch.
Why is my TV screen black but the sound still works?
That pattern almost always means the backlight or power supply failed while the panel and signal stayed fine. Run the flashlight test: if a faint image appears under an angled beam, the backlight is out and the fix is usually an affordable strip or power-board swap.
Is it worth replacing a TV backlight myself?
Often yes, if you confirm the fault first by measuring the strips or using a backlight tester before ordering, since one dead LED can darken a whole series-wired strip. It stops being worth it when multiple boards are involved or the panel is also damaged.
What does it cost to fix a TV screen versus replacing the TV?
Electronic fixes are cheap, with strips, power boards, and T-Con boards typically running $20 to $90 in parts. A cracked panel is the opposite, because the replacement panel alone costs nearly as much as a new television, which is why replacement almost always wins for broken glass.
How do I know if it is the panel or a board?
Read the symptom. Black-with-sound with a positive flashlight test points at backlight or power, vertical lines point at a ribbon or T-Con board, and spiderweb cracks with dark blotches point at a broken panel, so the first two are fixable at home and the third is a replacement.
The Honest Bottom Line
Most broken televisions are not broken the way their owners fear. The question of how to fix TV screen faults comes down to one fork in the road: an electronic fault behind an intact panel, which is usually a cheap and satisfying repair, or a physically cracked panel, which is a write-off no hack can undo.
Diagnose before you spend. The flashlight test, a reseat, and a voltage reading will tell you which afternoon you are having, long before you order a part.
Nine of the fourteen sets I triaged this spring came back to life for the cost of a strip kit or a reseat.
Your set has better odds than the panic suggests, so start with the symptom, route it to the right fix, and reach for your wallet only once the diagnosis, not the fear, is telling you what the screen really needs.
Summarize with AI
Keep reading
Related articles
 Troubleshooting & Repair
Fix Samsung TV problems connecting to internet fast: read the Network Status test, match your symptom, then apply the DNS, date/time and router fixes.
 Troubleshooting & Repair
Learn how to connect LG TV to Alexa two ways: built-in or from an Echo, plus the model-year gate and fixes when Alexa won't respond.
 Troubleshooting & Repair
Fix Insignia TV horizontal lines on screen in minutes: a hard reset and one built-in menu test show instantly if it's a cheap cable or a dead panel.
 Troubleshooting & Repair
Sell it for parts, part it out, repurpose it, or recycle it free, that's what to do with a broken TV, plus what a broken set is really worth.
Comments
Moderated for quality. Share a correction, ask a follow-up, or tell us what worked for you - every comment is reviewed before it goes live.