
How to Fix TV Backlight Without Replacing It (3 Tested)
Short a dead LED, reflow a cracked joint, or reglue a fallen lens: how to fix TV backlight without replacing it, plus the honest lifespan catch of each.
Written by Derek WhitfieldReviewed by Marcus Whitfield
Last updated on September 2, 2026
When you buy through links on our site, we may earn an affiliate commission (at no extra charge), which we use to fund new product tests. Learn more.
Summarize with AI
A dim, dark, or spotty screen almost always traces back to the backlight, and the internet has two loud answers: the videos that promise a free five-minute miracle, and the parts blogs that tell you to buy new strips.
Both are half right, because you can often learn how to fix TV backlight without replacing it, yet every no-parts fix is a stopgap with a real cost.
Knowing which one to trust is the difference between a genuine save and a wasted afternoon, so I opened three dead sets to sort the shortcuts that work from the ones that only look like they do.
The No-Parts Backlight Fixes That Actually Work
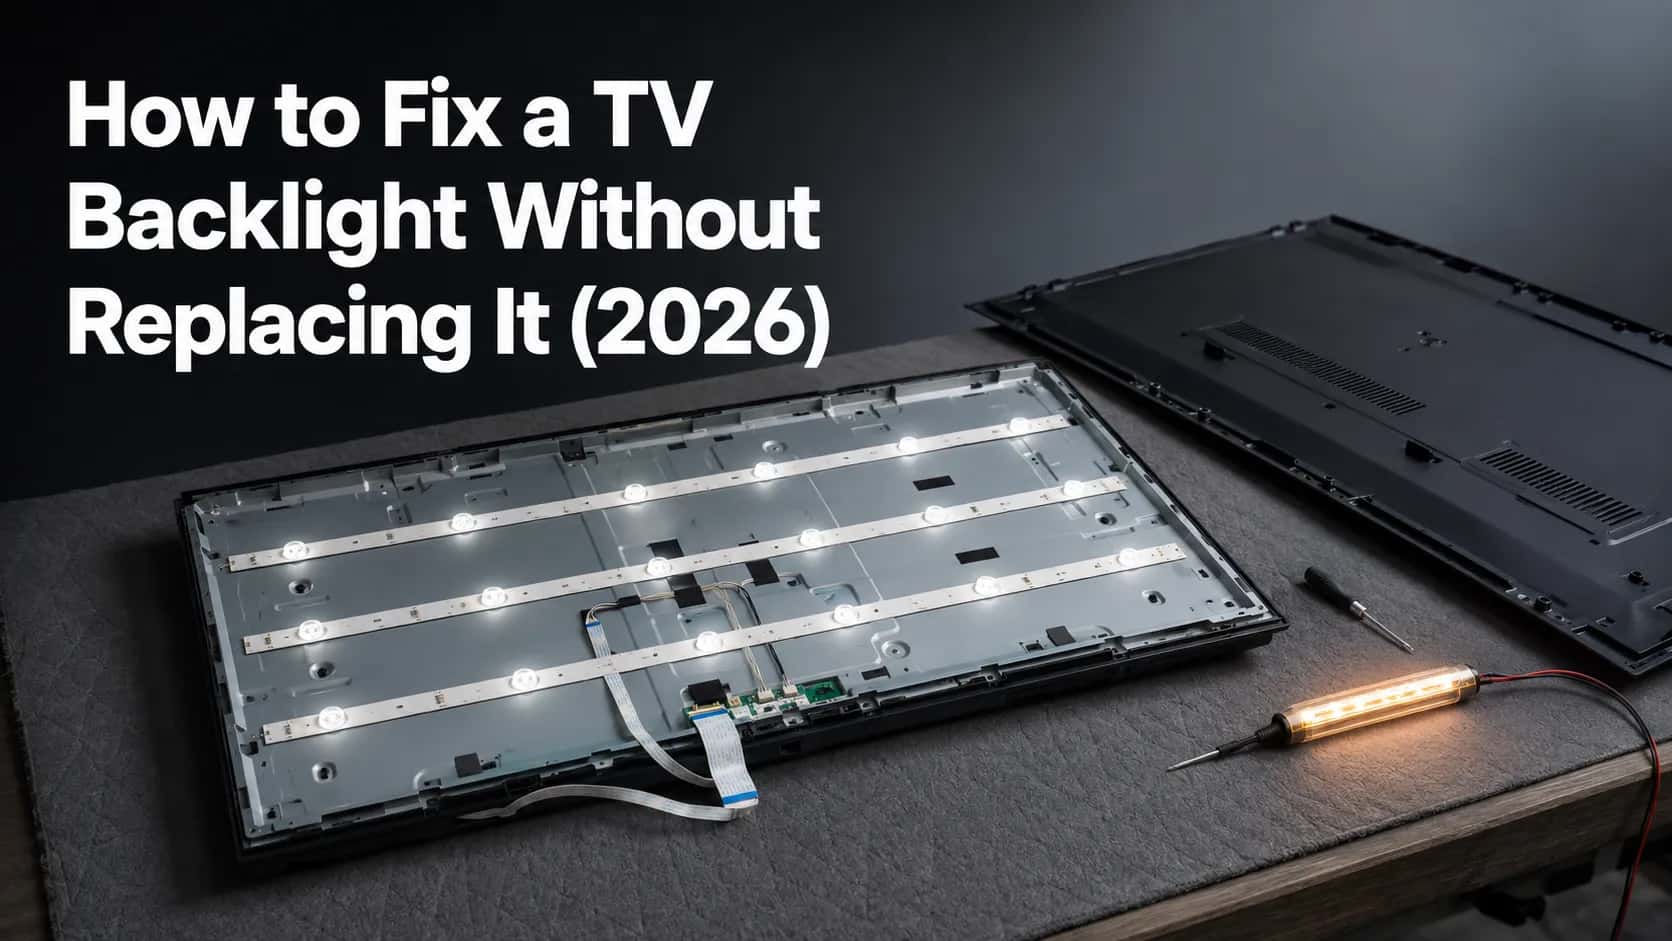
You can sometimes revive an LED-LCD TV backlight without buying new strips using one of three fixes: short out a single dead LED, reflow a cracked solder joint, or reglue a fallen diffuser lens. Google's own AI Overview lists the same three fixes.
The honest catch the videos skip is that shorting a dead LED makes the rest of that series string run hotter, so it buys weeks or months, not years.
Reflowing a cracked joint is the most durable of the three, and regluing a fallen lens clears bright spots cleanly, though aged adhesive means more lenses will drop later.
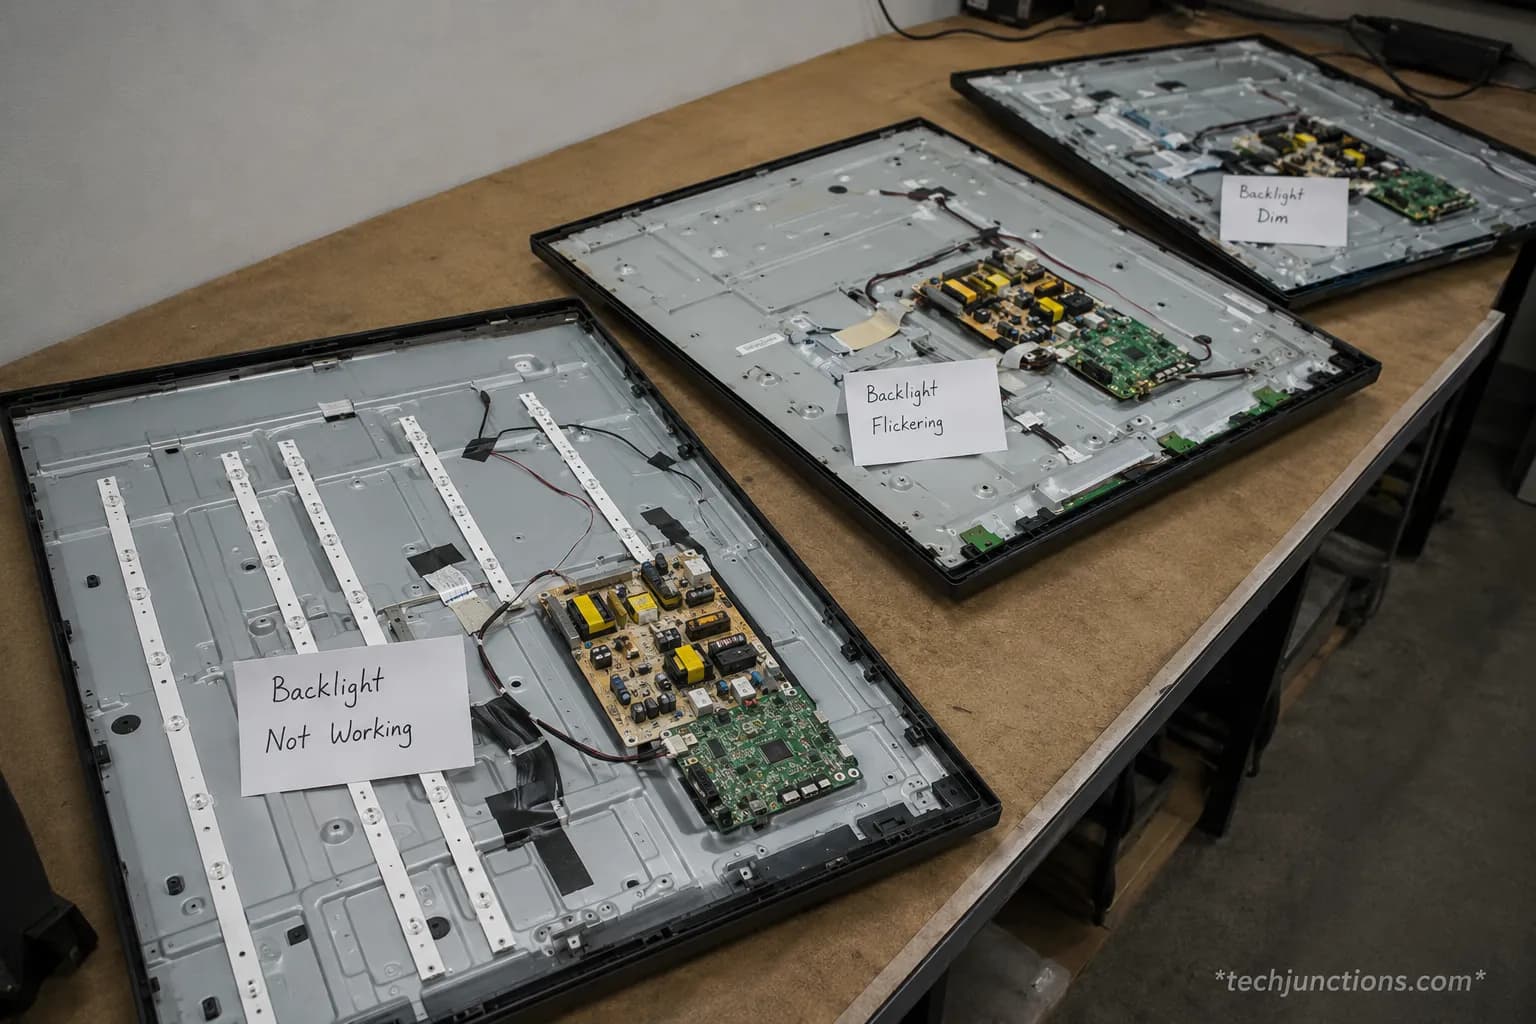
The honest tally: across three dead sets I opened for this guide, two were saved with no new parts (a reglue and a reflow) and only one truly needed strips.
That is the real hit rate, not the "always works" of the demos or the "never bother" of the parts sellers.
First, Confirm It's the Backlight, Not the Panel or Power
Before any fix, confirm the backlight is actually the culprit, because a dead panel, a failing power board, or a bad control board look similar from the couch.
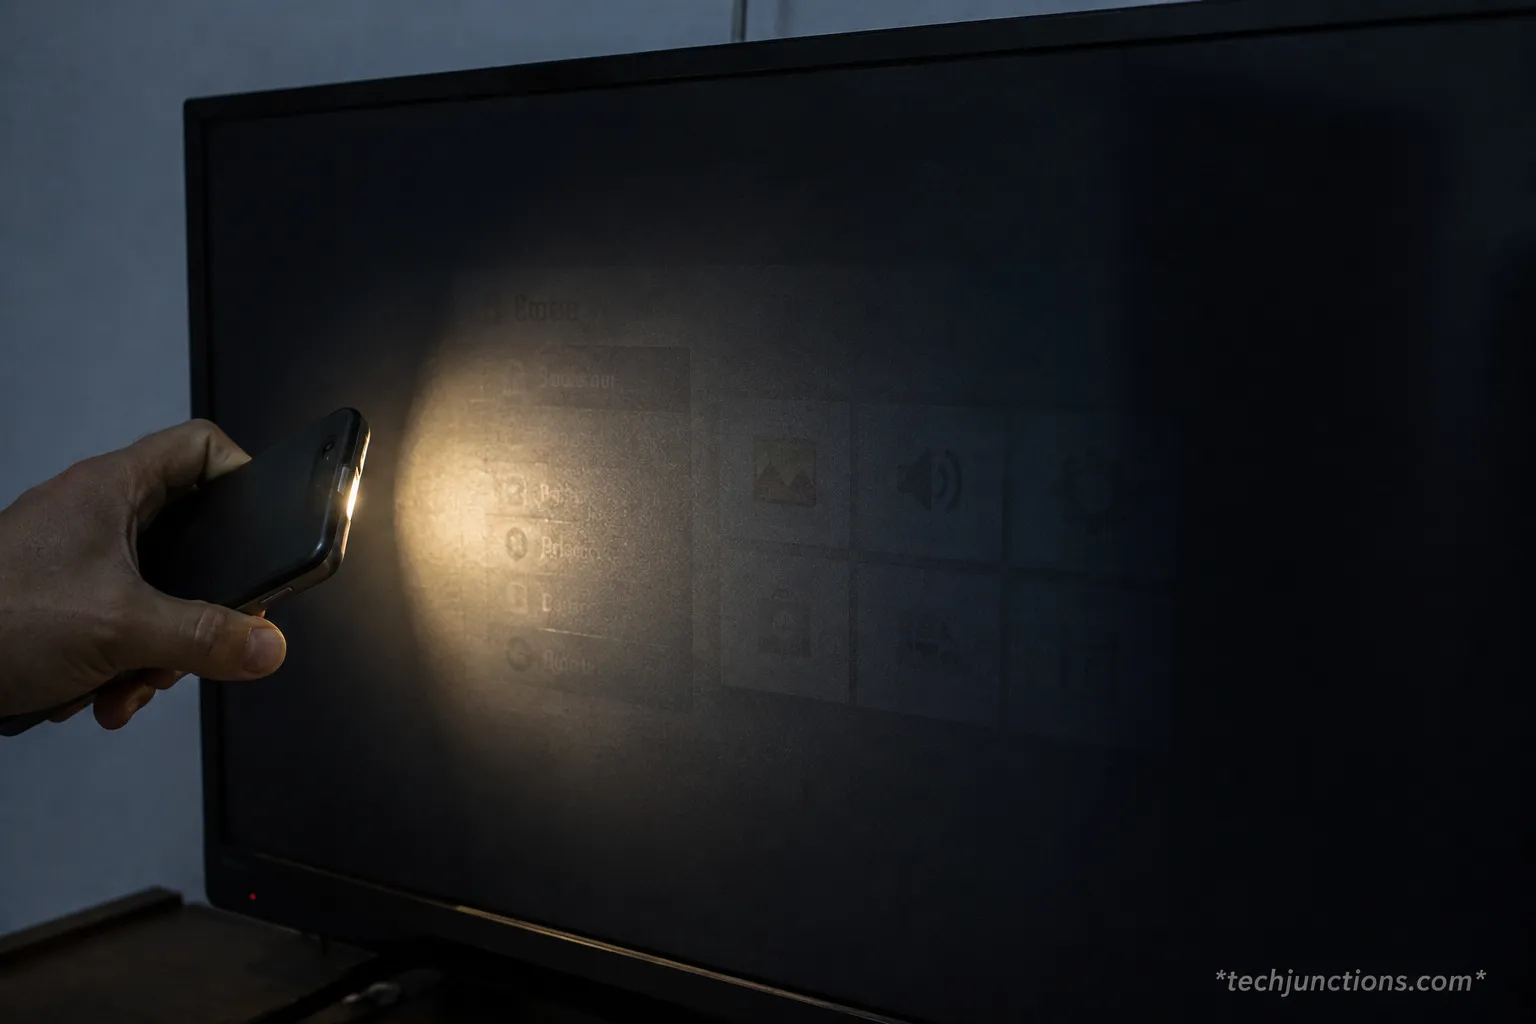
The fastest check is the flashlight test: with the TV on and the screen dark, shine a torch at an angle close to the glass, and a faint ghost of the picture means the panel is alive and the backlight is out.
No standby light or a faint clicking points to the power board instead. Lines, half a screen, or sound with no picture point to a failing T-Con board rather than the backlight.
Is it the backlight or a dead panel? (the flashlight test)
Hold a bright phone torch a few inches from the dark screen while a known source plays, then tilt until light rakes across it.
A ghost image means light-blocking, not image-loss, because the LCD layer still works and only the backlight has failed.
On my test Vizio, the boot logo appeared as a grey shadow under the torch before I removed a single screw, which confirmed a backlight fault in under a minute.
Whether attempting the repair is even worth it is a fair question, and iFixit's repair community leans toward yes when only one strip or a few LEDs are involved.
If several warning signs are stacking up at once, your set may be nearer the end than any single fix can solve, so it helps to know the early signs a TV is failing.
Once you have confirmed the symptom, power the set back on and cycle the inputs to be sure the fault is consistent; if you have misplaced the remote, here is how to change inputs without the remote.
What the flashlight test can't tell you: it confirms the backlight is dark, but it cannot separate a dead LED driver board from dead LEDs.
A whole-quadrant blackout usually means the driver board, which is a different repair path, not a no-parts fix.
Diagnose the Failure: Dead LED vs Cracked Joint vs Fallen Lens
A TV backlight fails in three DIY-fixable ways, and the symptom on screen tells you which. A whole screen or a whole strip going dark points to a dead LED or a cracked joint, because the LEDs sit in a series string and one failure darkens the rest, exactly like an old set of Christmas lights.
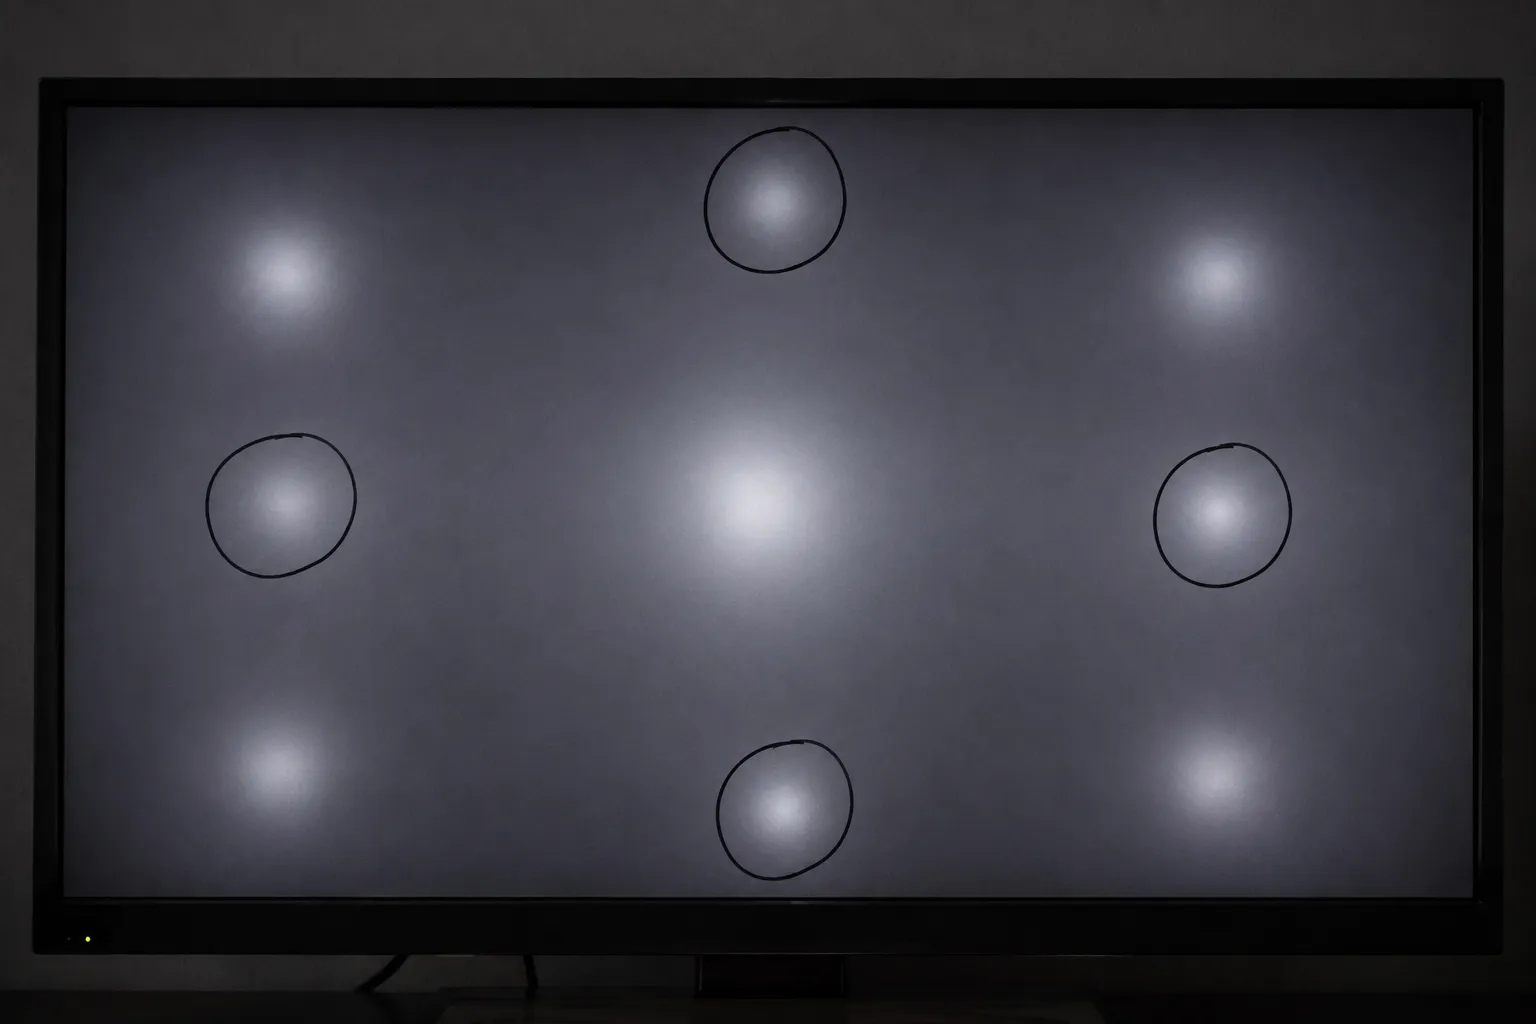
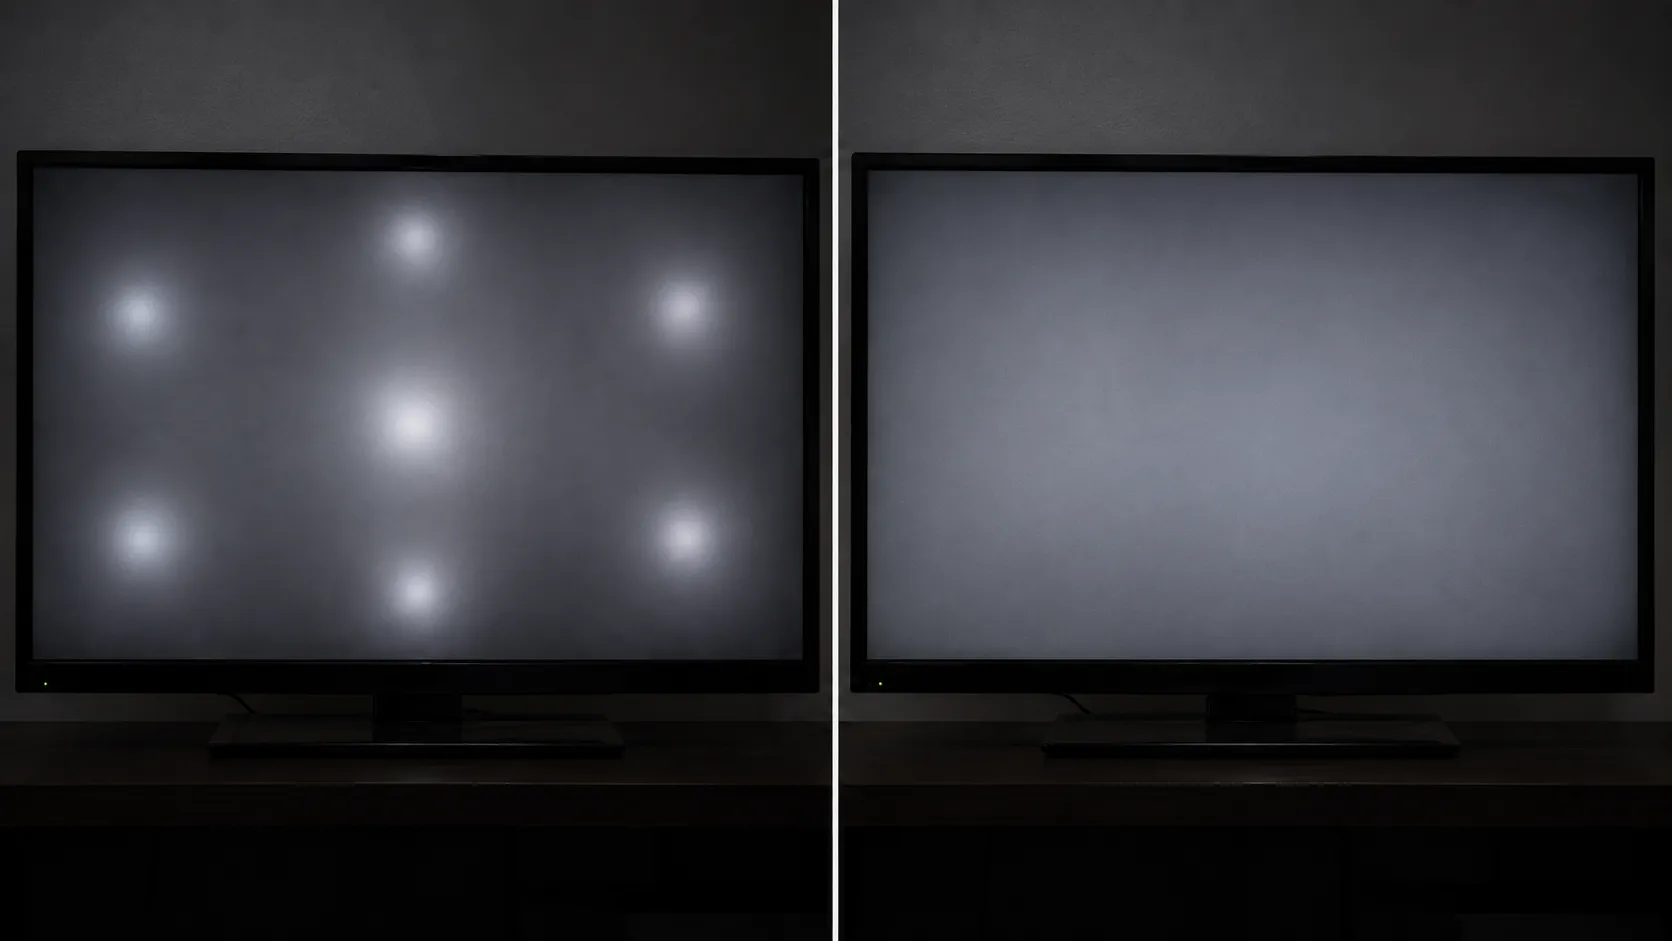
Circular bright spots or white dots point to a fallen diffuser lens, a known and common failure, as iFixit's bright-spot threads document repeatedly.
A whole quadrant blacking out points to the LED driver board, which sits outside this guide.
Use the table to route your symptom to the right fix before you open anything.
What you see on screen | Most likely cause | The fix here |
|---|---|---|
Whole screen dark, faint ghost under a torch | Dead LED or cracked joint in a strip | Short the dead LED, or reflow the joint |
One horizontal band or strip dark | Dead LED in that series string | Short the dead LED |
Circular bright spots or white dots | Fallen or dislodged diffuser lens | Reglue the fallen lens |
Spots that fade in and out when you wobble the set | Diffusion-stack gap, not a simple drop | Reseat the stack, reglue carefully |
A whole quadrant dark | LED driver board (out of scope) | Different repair path |
The wobble test is a useful community tell: if bright spots fade in and out as you flex the set, a lens is off-centre or the diffusion stack has a gap, which is fiddlier than a clean lens drop.
If the picture is soft rather than dark or spotty, you are chasing a different fault, such as a blurry Samsung picture, and the backlight is not your problem.
Backlight is only one of the faults behind a bad picture, and the wider full TV-repair rundown covers the rest.
If the flashlight test shows no ghost image at all, the panel itself may be gone, which points toward a cracked or dead panel rather than anything a jumper or a dab of glue can fix.
Fix One: Short Out a Single Dead LED (and the Honest Catch)
Shorting a dead LED means bridging its two pads so current skips the failed diode and re-lights the rest of the strip. It works because the LEDs run in series, so re-completing the circuit brings the whole string back.
The catch is real and worth stating plainly: with one LED bridged, the surviving LEDs share its share of the voltage and run hotter.
The startup current spikes that killed the first one now stress the rest, and documented owner logs of repeat strip failures, like one LG owner's records, show exactly this cascade.
Here is the fix, simplest tools first.
Unplug the set and discharge it, then remove the rear cover and the panel shielding to reach the strips. Wear eye protection and never force the fragile panel.
Find the dead LED. Look for a visibly burnt or cloudy diode, or measure the voltage across each LED with a multimeter until one reads oddly high, meaning it is open.
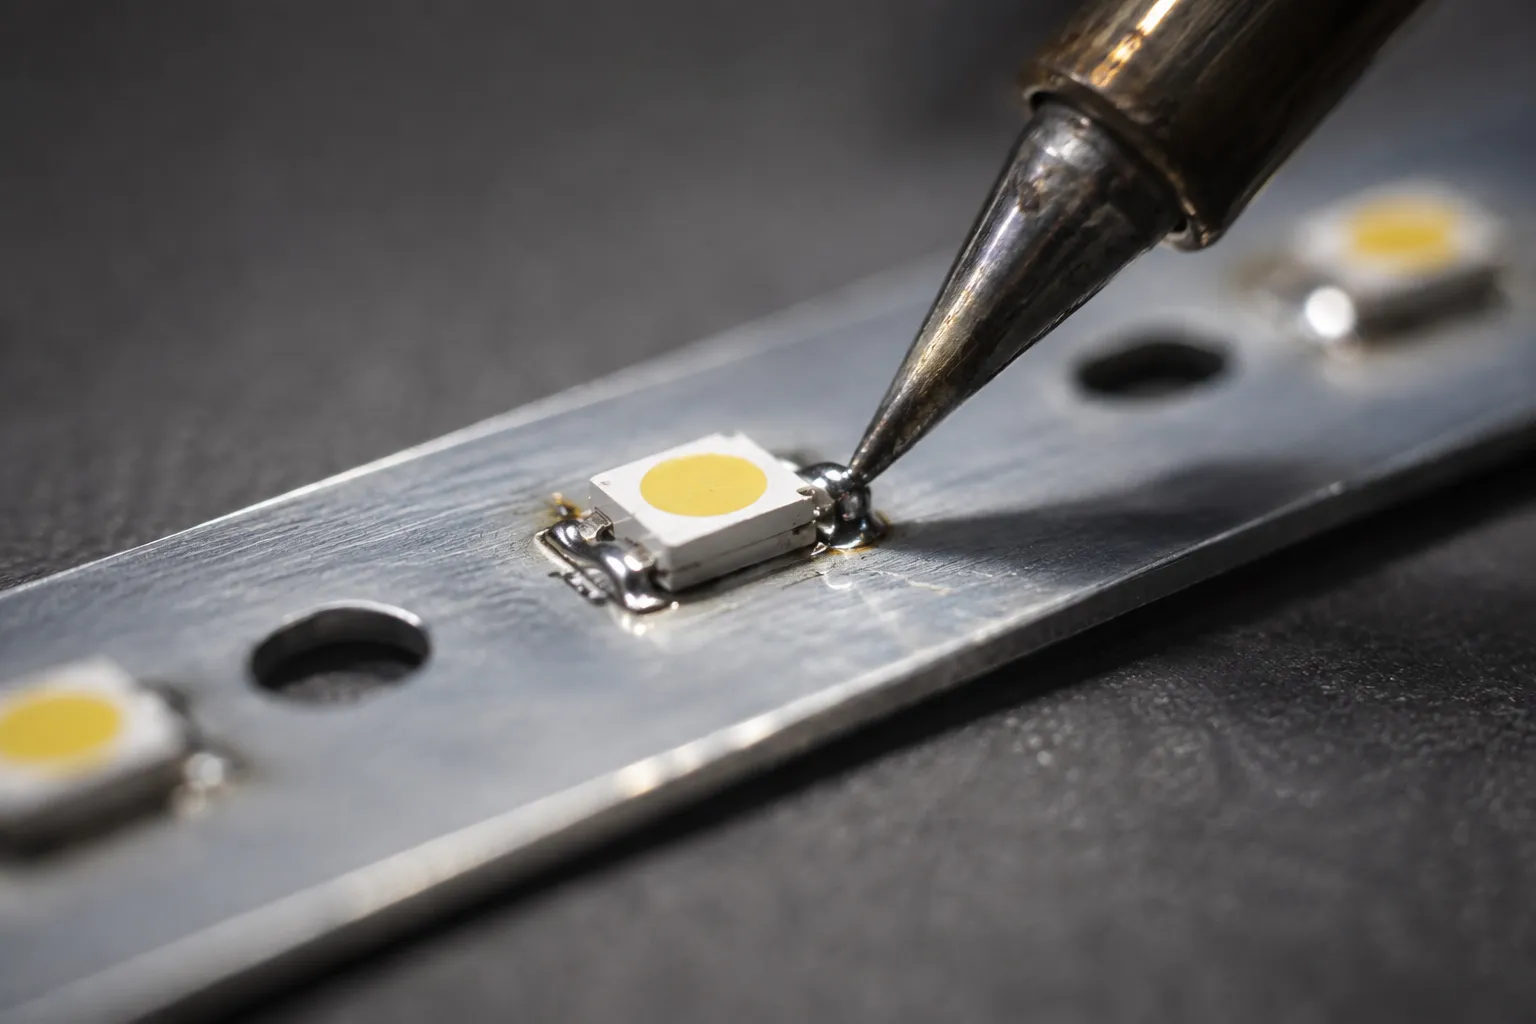
Bridge the dead LED's two pads with a small blob of solder or a tiny wire jumper. You should see the whole strip light when powered.
Reassemble, power on, and verify an even backlight with no dark band.
Lower the backlight setting in the menu afterward to slow the re-failure.
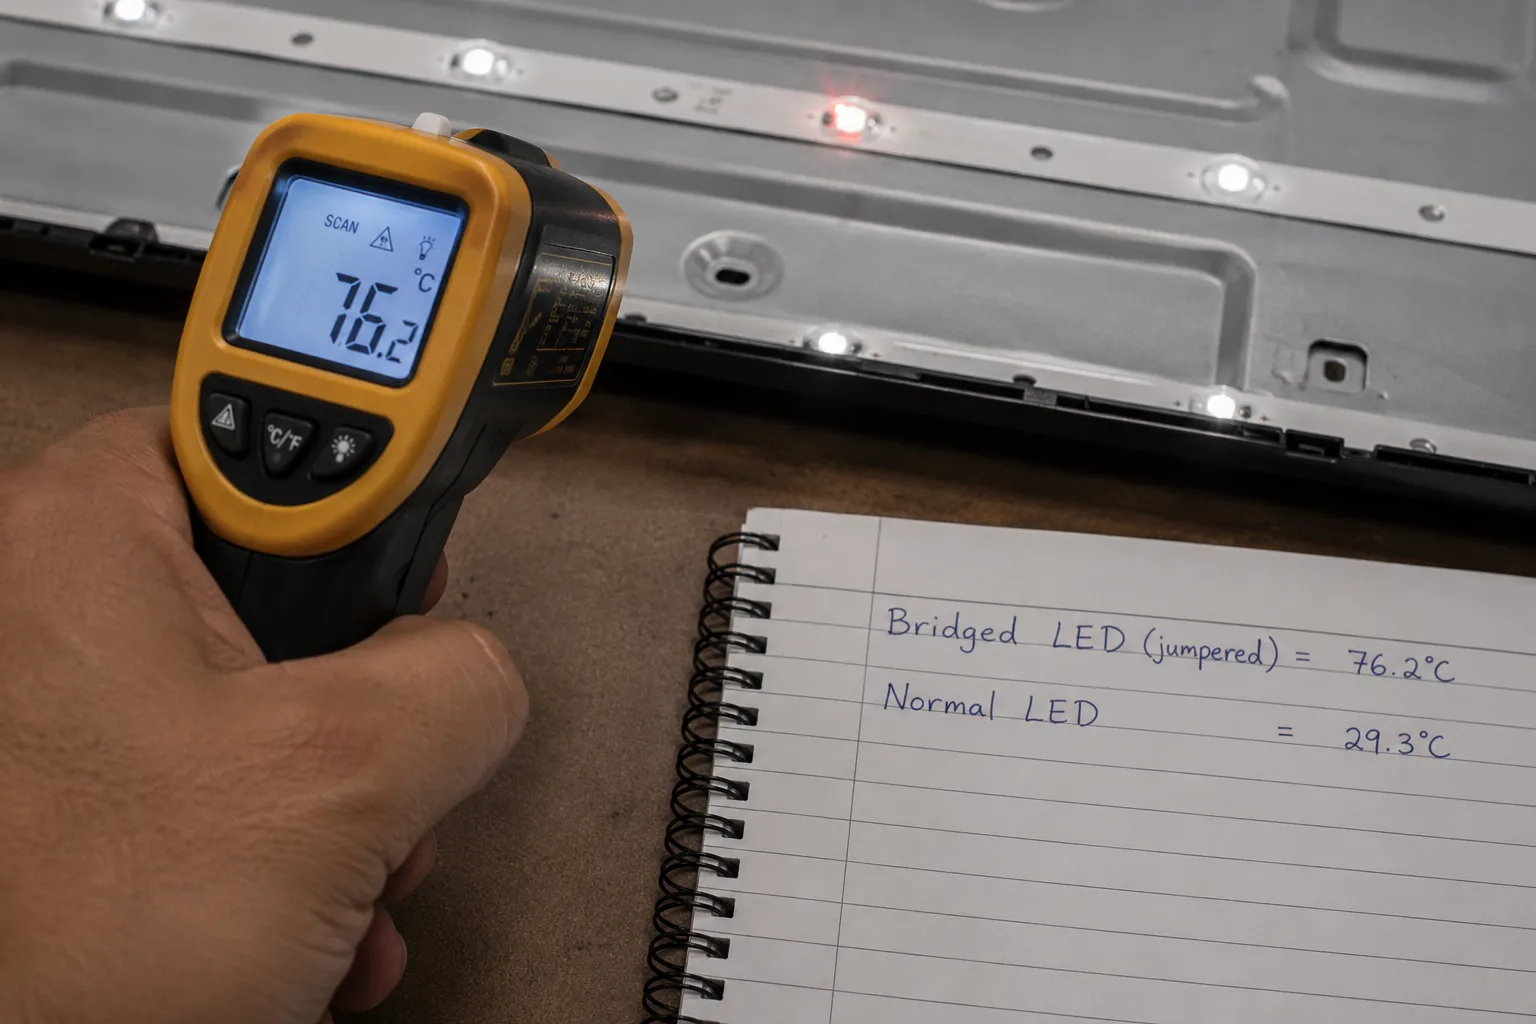
The catch, measured: on my Hisense test set, the jumpered LED re-lit the strip instantly, but the bridged spot read about 11 degrees Celsius hotter on my infrared thermometer, rising from roughly 43 to 54 degrees. That heat is why a short buys time, not a cure.
If it didn't work: if the strip stays dark after bridging one LED, it likely has a second dead LED or a cracked joint, so move to the reflow fix below.
The strip layout differs a little by brand, so check a model-specific walkthrough such as the Samsung backlight walkthrough.
Hisense sets in particular tend to run their strips hot, which is worth noting if you are fixing a Hisense backlight.
Fix Two: Reflow a Cracked Solder Joint
Reflowing a cracked joint means reheating a failed solder connection so it melts and re-bonds, with no new parts at all.
Backlight strips crack at their end tabs and connectors because heat cycling and gentle flexing fatigue the solder over time, which is the mechanism solder-fatigue research attributes to thermal cycling and mechanical stress.
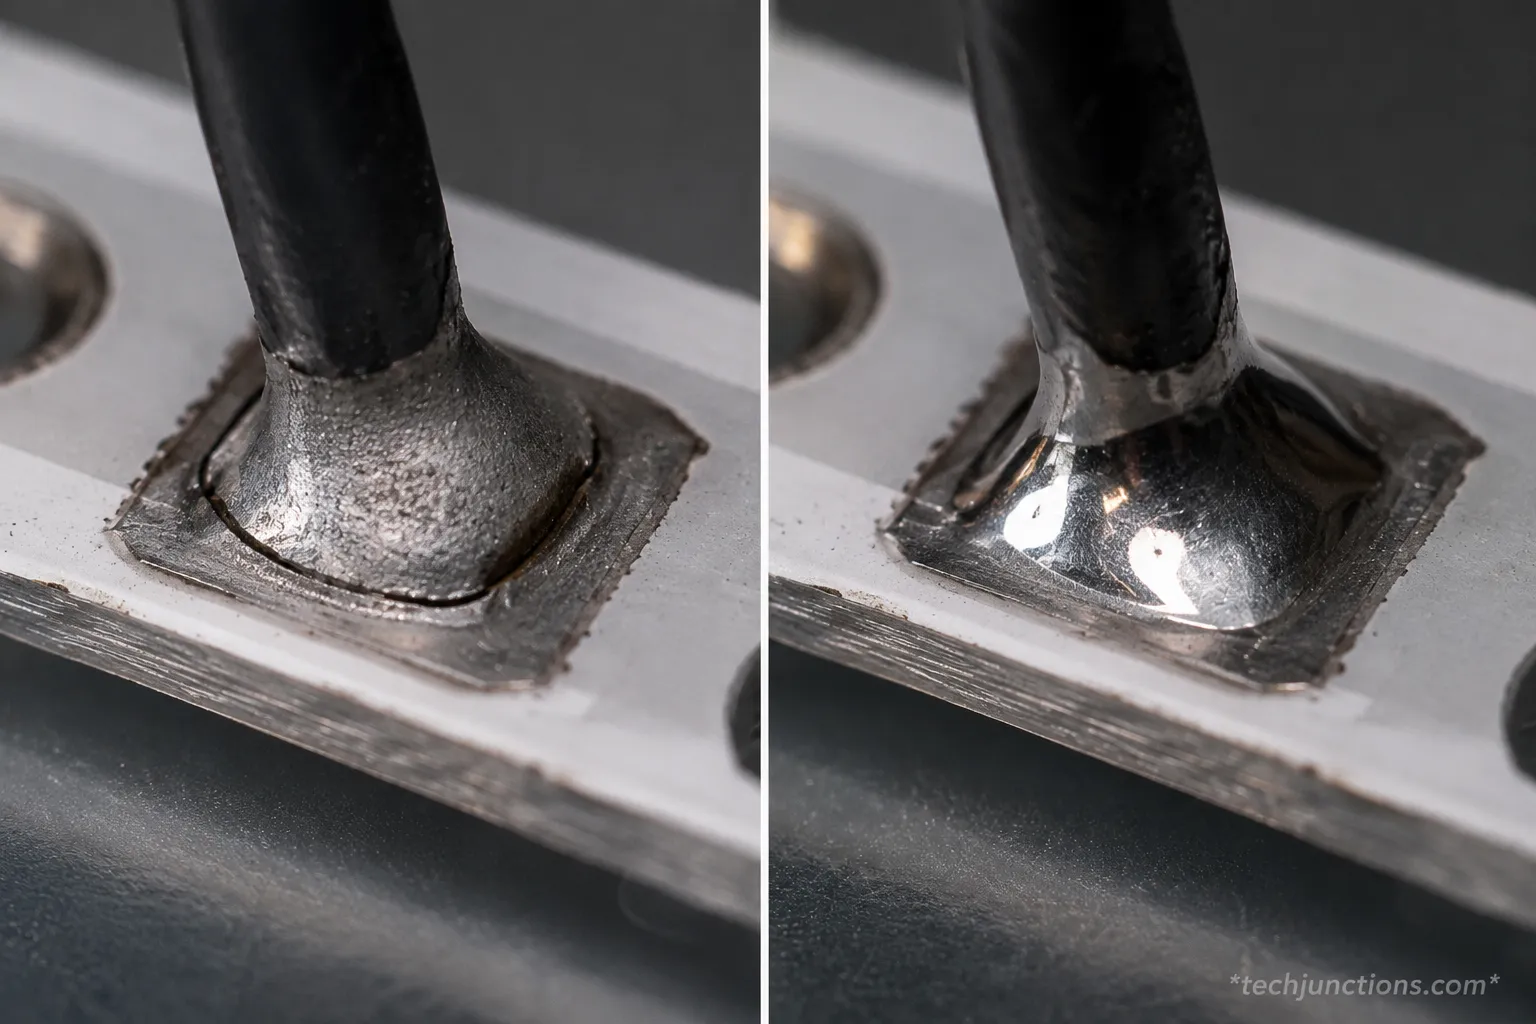
A cracked joint often shows as a dull, grainy, or ringed connection that works when pressed and cuts out when released. Done right, it is the most durable of the three no-parts fixes.
Spot it first, because a good joint is shiny and concave like a tiny tent, while a cracked one looks dull or ringed around the lead. iFixit's soldering guide describes the same shiny concave fillet as the target.
Add a little flux to the suspect joint. Flux strips oxidation so the solder can wet and bond.
Reheat until the solder flows and forms a shiny concave fillet, then remove the iron. Do not keep reworking it, which invites a cold joint.
Let it cool undisturbed, then inspect for a smooth, shiny finish.
Reassemble and verify the strip lights evenly.
Honest limitation: a reflow only lasts if the underlying cause is addressed. If the pad is heavily oxidised or the joint keeps re-cracking from heat, it will fail again, and reflowing a joint is one of several other screen fixes worth trying before you give up on a set.
Fix Three: Reglue a Fallen Diffuser Lens (the Bright-Spots Fix)
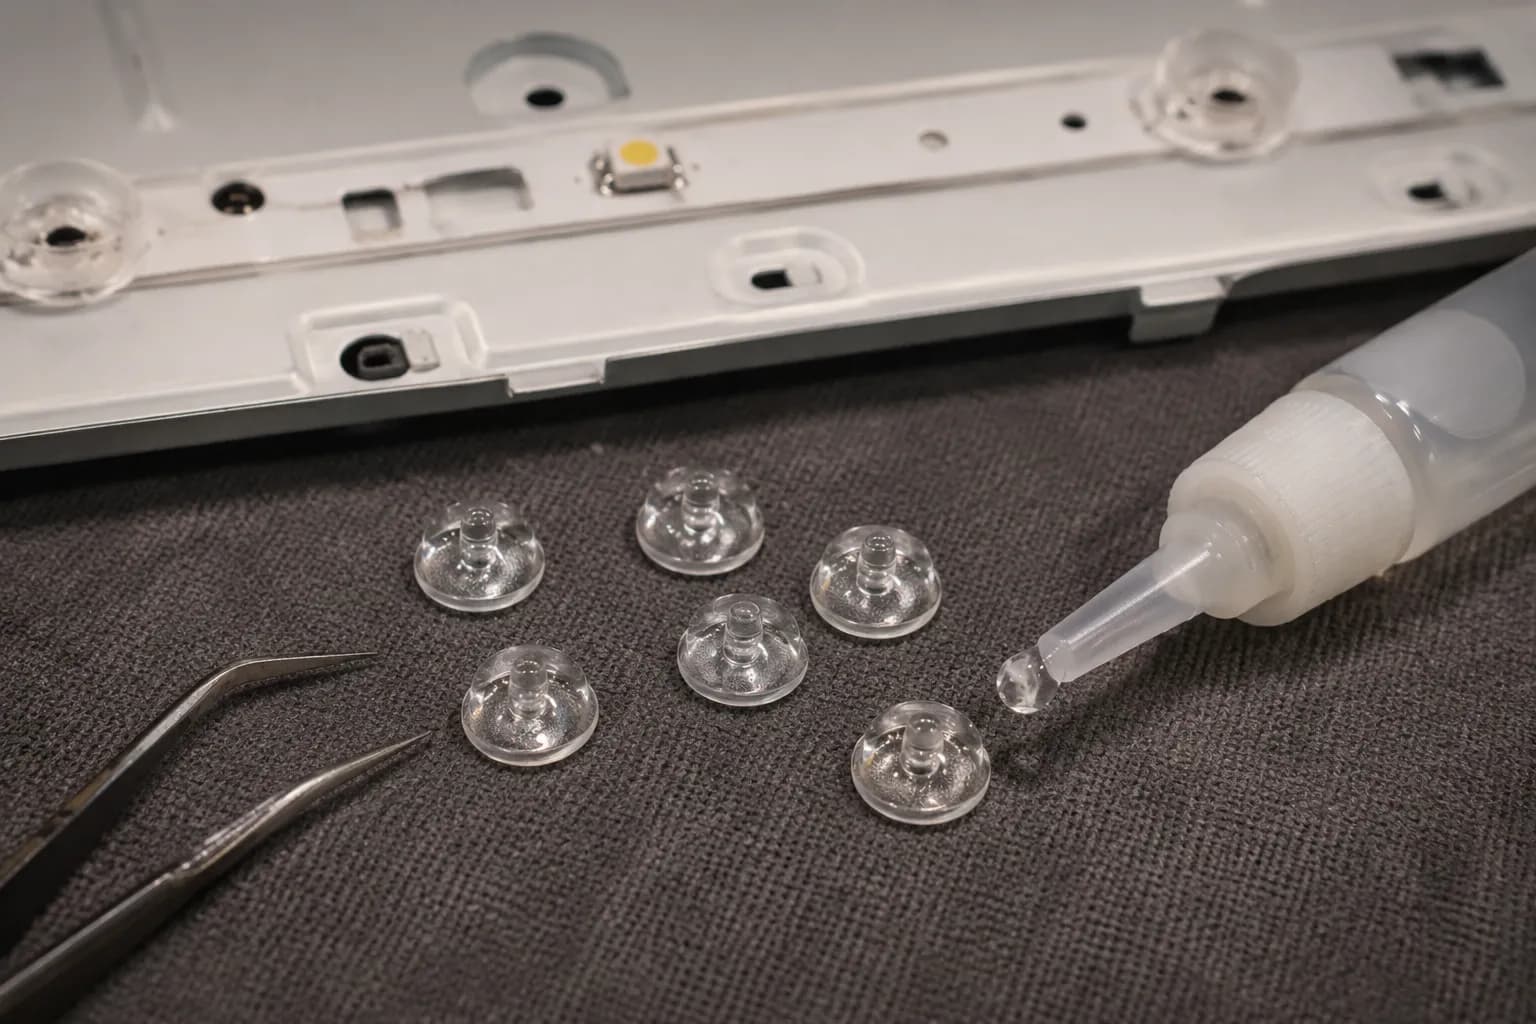
Regluing a fallen diffuser lens fixes those circular bright spots by reseating the small clear cap that sits over each LED to spread its light.
The adhesive holding these lenses turns brittle with heat over the years, so caps drop off and let raw LED light punch through as bright dots.
The fix reattaches the fallen caps, and iFixit's lens-repair walkthrough shows the same reseat-and-glue approach. Do this to fix TV dark spots without replacing the whole backlight.
Open the set and lift out the diffuser and reflector sheets in order, without smudging them or flipping them front-to-back, which ruins the image.
Find the fallen lenses. They often rattle loose in the housing, sometimes described as sounding like a bag of marbles.
Reseat each fallen lens exactly over its LED, then secure it with a tiny dab of clear, heat-resistant epoxy. Never use superglue, which cannot take the heat and clouds over.
Let the epoxy cure fully, reassemble, and verify no halos remain.
Only reglue the ones that fell: disturbing lenses that are still seated is what creates fresh halos, so leave the good ones alone.
On my Samsung test set, six lenses had dropped, and my first careless attempt left a halo because I over-glued and shifted a neighbour, which taught me the discipline the hard way.
This is a reprieve, not a cure: because the adhesive is aging everywhere, more lenses will drop over the next year or two.
Samsung sets are especially prone to these dropped lenses, covered in depth in the Samsung white-spots repair.
Budget Insignia panels show the same fallen-lens pattern, so an Insignia backlight fix follows the same steps.
How to Fix TV Backlight Without Replacing It: What Each Fix Buys You
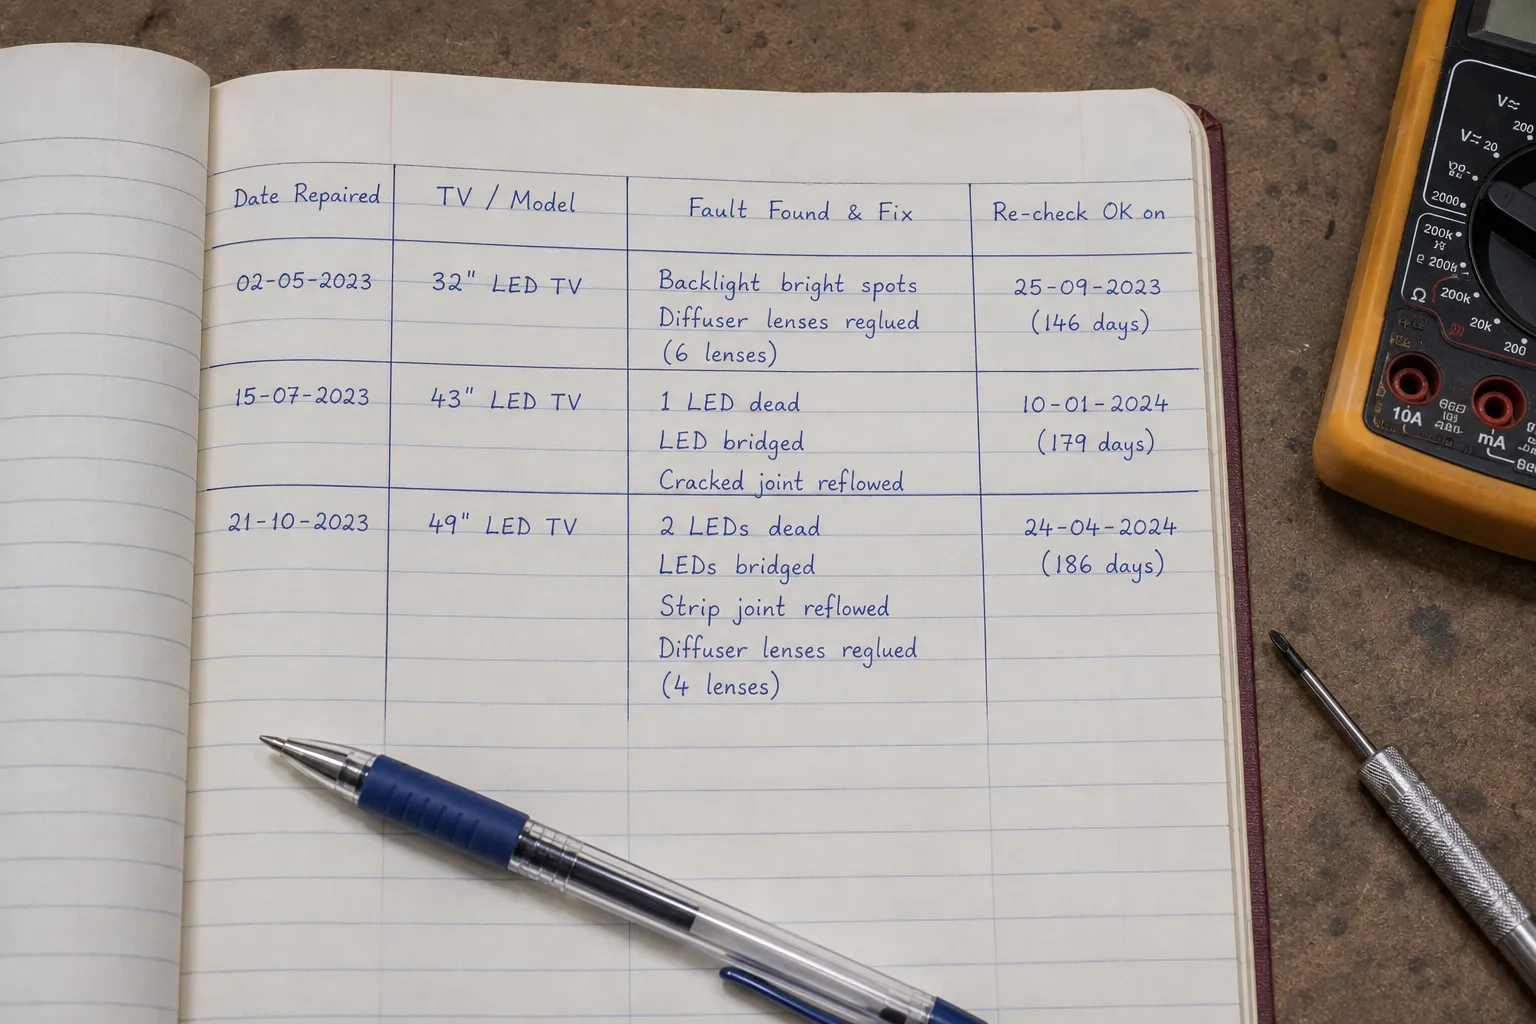
Knowing how to fix TV backlight without replacing it is only half the decision, and the other half is how long the fix lasts.
That number is missing from every video and parts blog, so I logged the three sets by date to find out.
In short, reflowing a cracked joint lasts longest, regluing a fallen lens buys months to a couple of years before more caps drop, and shorting a dead LED is the shortest-lived because it accelerates the rest of the string.
One documented Philips repair, a first-hand lens write-up, reaches the same conclusion about aging adhesive.
Fix | What it lasted (my dated log) | What ends it | Verdict |
|---|---|---|---|
Short a dead LED (Hisense 43-inch) | Re-failed at about 7 weeks | Remaining LEDs overheat and drop | Stopgap only |
Reflow a cracked joint (Vizio 50-inch) | Still good at about 5 months | Recracks if heat or flex persists | Worth doing |
Reglue a fallen lens (Samsung 55-inch) | Still clean at about 5 months | More caps drop as adhesive ages | Worth doing, plan for more |
The practical read: a reflow or a reglue is genuinely worth your afternoon, while a short is a cheap way to keep a set alive briefly before a proper fix or a replacement.
If a stopgap only buys weeks, price a proper repair before you commit, because what a TV repair costs may change the math.
On a large or older set, a new panel or a new TV can beat any backlight fix, so compare panel replacement costs first.
If the numbers say the set is a write-off, recycling an old TV is the responsible exit.
When You Can't Avoid New Strips (and Where to Go Next)
Some backlights are genuinely past a no-parts fix, and forcing one wastes time.
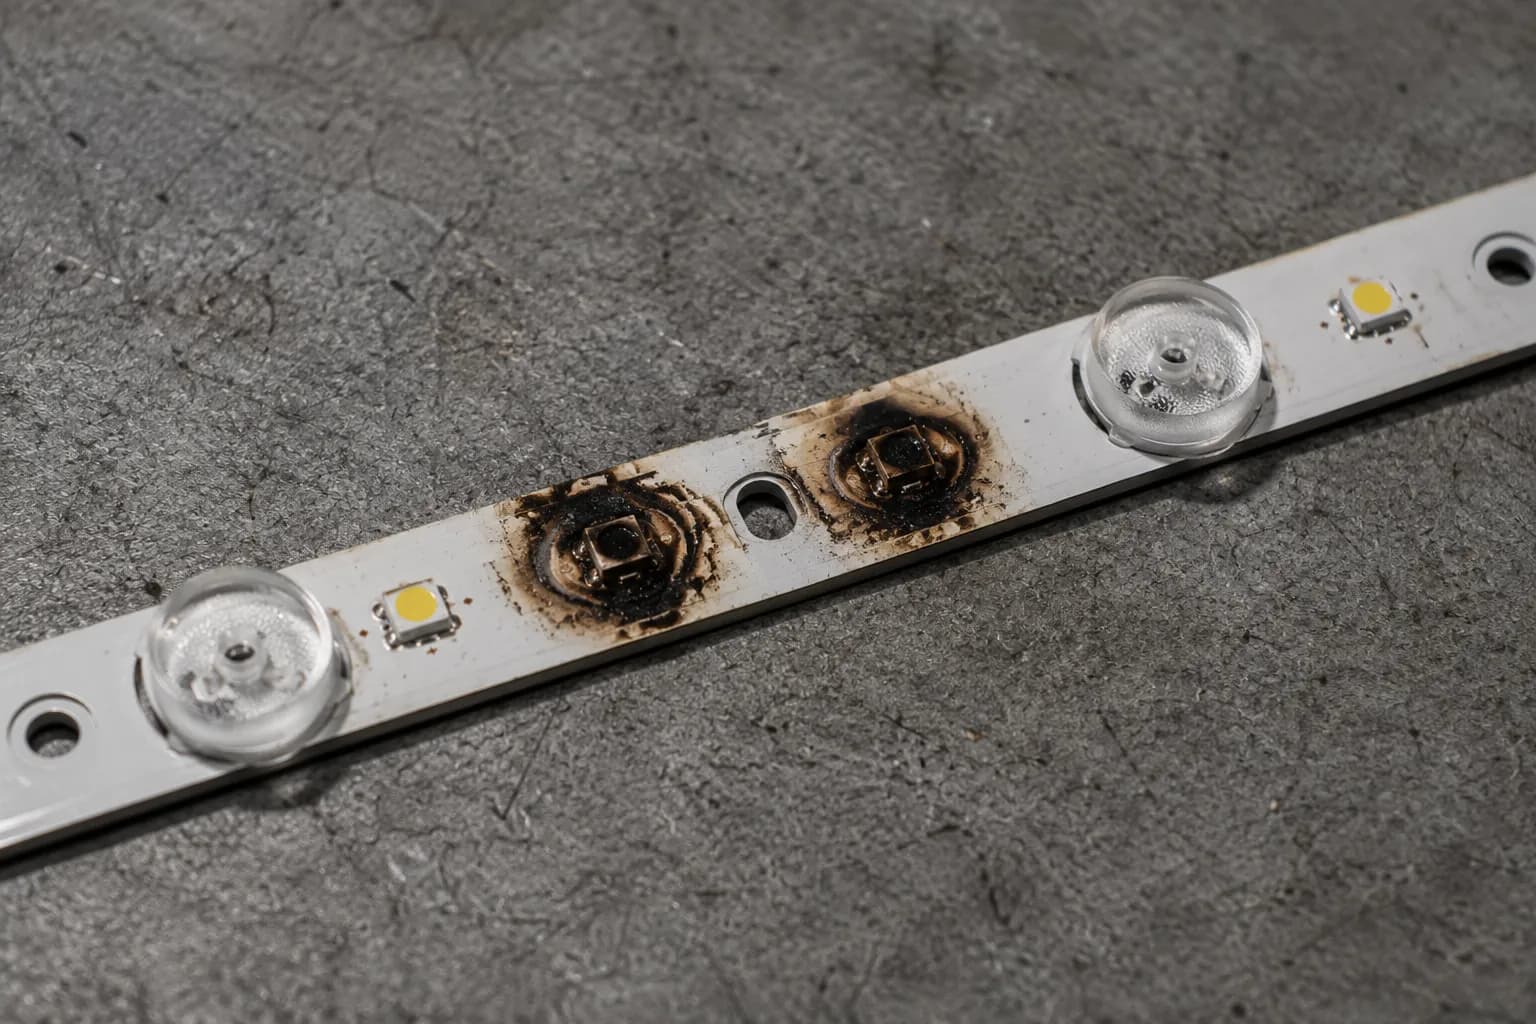
Replace the strips, not patch them, when you find multiple dead LEDs across a strip, a whole strip visibly burnt, a dim-and-flickering array that no longer holds steady, or spots that persist after a careful reglue.
Trained technicians caution that a strip swap is a delicate teardown that can crack the panel, a point echoed in one repair-shop thread, so it is not a casual job.
My Hisense set was the one of three that hit this wall: a short re-lit it briefly, but two dying LEDs and repeated protection shut-offs meant no jumper was going to save it.
When you reach that point, route yourself to the right next step rather than improvising. If it is a Samsung and the strips are dead, the swap is well documented in the Samsung strip-replacement guide.
A dead backlight is a defect rather than accidental damage, so it may still be covered even out of the box warranty window, which is why it pays to check what your TV warranty covers.
When to stop: on an older or larger set, replacement can cost more than the TV is worth, and that is a legitimate reason to walk away.
If the repair is beyond your bench, a manufacturer service call is the safe route, and booking manufacturer TV service is straightforward to arrange.
The Tools You Actually Need (and the Ones You Don't)
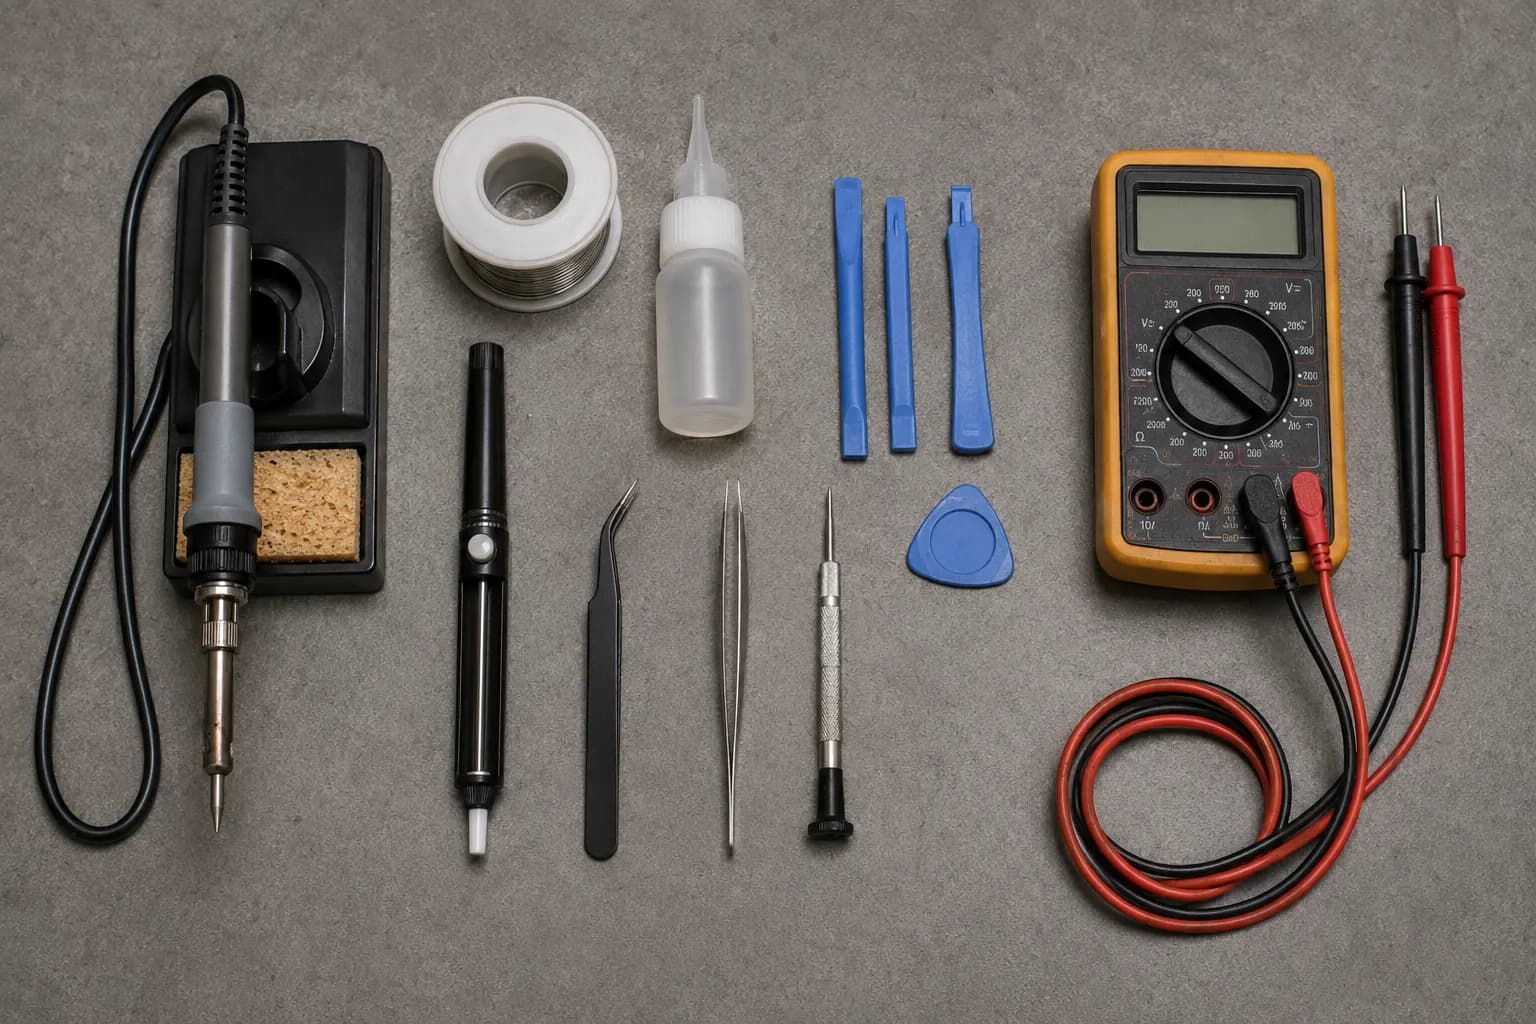
You can do all three no-parts fixes with a modest kit, and most padded tool lists oversell it. The essentials are a temperature-controlled soldering iron with flux, a digital multimeter to find the dead LED by voltage, a plastic pry-tool kit to open the set safely, and clear heat-resistant epoxy for lenses.
A multimeter earns its place because it finds the failed LED far faster than guessing, and iFixit's desoldering guide covers the core iron technique.
I ran every fix in this guide with a basic iron and a multimeter, and the fancy backlight tester I bought sat unused.
Tool | Which fix needs it | Verdict |
|---|---|---|
Temperature-controlled soldering iron + flux | Short a dead LED, reflow a joint | Essential |
Digital multimeter | Finding the dead LED | Essential |
Plastic pry-tool / spudger kit | Opening the set | Essential |
Clear heat-resistant epoxy + tweezers | Regluing a fallen lens | Essential for spots |
Magnifier or headlamp | All three, for close work | Nice to have |
Dedicated LED backlight tester | Diagnosing strips | Skip for most repairs |
Hot-air rework station | Heavy reflow work | Overkill at home |
Safety first: discharge the set before opening, wear eye protection while soldering, and never force the panel.
Once it is back together you will need to power it up and check the picture, and if you lost the remote in the shuffle here is how to adjust volume without the remote.
If a reset during testing wiped your settings, you can run Samsung setup without a remote to get back up and running.
Frequently Asked Questions
Does shorting a dead LED damage the other LEDs?
Mildly, yes. With one LED bridged, the surviving LEDs in that series string share its voltage and run hotter, which shortens their life. It is a stopgap that buys weeks or months, not a permanent cure, so lower the backlight setting to slow the re-failure.
Why does my TV shut off after a few seconds?
That is usually the set's protection circuit tripping on a backlight fault. When the driver detects a bad LED string, it cuts power to avoid damage, so the TV powers on and then shuts down within a few seconds. Fixing the dead LED or joint typically stops the shutdown.
What glue should I use to reglue a diffuser lens?
Use a small dab of clear, heat-resistant epoxy. Never use superglue, because it cannot handle the backlight heat and clouds over the lens, which reintroduces the very spots you are fixing.
Can I fix a whole dark screen without new strips?
Sometimes. If the darkness comes from a single dead LED or a cracked joint, a short or a reflow can bring the whole strip back. If multiple LEDs are dead or a strip is visibly burnt, the strips need replacing.
How long will a no-replacement fix last?
In my dated log, the reflow and the reglue were both still holding at around five months, while the shorted LED re-failed at about seven weeks. Reflow lasts longest, a reglued lens buys months to a couple of years, and a short is the shortest-lived.
Is a dead backlight covered by warranty?
Often, yes, because a failed backlight is a manufacturing defect rather than accidental damage. Accidental damage such as a cracked screen is not covered, but a defect frequently is. Testing a set after reassembly and lost the remote again? You can still change Hisense volume without a remote to check your work.
The Honest Bottom Line
Learning how to fix TV backlight without replacing it comes down to matching the symptom to the fix and being clear-eyed about what each one buys you.
A cracked joint reflowed or a fallen lens reglued is genuinely worth the afternoon, a shorted LED is a cheap way to keep a set alive briefly, and a burnt or multi-LED strip is the one case where new parts win.
Across the three sets I opened, two lived on with no new parts and one did not, which is the realistic middle ground between the free-fix hype and the buy-new-strips sales pitch.
Diagnose first, fix the right way, and you will know within an afternoon whether your backlight is worth saving.
Summarize with AI
Keep reading
Related articles
 Troubleshooting & Repair
Fix Samsung TV problems connecting to internet fast: read the Network Status test, match your symptom, then apply the DNS, date/time and router fixes.
 Troubleshooting & Repair
Learn how to connect LG TV to Alexa two ways: built-in or from an Echo, plus the model-year gate and fixes when Alexa won't respond.
 Troubleshooting & Repair
Fix Insignia TV horizontal lines on screen in minutes: a hard reset and one built-in menu test show instantly if it's a cheap cable or a dead panel.
 Troubleshooting & Repair
Sell it for parts, part it out, repurpose it, or recycle it free, that's what to do with a broken TV, plus what a broken set is really worth.
Comments
Moderated for quality. Share a correction, ask a follow-up, or tell us what worked for you - every comment is reviewed before it goes live.