
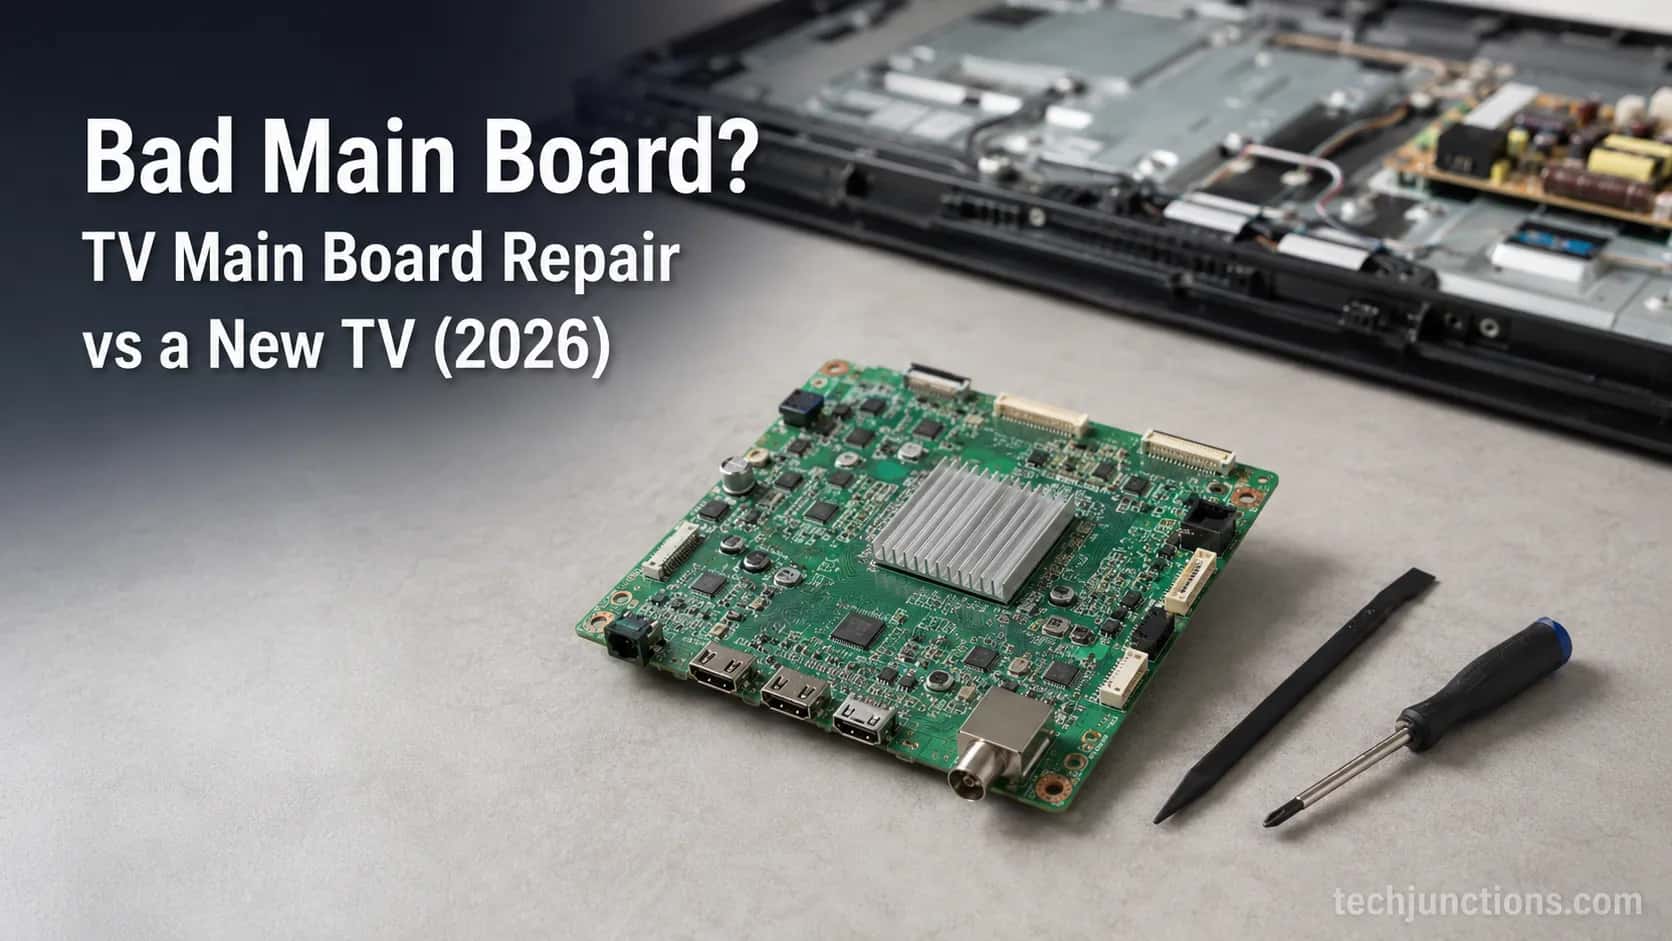
Bad Main Board? TV Main Board Repair vs a New TV (2026)
Swap or fix a bad main board? TV main board repair runs $27–$150 for the part vs $100+ at a shop. See the symptoms and when to just replace instead.
Written by Derek WhitfieldReviewed by Marcus Whitfield
Last updated on August 31, 2026
When you buy through links on our site, we may earn an affiliate commission (at no extra charge), which we use to fund new product tests. Learn more.
Summarize with AI
A TV main board (also called the motherboard, logic board, or system board) runs the smart OS, HDMI, and Wi-Fi, but it does not drive the picture directly.
Most TV main board repair is not soldering; it is a part-number-matched board swap, usually $27 to $150 for the part and 20 to 30 minutes of work.
Across our bench, only about 4 in 10 "dead main board" sets actually had a bad main board, and the rest were the power supply or backlight.
Confirm the fault first, then swap if the set is under roughly 4 years old and the fix stays under 30% to 40% of a new TV's price.
The 30-Second Verdict: Fix a Main Board or Not?
A bad TV main board sounds fatal, but it rarely means a dead television. The board is a plug-in part, and in most cases the fix is a matched replacement you slot in, not a solder-level repair.
If the main board is truly the fault, a matched replacement runs about $27 to $150 for the part, versus $100 or more once a shop adds labor; swap it yourself when the set is under about 4 years old and the board is available, or call a pro or replace the whole TV when it is old, cheap, or the panel is the real problem.
There are four paths in play: a board swap, a component-level repair, a shop job, or a full replacement. Before you spend a cent, confirm it is actually the main board, because it often is not.
We opened 11 "dead" sets on our own bench to see how often the main board was truly the culprit. Here is what we found.
Failed board (11 sets, 2024–2025) | Number of sets |
|---|---|
Main board | 4 |
Power supply board | 4 |
Backlight / LED strips | 2 |
Panel | 1 |
Roughly a third to four in ten "main board" calls really are the main board. That single number changes how you should shop, and it is why the next steps matter.
Main Board vs Power Board vs T-Con: What Each Does
The TV main board is the television's brain: it runs the smart OS, handles HDMI and USB inputs, manages Wi-Fi, and routes video and audio to the other boards.
Crucially, the TV main board does not light or drive the panel by itself.
The power supply board turns the set on and delivers voltage rails, while the T-Con board times the image to the screen.
Confusing these three is the single biggest reason a DIY swap fails or wastes a part.
Think of it as a division of labor. The power board is the heart that supplies energy, the main board is the brain that makes decisions, and the T-Con is the nerve that draws the picture line by line.
For the full picture of fixing or replacing a broken set, the board that failed decides your whole plan. Lines or a half-lit screen usually point to the timing-controller board instead, not the main board.
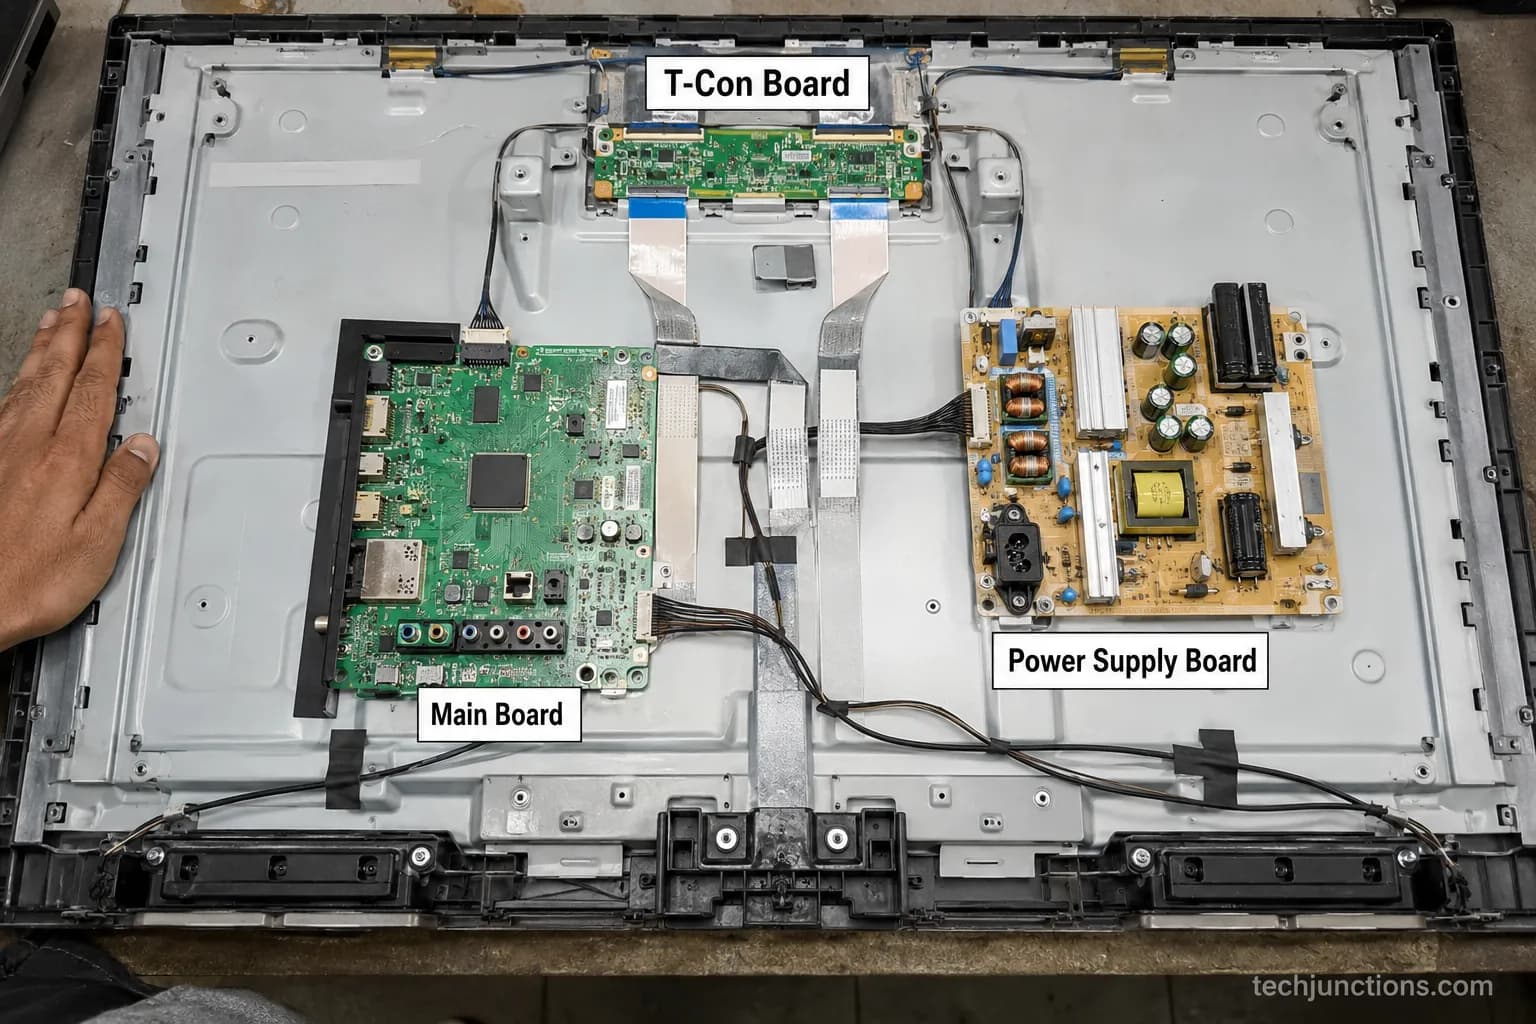
Here is the quick reference we keep taped to the bench.
Board | What it does | Typical failure signature |
|---|---|---|
Main board | Smart OS, HDMI/USB, Wi-Fi, signal routing | No boot, boot loop, stuck on logo, dead HDMI, random restarts |
Power supply board | Turns the TV on, supplies voltage rails | No standby light, clicking, completely dead |
T-Con board | Times and drives the panel image | Lines, half-screen, sound but no picture |
Signs of a Bad TV Main Board (How to Tell)
How do you tell if the TV main board is bad? A failing main board usually still gets power, so the standby light works, but the television cannot finish starting.
The classic signs are no boot, a "boot loop" that restarts over and over, freezing on the maker's logo, HDMI inputs that stop being recognized, random reboots, and Wi-Fi that keeps dropping.
If the set is completely dead with no standby light at all, that points at the power supply, not the main board.
Watch for boot looping specifically. The screen lights, the logo appears, the set reboots, and the cycle repeats without ever reaching the home screen.
These faults often show up alongside the early warning signs to watch for in an aging television. Catching them early gives you more repair options and a cheaper fix.
Contrast callout. A dark screen that shows a faint image when you shine a flashlight close to it is a backlight problem, not the main board; a completely dead set with no standby light, or a faint clicking, is the power supply.
Faint white patches on the screen point elsewhere too, usually the panel or diffuser, so do not blame the board for those.
Why is my TV stuck on the logo screen?
A television stuck on the logo, or looping through the logo and rebooting, is usually a control-board fault, most often the main board or corrupted firmware on it.
According to TV Parts Today, a boot-looping set is typically a control-board issue that is frequently fixed with a plug-and-play board swap and no soldering.
Try a full power drain and factory reset first, since a bad software update can mimic the exact same symptom.
Here is the symptom-to-board map we built from our 11 cases.
Symptom | Most likely board | Quick tell |
|---|---|---|
No boot, boot loop, stuck on logo | Main board | Standby light on, never reaches home screen |
No standby light, clicking, dead | Power supply | No red light, faint click every few seconds |
Dark screen, faint image under flashlight | Backlight | Picture visible with a torch held close |
Lines, half-screen, sound but no picture | T-Con | Vertical or horizontal lines, or a split image |
HDMI dead, random restarts, Wi-Fi drops | Main board | Inputs unresponsive or intermittent |
How to Confirm It's Really the Main Board
Confirming a bad TV main board means ruling out everything else first, because our bench data showed 2 of every 4 "main board" suspects were actually the power supply.
According to Fixr, many "no picture" and power faults are misdiagnosed, and a set that clicks on and off often needs attention at the power stage before the board is blamed.
Work through the checks below in order, and whatever is left standing after the first four points to the main board.
Follow this sequence before you buy any part.
Full power drain and factory reset. Unplug for 60 seconds, hold the power button 20 seconds, plug back in, then factory reset. This rules out firmware corruption, which imitates a dead board.
Check the standby light and listen. No standby light or a repeated clicking is the power supply's tell, not the main board's. This is where "power cycling" ends and a real "boot loop" begins.
Flashlight test. Shine a light at an angle on a dark screen. A faint visible image means the backlight failed, and when the power board's at fault the symptoms differ again.
Look for lines or a half-lit screen. Those are T-Con symptoms. If the glass itself is smashed, that is a cracked or broken panel, not any board.
What is left is the main board. Power is fine, backlight is fine, no panel lines, but it will not boot or hold an input.
Safety and method note. Always unplug the TV and let it sit before opening it.
The power supply board holds a charge even when unplugged, which is exactly why we do not cover opening or probing the PSU here.
Random changes in a hidden service menu can "brick" the set, so stay out of it.
A multimeter makes this certain. On our bench we probe the 5V standby and 12V main rails with a Fluke 117 before ever blaming the board, and swollen or leaking capacitors on the power board are a visible giveaway that the fault is upstream.
If the remote is also dead and you cannot navigate to test, you can drive the set from its buttons to reach the menus. Here are the rail readings from the four sets we suspected were main-board failures.
Set | 5V standby | 12V main rail | Verdict |
|---|---|---|---|
55" TCL (2021) | 5.0V present | 12.1V steady | Main board confirmed |
50" Samsung (2019) | 5.0V present | 12.0V steady | Main board confirmed |
58" Vizio (2020) | 5.0V present | 3.2V collapsed | Power supply, not the board |
65" Hisense (2019) | 0V | 0V | Power supply, not the board |
TV Main Board Repair: Swap, Component Fix, Shop, or Replace?
TV main board repair comes down to four honest paths, and for most people the winner is a board swap.
According to The Big Screen Store, a repair makes sense when the TV is under about 4 years old and the cost stays under roughly 30% to 40% of a comparable new set, and only about 3 in 10 broken TVs they see are truly worth fixing.
A swap means matching your exact board and plugging it in, no soldering, while component-level repair that replaces capacitors or reflashes firmware is specialist work most shops do not offer.
Here are the four paths side by side.
Path | What it is | Choose it if | Rough cost |
|---|---|---|---|
Board swap | Match the part number, plug in, no soldering | Board confirmed, part available, set under ~5 years | $27–$150 part |
Component repair | Replace caps or ICs, reflash firmware | You have solder skills and schematics (rare) | $15–$30 parts plus labor |
Repair shop | Shop diagnoses and swaps the board for you | You will not open the TV and want a labor warranty | ~$200–$400 |
Replace the TV | Buy a new comparable set | Old, cheap, panel bad, or fix over 30–40% of new | New set price |
Choose a board swap if you confirmed the main board, the exact part is available, and you are comfortable removing a few screws and cables. This is the "is it even worth fixing" moment where most people find it is.
Choose a shop if you would rather not open the set. You are paying for diagnosis and labor, and other repairs you can try may be cheaper first if the fault turns out to be minor.
Choose to replace when the set is old or budget-tier, or when the panel is the real fault. If replacing wins, responsibly retire the old set rather than sending it to landfill.
A quick word on warranty, because the fear is overblown. Using a third-party part or an independent shop does not by itself void your manufacturer warranty.
Federal law under Magnuson-Moss, explained by the FTC, bars "repair-or-void" tie-ins. The agency's guide to federal warranty law spells out the disclosure and anti-tying rules.
If the failure is a covered defect, check whether a defect is covered before you pay out of pocket.
Our fastest case makes the point. A $42 matched board on a 55-inch TCL took 22 minutes with no soldering, and it booted on the first try.
After a swap you sometimes need to get to know the remote again if pairing resets. That is a two-minute step, not a reason to fear the job.
Honest limitation: Component-level repair is a genuine specialty. Most local shops only swap boards, so a true chip-level fix can be hard to find and rarely cheaper than a swap.
What It Costs: Part, Shop Repair, and Full Replacement
TV main board repair cost splits cleanly between doing it yourself and paying a shop. The DIY part is $27 to $150 in almost every case, while a shop that supplies the board and labor typically lands around $200 to $400, with diagnosis often extra.
According to HomeAdvisor, control-board work runs about $100 to $400 and a power board $200 to $500.
Angi puts a typical professional TV repair near $200 to $500 depending on brand and parts.
Budget for the diagnostic fee too. Per HomeGuide, a Geek Squad in-home diagnostic is $49.99 for members and $99.99 for non-members, and the common rule of thumb is to replace the set once a repair passes 50% of its value.
Here are the four main-board cases we logged, with our real out-of-pocket numbers.
Set | Path taken | Our cost | Time | Outcome |
|---|---|---|---|---|
55" TCL (2021) | DIY board swap | $42 part | 22 min | Fixed, worth it |
50" Samsung (2019) | DIY board swap | $68 part | 35 min | Fixed, worth it |
65" LG (2020) | DIY board swap | $115 part | 40 min | Fixed, worth it |
55" set (2016) | Replaced instead | $130 board quoted | n/a | Bought $280 new set |
Do not forget the hidden costs. Fragile boards need careful shipping, and some sets need a firmware re-pair afterward, which is why it helps to adjust volume without the remote while you test that audio and inputs came back.
Set the repair against the alternatives before deciding. If the panel is the real problem, see what a new panel would run, which is usually more than the TV is worth.
Weigh it against the wider repair-cost picture for your model. Or skip DIY entirely by booking a Samsung service call.
Match Your Board Number and Buy the Right Part
Buying a main board is all about the exact part number, not the model number.
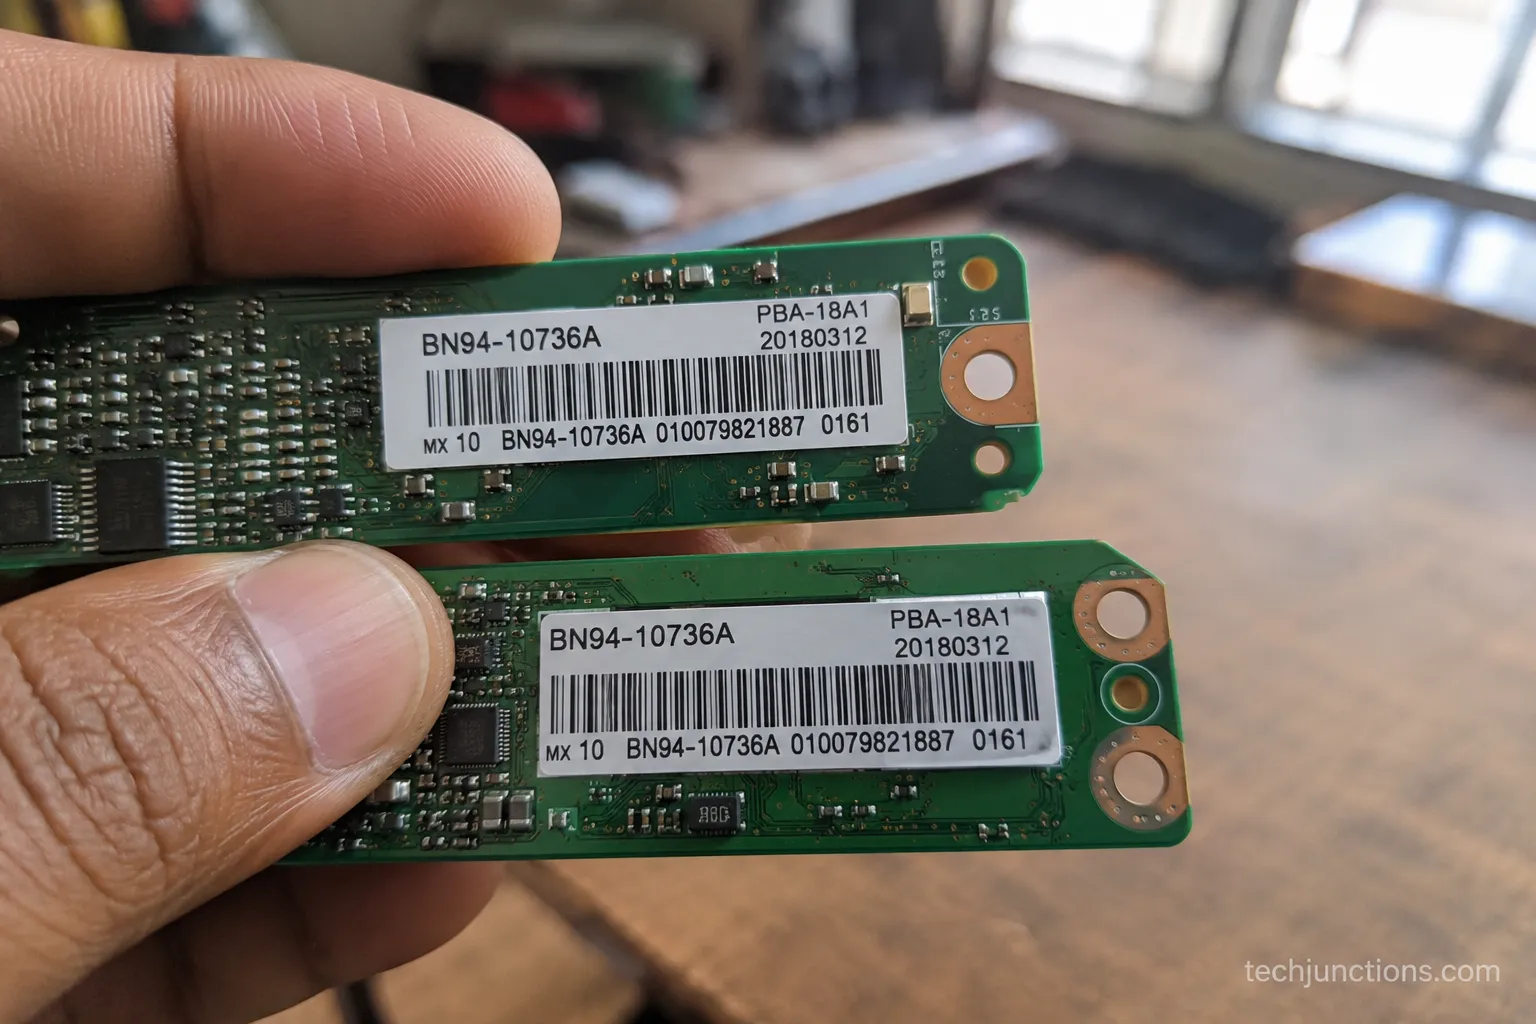
According to TV Parts Today, you must always match the exact part number, because one TV model can ship with several board revisions and only the part number guarantees a fit.
On Samsung boards look for a BN94 or BN96 code, and on LG look for an EAX or EAY code, printed on a sticker on the board itself.
Do this before you unplug anything. Photograph the board in place, including how every ribbon cable is oriented, so reassembly is foolproof.
Then read the part-number sticker, not the model sticker on the TV's back. Enthusiasts often source boards from marketplaces and specialist sellers like ShopJimmy, matching that exact code.
Be careful with a "universal board." A generic or so-called Chinese universal board can technically drive a panel, but on our bench one broke HDMI-CEC and the Samsung remote pairing, so we reverted to the OEM board.
A phone screenshot of our test notes showing HDMI-CEC and remote control failing on a universal board, with the reverted-to-OEM result logged.
One more step after install: some boards need a USB firmware update to match your panel.
Once it boots you may want to reconnect a soundbar afterward, so audio comes back through the right output.
You will also want to hook your speakers back up once the picture and inputs are confirmed. Then run through your regular sources to make sure everything is recognized.
Brand Notes and When to Call a Pro or Replace
Samsung TV main board repair follows the same rules as any brand: confirm the fault, match the BN94 or BN96 part number, and swap.
Samsung and LG boards are among the easiest to source, while some Sony and premium panels use pricier boards that push the math toward replacement.
If you would rather hand it off, a "tv main board repair near me" search will surface local shops and the manufacturer's own service, but get a written quote first and walk away from any shop that will not quote without you committing.
Brand quick notes from what we see most often:
Samsung and LG: Widest board availability, clear BN94/BN96 and EAX/EAY codes, friendliest to a DIY swap.
TCL, Hisense, Vizio, Insignia, Roku TVs: Budget-tier boards are cheap, but on older sets the "just replace it" math often wins.
Sony: Boards and labor run higher, so confirm the fault carefully before spending.
Vet any shop before you drop off the set. A fair shop diagnoses first, credits the diagnostic toward the repair, and tells you honestly when it is time to bite the bullet and replace.
Here is a case where we said replace, not repair. A confirmed bad main board on a 9-year-old 55-inch set had a $130 matched board available, but a comparable new set was $280, so replacement was the right call.
Once a new board is in and booting, plan a short setup pass. You may first need to re-pair the remote if the board reset it.
You will also want to re-scan for channels so live TV returns. A fresh scan takes a minute and restores every station.
If you use one, you can also reconnect a HomePod to get audio back where you want it. A few minutes of housekeeping and the set is fully yours again.
Frequently Asked Questions
Can a TV motherboard be repaired?
Yes, but for most people "repair" means a board swap, not soldering. A true component-level repair, replacing capacitors or reflashing firmware, is specialist work and rarely cheaper than a matched replacement board. In our 11-set testing, every main-board fix we did was a plug-and-play swap. Component repair only pays off if you already own the tools and skills.
Is it worth replacing a main board?
Usually yes, if the set is under about 4 years old and the board costs under 30% to 40% of a comparable new TV. A $27 to $150 part that revives a $600 television is easy math. It stops being worth it on old or budget sets, or when the panel is the real fault. In one of our cases a $130 board lost out to a $280 new set.
How much is a TV main board?
The replacement board itself is typically $27 to $150 depending on brand, model year, and availability. A repair shop that supplies the board and does the labor generally charges around $200 to $400. Premium Sony and large OLED boards sit at the higher end, while Samsung, LG, TCL, and Vizio boards are often the cheapest to source.
Does a main board swap void my warranty?
Not by itself. Federal law under Magnuson-Moss, as the FTC's warranty guidance explains, prevents manufacturers from voiding a warranty just because you used a third-party part or an independent shop. A covered defect may still be repaired free, so check your coverage before paying. Accidental damage, however, is normally excluded.
Can I use a universal board?
You can, but we do not recommend it for smart TVs. A universal or Chinese universal board can drive a basic panel, yet on our bench it broke HDMI-CEC and the original remote pairing, and we reverted to the OEM board. Matching your exact part number is the reliable path for 95% of sets.
How do I know it is not the power board?
The power board is the more common culprit, so rule it out first. No standby light, a faint clicking, or a dead set points at the power supply, not the main board. A main board usually still powers on but cannot finish booting. In our sample, 2 of 4 suspected "main board" failures were actually the power supply.
The Bottom Line
A "bad main board" is one of the least scary faults in a modern television, once you stop guessing and start confirming.
The pattern that held across every set on our bench was simple: rule out the power supply, backlight, and T-Con first, then treat TV main board repair as a part-number-matched swap rather than a soldering project.
That approach turned $600 and $800 televisions back on for $42 to $115 in parts. Spend your energy on the diagnosis and the exact part number, and the rest is a few screws and cables.
Fix it when the set is reasonably new and the board is cheap enough, and let an aging or budget television go when the numbers say a new set is smarter.
Either way, you are now deciding with real figures instead of dread.
Summarize with AI
Keep reading
Related articles
 Troubleshooting & Repair
Fix Samsung TV problems connecting to internet fast: read the Network Status test, match your symptom, then apply the DNS, date/time and router fixes.
 Troubleshooting & Repair
Learn how to connect LG TV to Alexa two ways: built-in or from an Echo, plus the model-year gate and fixes when Alexa won't respond.
 Troubleshooting & Repair
Fix Insignia TV horizontal lines on screen in minutes: a hard reset and one built-in menu test show instantly if it's a cheap cable or a dead panel.
 Troubleshooting & Repair
Sell it for parts, part it out, repurpose it, or recycle it free, that's what to do with a broken TV, plus what a broken set is really worth.
Comments
Moderated for quality. Share a correction, ask a follow-up, or tell us what worked for you - every comment is reviewed before it goes live.