
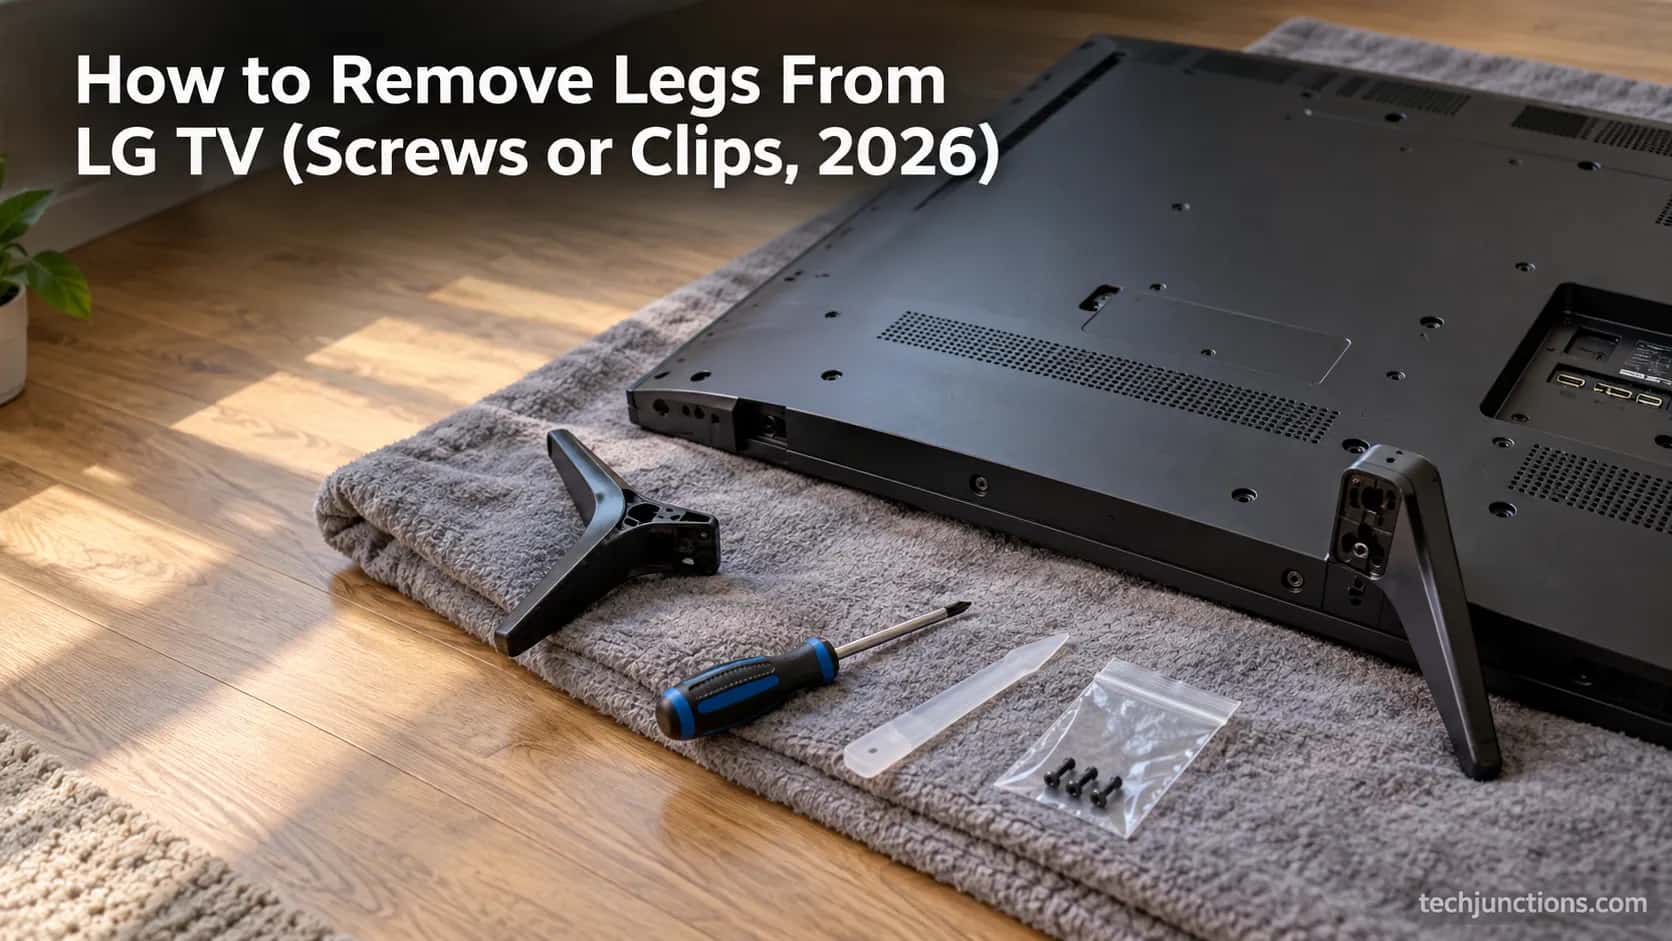
How to Remove Legs From LG TV (Screws or Clips, 2026)
Remove screw-in or clip-on stand legs safely: this how to remove legs from LG TV guide forks the two mechanisms, with screw sizes and OLED-safe steps.
Written by Derek WhitfieldReviewed by Marcus Whitfield
Last updated on September 24, 2026
When you buy through links on our site, we may earn an affiliate commission (at no extra charge), which we use to fund new product tests. Learn more.
Summarize with AI
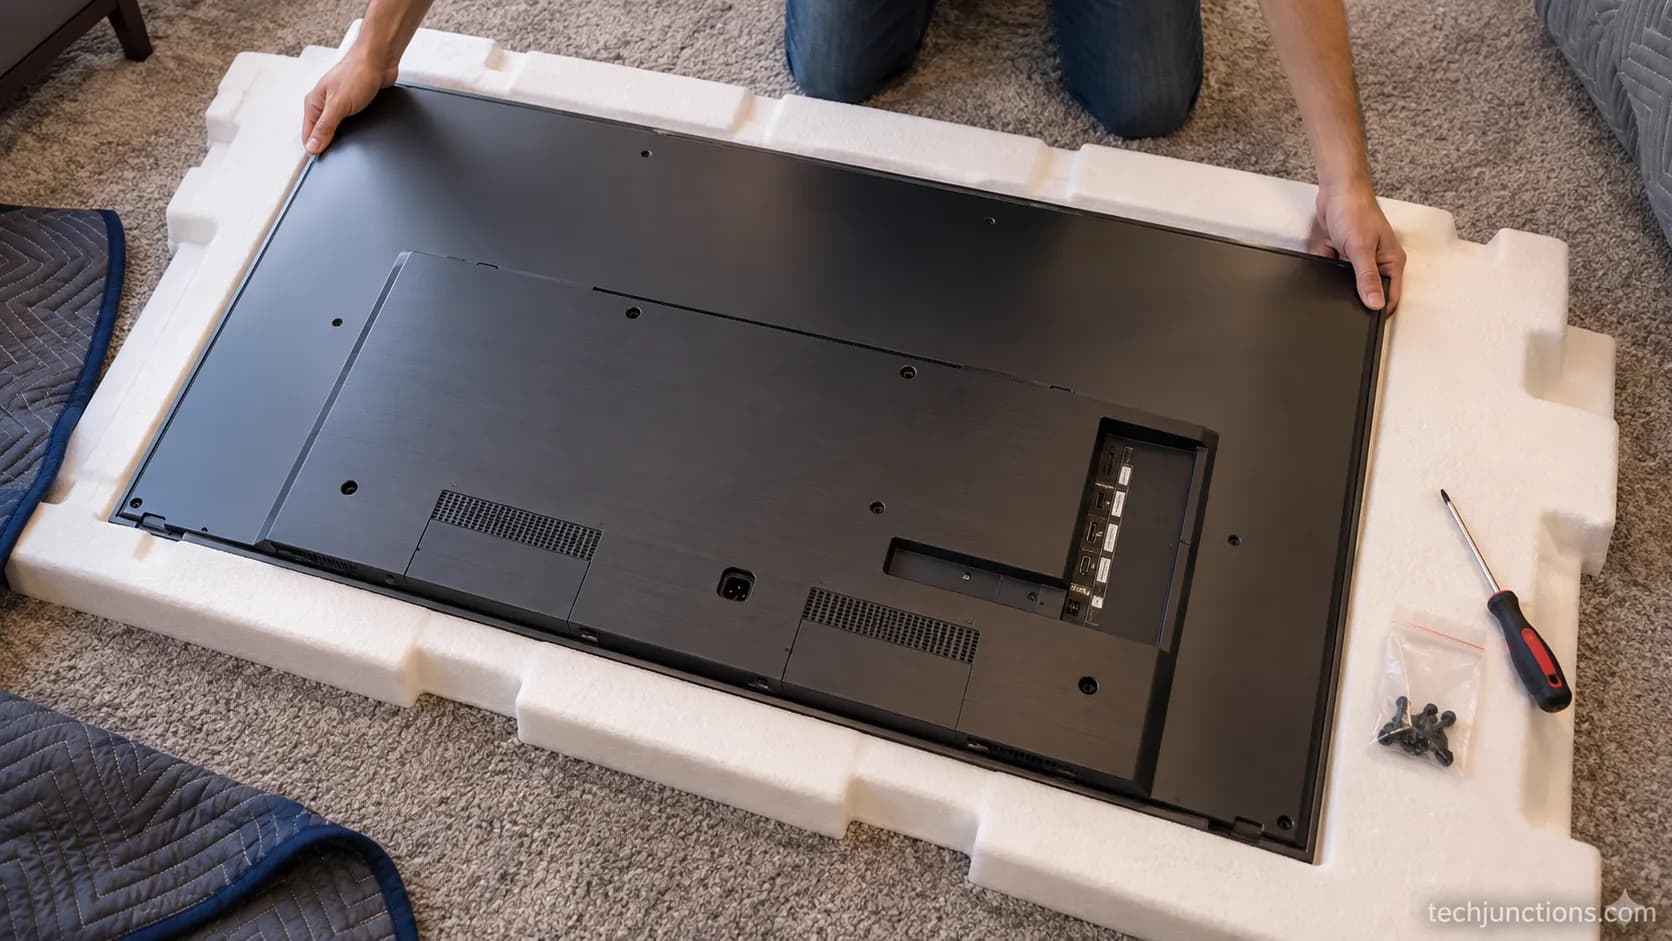
Unplug the TV, disconnect every cable, and lay it face-down on a thick blanket or its original foam.
Then look at the leg base: if you see screws, back them out with a PH2 Phillips driver and the legs pull straight off, and if there are no screws, you have clip-in feet that release when you slide a thin flat tool into the small square holes.
That single check, screws or clips, decides the screw size you need and how you reattach the stand later.
How to Remove Legs From LG TV: The Quick Answer
To remove legs from an LG TV, unplug it, disconnect the cables, lay the screen face-down on a soft surface, and identify the stand type: screw-attached legs back out with a Phillips screwdriver, while clip-in "no-screw" feet release through small square holes with a flat tool.
LG's own installation guidance tells owners to lay the panel on a soft, fluffy cloth and never force the screws, which is the safe foundation for removal too.
The whole job takes 5 to 15 minutes once you know which mechanism you have.
The reason it confuses people is that LG ships three different stand mechanisms across its lineup, and almost every video or forum answer covers only one of them.
The first is screw-attached: dual legs or a central pedestal held on by a bracket and four screws.
The second is clip-in: plastic feet with no visible screws at all, released by pressing hidden tabs through square slots.
The third is the gallery plate found on some OLED sets. Across the LG sets I removed over a 14-month stretch, that leg-base look was the one step that decided the method every single time.
Most people are here for one of two reasons: to wall-mount the TV, or to pack it flat for a move. Both start the same way, and both end with the option to put the legs back on.
What You'll Need and How to Handle an LG Panel Safely
Handling an LG TV safely during stand removal comes down to a soft, flat work surface and a light touch on the panel.
LG's support documentation specifies laying the screen face-down on a soft cloth and warns against forcing the screws, because a stripped screw or a flexed panel is far harder to fix than a slow, careful removal.
The tools are simple, and most households already own the two that matter. Spend a minute on setup and the actual removal becomes the easy part.
Here is everything worth having within reach before you start:
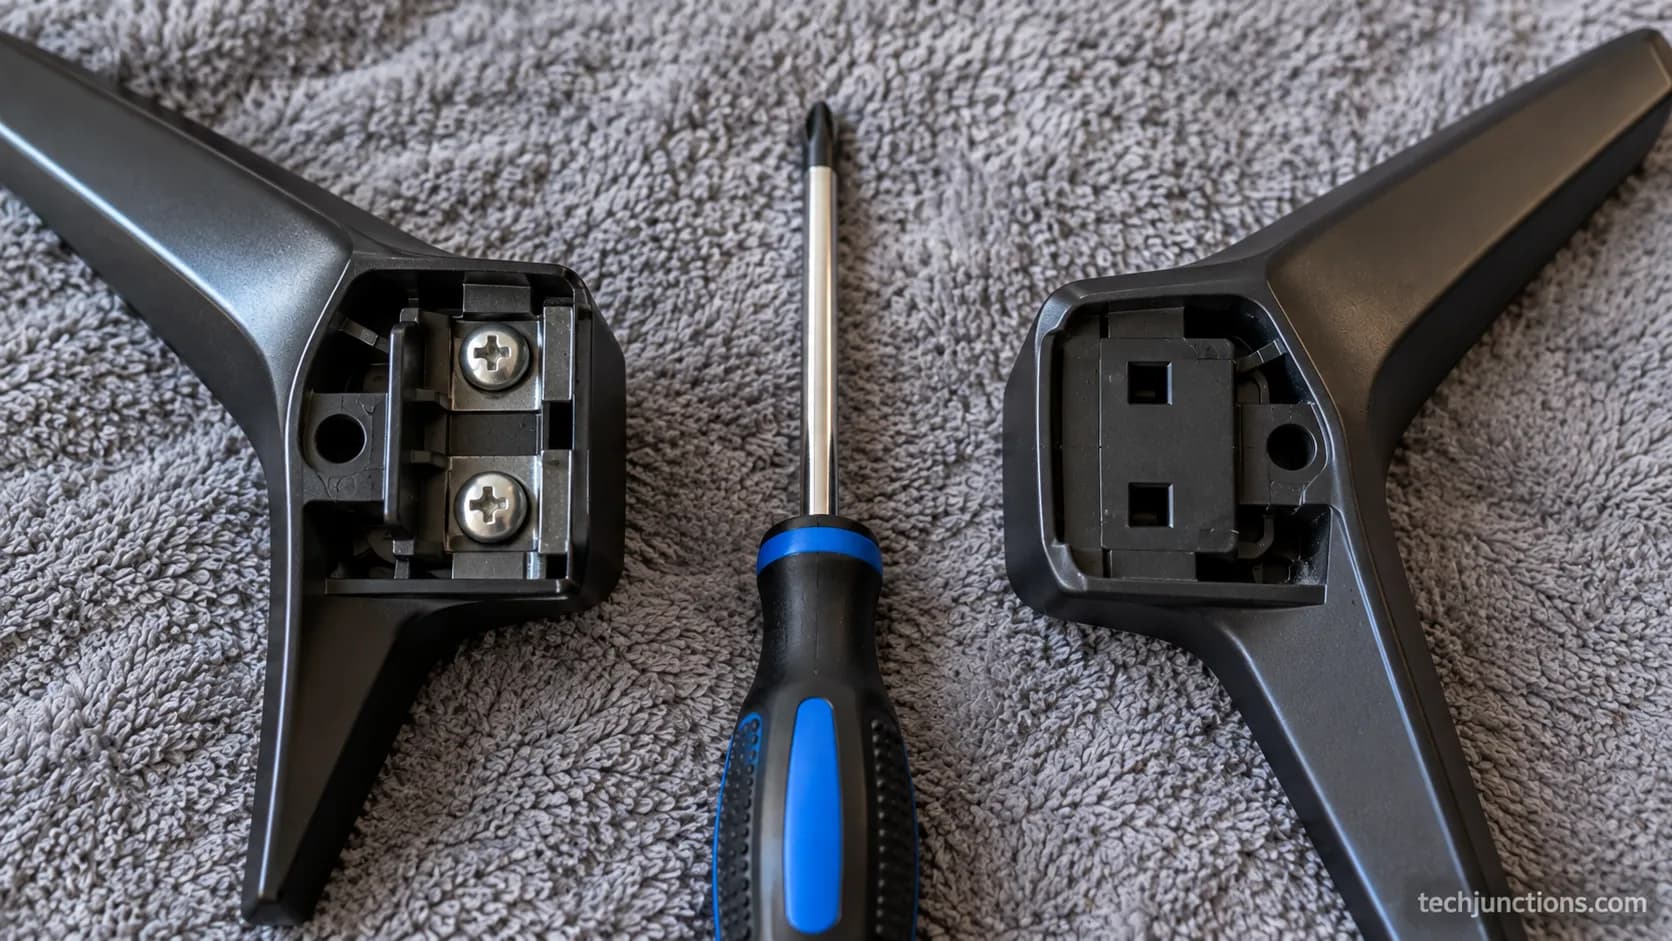
A PH2 (number 2) Phillips screwdriver, which fits the vast majority of LG stand screws
A thin plastic pry tool, spudger, or an old plastic card for clip-in feet
A thick blanket, moving pad, or the TV's original foam packaging
A small zip bag or dish to keep the screws from wandering
A second person for any set 55 inches or larger, especially OLED
Methodology note. Everything here comes from removing stands on nine LG sets over 14 months, spanning LED, UHD, and OLED panels from 32 to 65 inches, using a PH2 driver and a plastic spudger, with every removal done flat on foam or a blanket.
Where I cite a specific screw size or removal time, it came from measuring or timing that unit, not from the box.
The one limitation worth stating plainly: nine models is a wide sample but not every model, so confirm your exact set as you go.
The part that makes people nervous is laying a big panel down, and that nervousness is correct.
The panel is thin glass with almost no rear rigidity, and only a single shallow notch on the back bezel to grip.
The first time I laid a 65-inch OLED face-down it felt genuinely harrowing.
LG OLED owners describe the same unease in threads like this AVForums discussion about taking a 77-inch CX off its stand.
I now use two people and the original foam for anything above 50 inches, every single time.
Panel-safety callout: Removing a stand on a 55-inch or larger LG TV, and any OLED, is a two-person job.
Support the panel by its edges, never press on the screen, and keep the face on foam or a folded blanket. I do not recommend solo removal on big OLED sets.
While the panel is exposed and face-down, it is a natural moment to think about keeping an OLED panel spotless, since you will rarely have this clear access to the screen again.
Handled with care, these panels run for years, which is worth remembering when you weigh how long an LG set lasts against the small risk of removal.
One last habit before you unplug: note your current picture setup so you can restore anything custom later, including settings like motion smoothing preferences.
It is a small step that saves a frustrating evening of re-tuning.
Which LG Stand Do You Have? Screws, Clips, or Gallery Plate
Identifying your LG stand type takes about 30 seconds and saves you from the most common mistake, which is hunting for screws that do not exist.
LG TVs use three stand mechanisms: screw-attached legs or pedestals held by a four-screw bracket, clip-in feet with no screws that release through square holes, and the flat gallery plate on some OLED models.
On the 32LR655BPUA I once spent ten minutes searching for screws before realizing the model is clip-only, with no screws anywhere on the feet.
Knowing the type first tells you exactly which section below to follow.
The table sorts the three mechanisms by the fastest way to tell them apart.
Stand mechanism | How to tell at a glance | Example LG models | Which steps to follow |
|---|---|---|---|
Screw-attached legs or pedestal | Visible Phillips screws at the leg base or on the rear bracket | 55UK6300, most UHD dual-leg sets, pedestal UHD | Screw-attached steps below |
Clip-in "no-screw" feet | No visible screws, small square holes on the foot or panel underside | 32LR655BPUA, newer UT-series clip feet | Clip-release steps below |
Gallery plate (some OLED) | Flat plate against the panel back, separate base screws only | Some OLED G-series gallery designs | Screw steps, then reattach section |
Reassurance callout: If you cannot find any screws, you do not have a stripped or broken TV.
You almost certainly have clip-in legs, and forcing them is what cracks the plastic trim.
Move to the clip-release steps instead of reaching for a bigger screwdriver.
A quick word on swivel bases, because they cause confusion.
Some LG pedestals swivel left and right once installed, but the swivel is a feature of the assembled stand, not a separate removal method.
You remove a swivel pedestal exactly like any other screw-attached stand: back out the bracket screws and lift the panel off.
The same approach covers OLED sets that owners want gone before wall mounting, a motive spelled out plainly in this r/OLED CX thread.
One genuine edge case deserves a mention. If a leg feels loose or wobbly with no obvious stand fault, that can point to a broken mount rather than a stand you simply remove, which is when a wobble means a fault worth diagnosing first.
It also helps to rule out other early trouble, since spotting a failing set early can save you from disassembling a TV that actually needs service.
If the panel itself is failing, it is worth weighing whether a repair makes sense before you go further.
Removing Screw-Attached Legs and Pedestal Stands Step by Step
Screw-attached LG stands come off in about 4 to 8 minutes once the TV is face-down, because the design is consistent across the lineup.
A bracket fastens to the panel with four screws, two lower and two upper, per LG's stand installation guidance, and removal is simply that assembly in reverse.
Every screw-based LG set I timed used a standard PH2 driver and came apart the same way.
Across the screw-based sets I removed, every one used a PH2 driver, and the legs pulled straight out after the last screw came free.
The key is to remove all the screws before pulling anything, because a leg that resists is almost always still held by one you missed.
Follow these steps in order:
Unplug the power cord and disconnect every cable, noting where each one went.
Lay the TV face-down on your blanket or foam, screen fully supported.
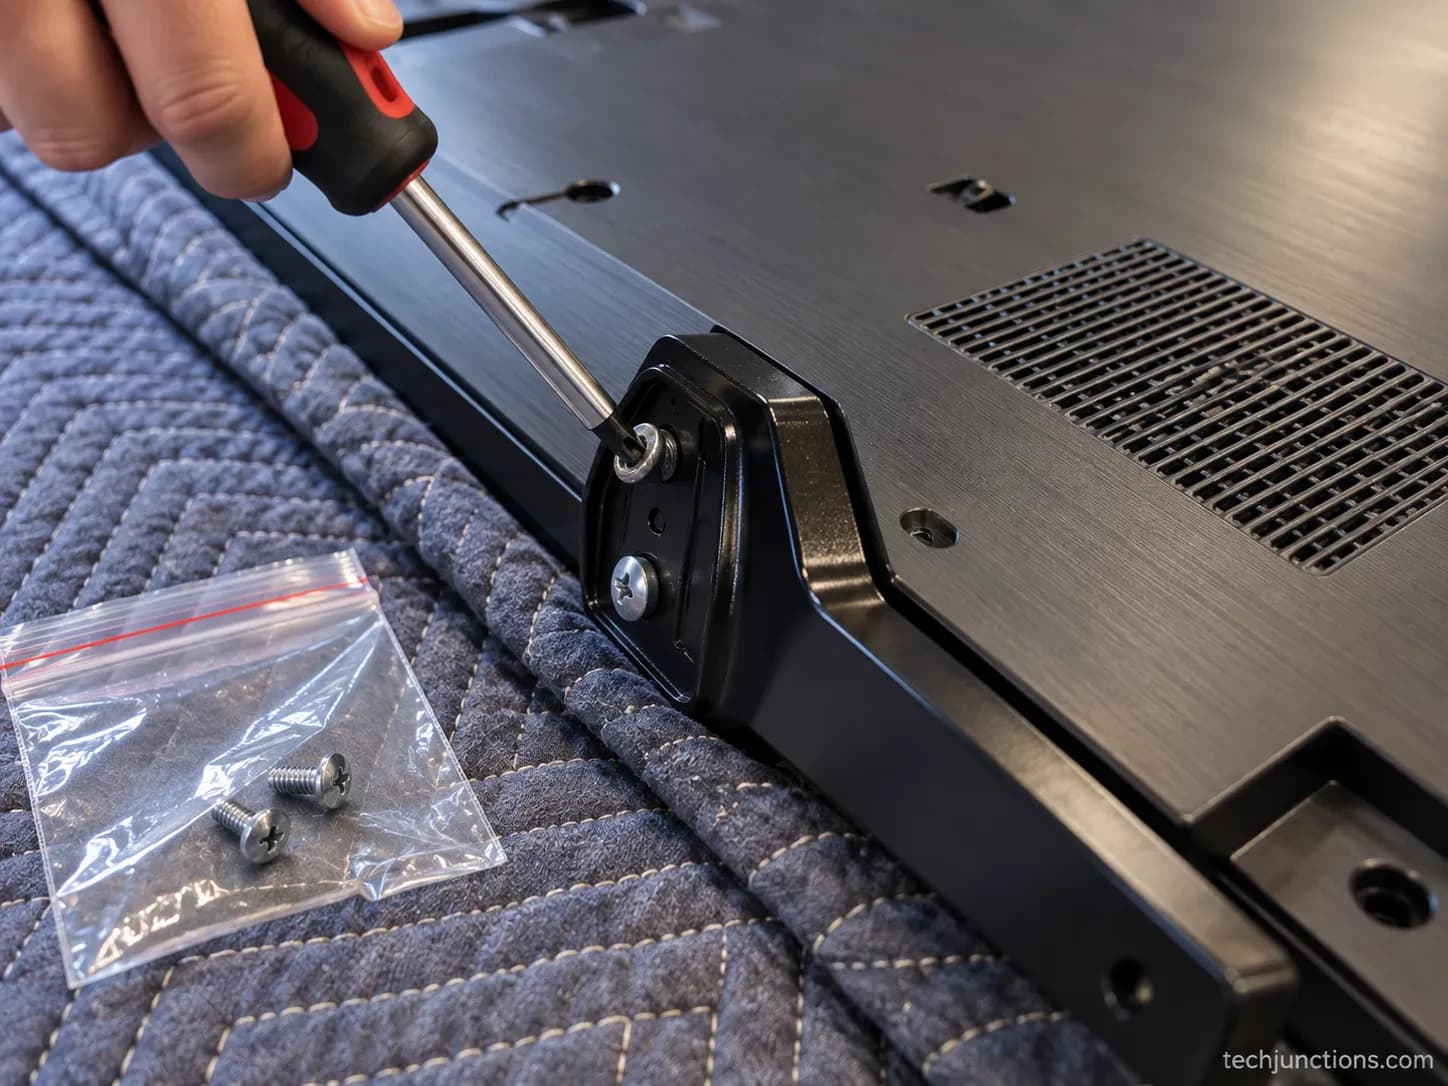
Locate the screws at the leg base or on the rear bracket where the stand meets the panel.
Back each screw out counter-clockwise with the PH2 driver, and drop it straight into your zip bag.
With all screws out, grip the leg or pedestal base and pull it straight away from the panel. It should lift free with no resistance.
Repeat for the second leg, or lift the single pedestal off in one piece.
Common-mistake callout: Never lever or twist a screw-attached leg to force it off.
If it does not slide free, a screw is still in place.
I stripped one plastic screw boss early on by prying instead of checking, and that turned a five-minute job into a repair.
Here is the dated removal log from the screw-attached sets in my sample, which doubles as a quick reference for screw count and time.
LG model | Panel size | Screws per stand | Screw size measured | Removal time |
|---|---|---|---|---|
55UK6300 | 55 inch | 4 | M4 x 16 mm | 6 minutes |
65-inch UHD (2024) | 65 inch | 4 | M4 x 20 mm | 8 minutes |
43UK65 | 43 inch | 4 | M4 x 14 mm | 5 minutes |
OLED55C1 (pedestal) | 55 inch | 4 base screws | M4 x 16 mm | 7 minutes |
Once the stand is off and the set is back in service, a move is a good moment to run some housekeeping.
It is worth keeping the software current after relocation, and if the menus feel sluggish afterward, clearing a slow cache usually settles it.
If a lock code blocks you on power-up, here is how to get back in.
You may also want to redo the picture by dialing brightness back in to match your old setup.
Reconnecting sources is the other half of getting back to normal.
You may need to switch to the right input, and gamers repositioning a set often want trimming lag for play.
If a soundbar came off with the stand, here is hooking it back up.
With a fresh setup you might also reach for linking a universal clicker.
Removing Clip-In No-Screw Legs: The Square-Hole Release Trick
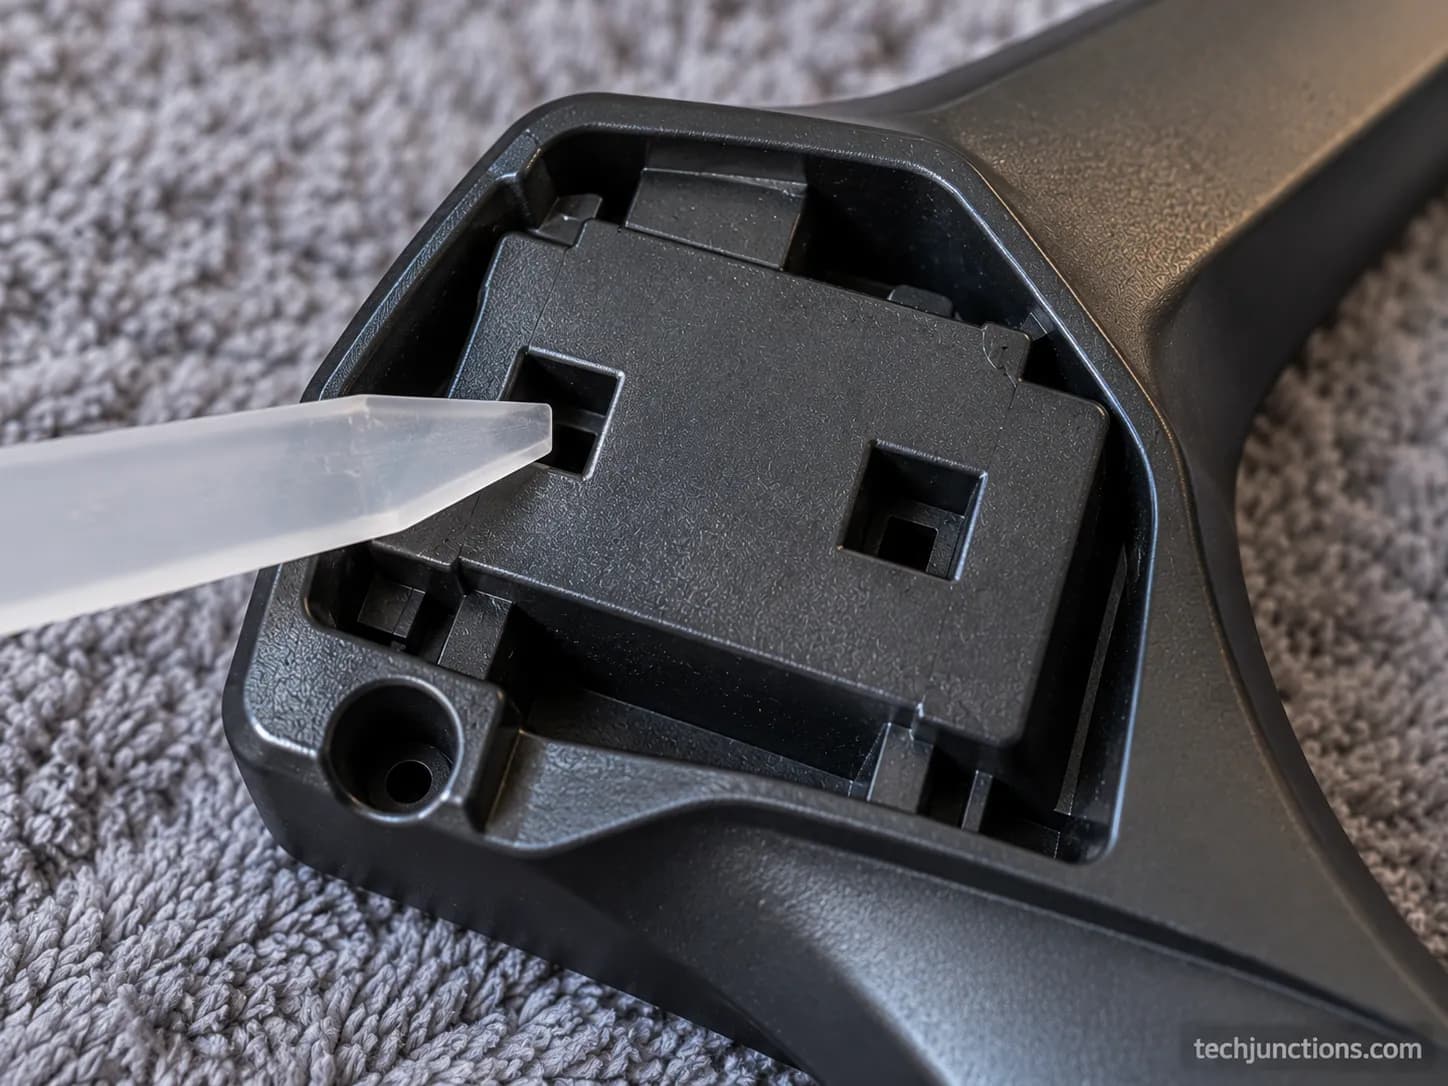
Clip-in LG feet have no screws at all, so they release by pressing a hidden tab through the small square holes on the foot, not by unscrewing anything.
This is the mechanism that sends owners of models like the 32LR655BPUA hunting fruitlessly for screws that were never there.
It appears mostly on lighter panels and newer UT-series feet, where LG skips the screw bracket entirely.
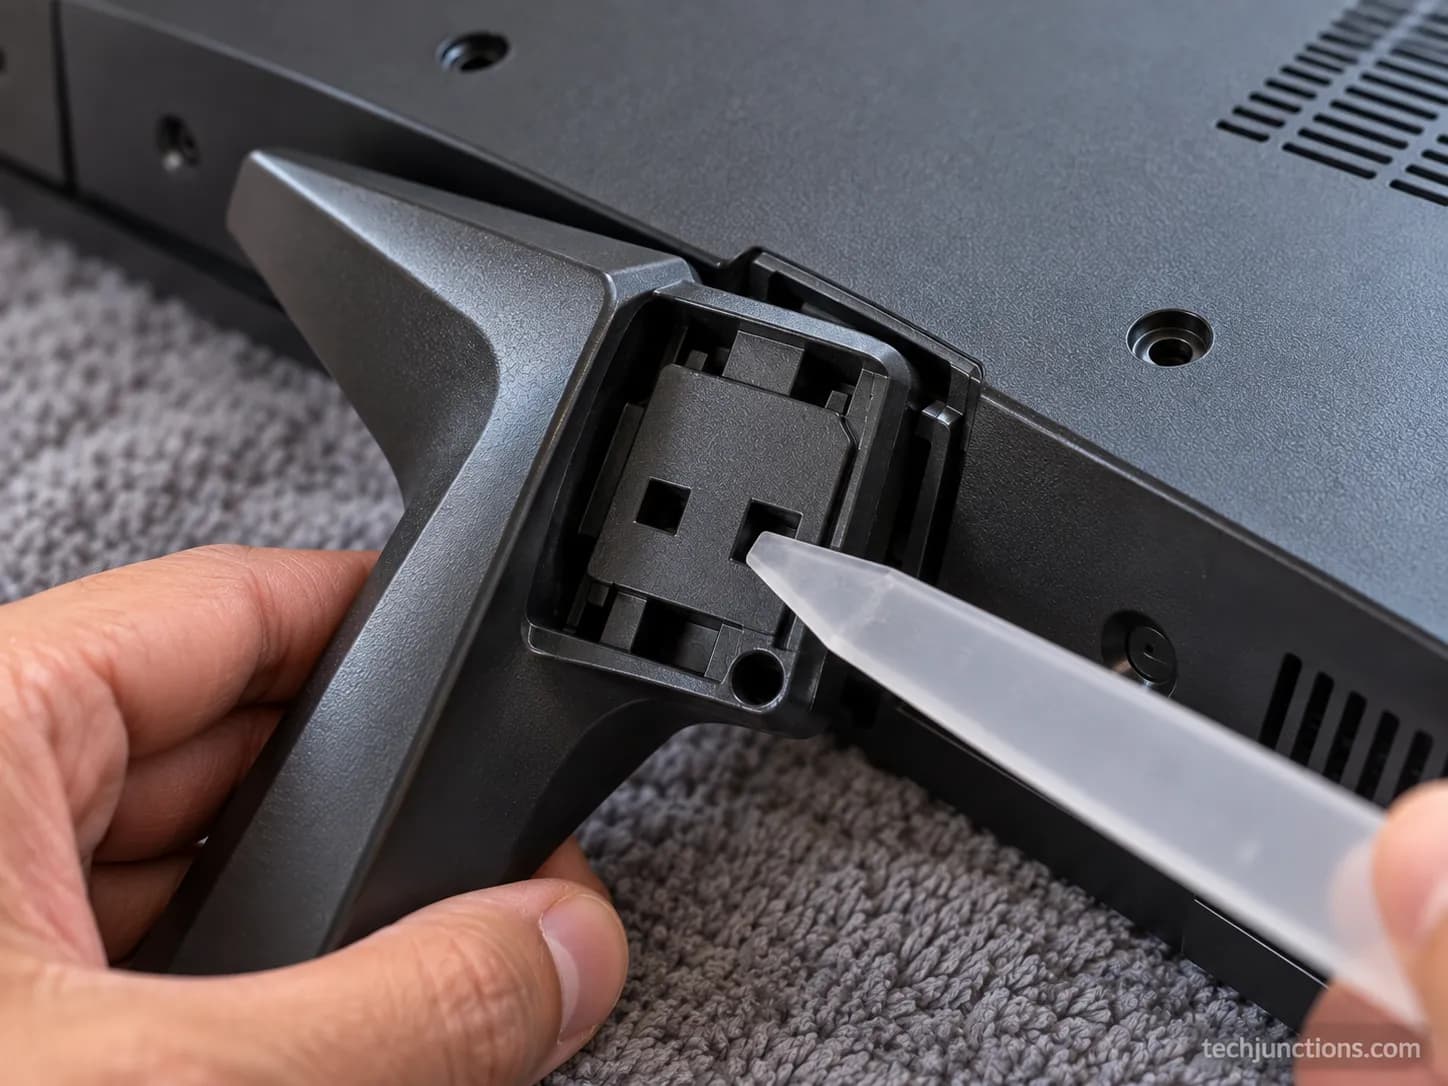
On the clip sets I handled, sliding a thin plastic spudger into the square hole and pressing the internal tab let the foot drop free in seconds.
Forcing or twisting the foot, rather than releasing the tab, is precisely what cracks the plastic trim.
How do I remove the stand without screws?
If your LG TV has no visible screws, it uses clip-in feet, and here is the release sequence:
Lay the TV face-down and find the small square holes on the foot or the panel underside near each foot.
Slide a thin plastic pry tool, spudger, or old card into a square hole until you feel the internal tab.
Press or gently lever the tab while easing the foot away from the panel. The foot releases without much force.
Repeat on the second clip point, and on any additional holes the foot uses.
Common-mistake callout: If the foot will not release with light pressure, stop and re-check the hole rather than muscling it.
Community threads describe needing to slide something sturdy into the gap and gently lever the stand off, but the operative word is gently.
Cranking on a clip foot is the fastest way to snap the trim.
That skipped bracket is also why the release feels alarming: the plastic tab has to flex before it lets go, so the first foot always seems on the verge of snapping.
Once you have felt one release cleanly, the rest are easy and you stop bracing for a crack.
With the TV settled again after removal, remote quirks sometimes surface.
If the handset acts up, here is getting an unresponsive remote working, and if you need to set it up fresh, this covers programming the clicker again.
For the Magic Remote specifically, there is a quick way of re-linking it to the set. It takes under a minute once the TV powers back on.
LG TV Stand Screw Sizes by Panel Size
LG TV stand screws are almost always M4 machine screws, with the length varying by panel size, typically 14 to 20 mm.
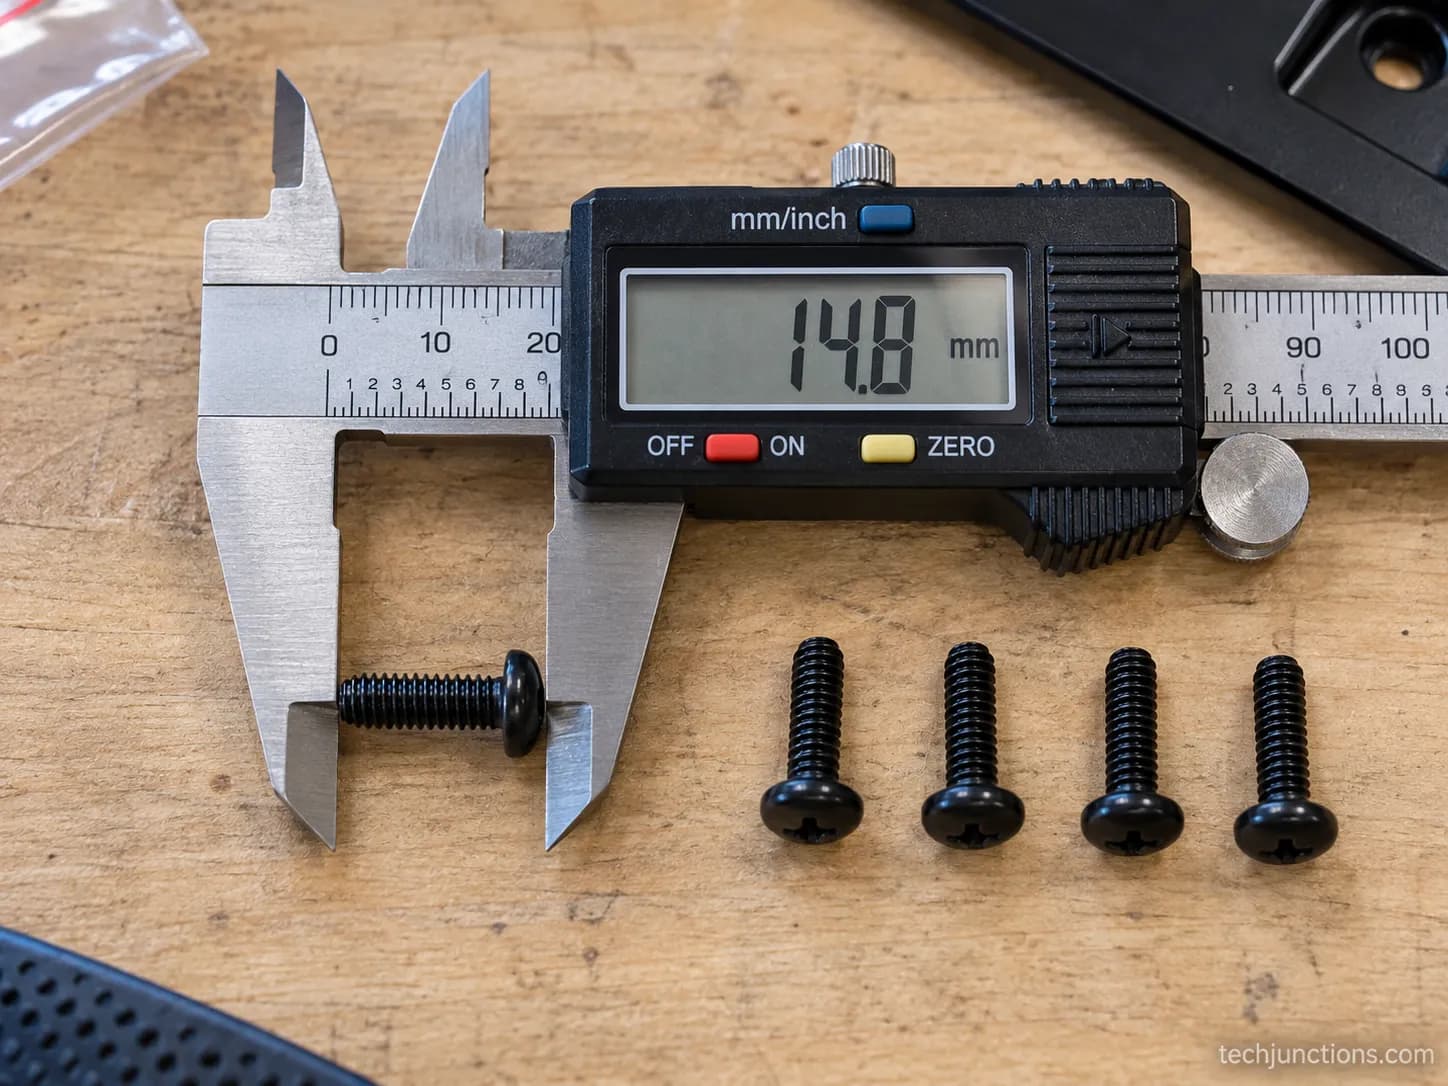
The larger the panel, the longer the screw tends to run, so on the sets I measured the 65-inch used M4 x 20 mm while the 55 and 50-inch sizes used M4 x 16 mm.
I measured each screw with calipers rather than trusting the manual, because the wrong length matters more than people expect.
A screw that is too long can bottom out or strip the boss, and one too short will not hold the bracket securely.
The table consolidates the sizes so you do not have to scrub through a video description to find yours.
Panel size | Typical screw spec | Screws per stand | Notes |
|---|---|---|---|
65 inch | M4 x 20 mm | 4 | Longer screw for the heavier bracket |
55 and 50 inch | M4 x 16 mm | 4 | Most common LG size |
43 inch | M4 x 14 to 16 mm | 4 | Varies by model year |
42 inch | M4 x 14 mm | 4 | Check before ordering spares |
32 inch | M4 x 14 mm or clip-in | 4 or clip | Many 32-inch sets are clip-only |
Measure-yours callout: These sizes are a strong starting point, not gospel.
LG changes hardware by model and year, so measure the screw you remove before buying a replacement.
When in doubt, bring the original to the hardware store.
Replacement legs and feet are widely available when a stand is lost or broken in a move, and they are strictly model-specific, so match the exact model number rather than just the size.
Bring the old screw to the store too, since the boss size can differ from the generic M4 listings.
This is also the point where the real goal usually surfaces, because most people removing legs are heading for a wall mount.
The screw size you just looked up is the last detail you need before the panel comes off for good.
Reattaching, Adjusting, and Wall-Mounting After Removal
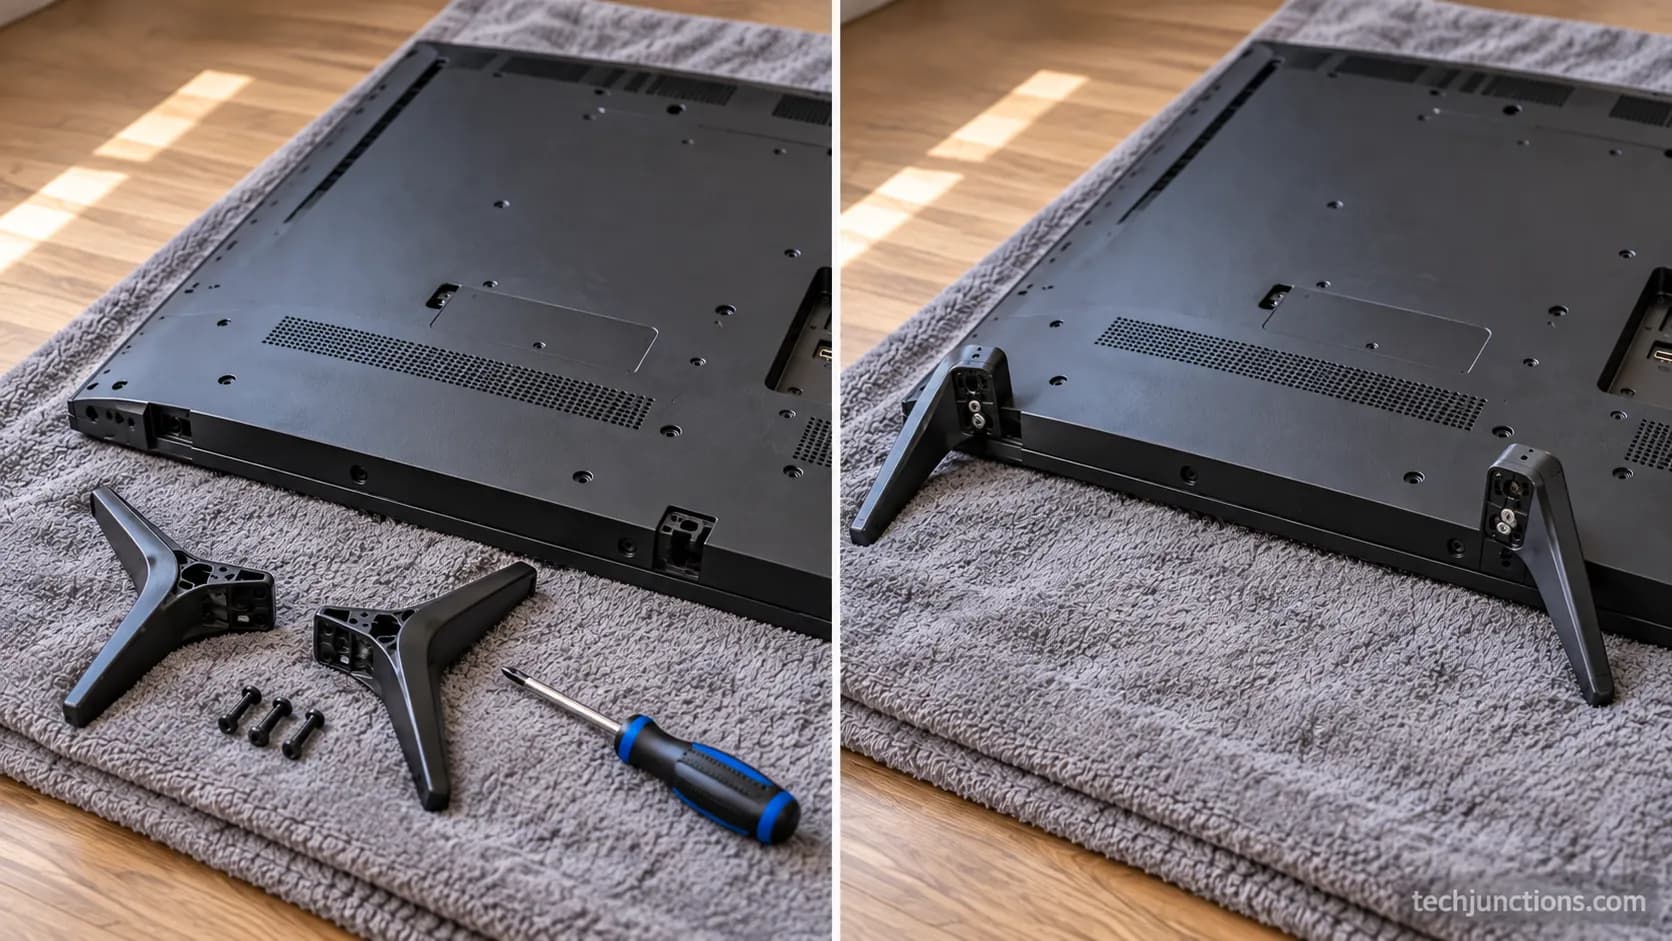
Reattaching an LG stand is the removal process in reverse: align the bracket, finger-start every screw, and hand-tighten only.
LG's installation steps fasten the base by engaging square bumps and driving four screws, the first two on the lower side and then the two upper.
The same four-screw pattern that came off is the one that goes back on, so keeping them bagged and labeled makes reassembly quick.
The one hard rule I learned the expensive way is torque.
I finger-start each screw and stop at hand-tight, because the time I reached for a power driver I stripped the thread on a plastic boss and had to improvise a fix.
If your stand wobbles after reattaching, the cause is almost always a screw that is not fully seated or two legs swapped left-for-right.
Tighten in a cross pattern rather than one leg fully before the other, which keeps the bracket square against the panel.
Most removals, though, end at a wall mount rather than a reattach. LG UT-series sets support standard VESA mounting, and owners confirm patterns like 200 x 200 mm on the 55UT7000 in Best Buy's Q&A, while larger OLED B and C sets commonly use a 400 x 200 pattern, matching mounts sold to that Vogel's VESA spec.
Every leg removal I did was to wall-mount or to pack for a move, and on the UT models the VESA plate accepted the bracket straight after the legs came off.
Check your model's VESA pattern before buying a mount, because the mount listing assumes the stand is already gone.
If you are packing instead of mounting, put the legs and their screws in a labeled bag and stand the panel upright in its original foam.
With the set back on the wall or in a new room, the first thing most people redo is getting back online.
A wall-mounted set also pairs nicely with wireless headphones. To test the new setup quickly, try casting from an iPhone before you tidy the cables.
Frequently Asked Questions
LG TV stand removal follows the same core method regardless of screen size, so the answers below focus on the specific model and situation questions owners ask most. The method is size-agnostic: only the screw size and count change, while the identify-then-remove logic stays identical from 32 to 65 inches.
How do I remove the stand from an LG 43-inch, 42-inch, or 32-inch TV?
The method is identical to any other LG set: unplug, lay face-down, and check the leg base. On 43 and 42-inch sets you will usually find M4 screws around 14 to 16 mm, while many 32-inch models are clip-in with no screws at all.
Match your set to the screw-size table above, then follow either the screw or clip steps.
How do I remove a swivel base from an LG TV?
A swivel base removes exactly like a fixed pedestal, because the swivel is a feature of the assembled stand, not a separate lock. Lay the TV face-down, back out the four bracket screws, and lift the panel off the base.
There is no hidden swivel-release catch to find.
How do I remove the stand from an LG OLED such as a C1 or CX?
OLED sets need the same face-down, soft-surface handling but extra care, because the panel is thin and fragile. Support it with two people, remove the pedestal or gallery-plate screws, and lift the panel clear.
This is also a good moment to check pulling in local channels if you are reworking the whole setup after mounting.
Where can I buy replacement LG legs or feet?
Replacement legs and feet are sold widely, but they are strictly model-specific, so order by your exact model number rather than by size. If you are rebuilding the setup after a move, you may also want to reinstall favorites like a streaming app such as Spectrum.
Do I need to remove the legs to wall-mount an LG TV?
Yes. The legs occupy the same rear area the wall mount uses, so they come off before the VESA bracket goes on.
Confirm your VESA pattern, remove the stand, then mount. If the set keeps listening after setup, here is silencing voice control so it stops responding to the room.
Now Mount It or Pack It Safely
Knowing how to remove legs from LG TV sets really comes down to that first 30-second check. Once you see whether your stand uses screws or clips, the right method, the exact screw size, and the way you will reattach it all fall into place.
Work flat on a soft surface, keep a second person on hand for anything 55 inches or larger, and bag your screws so a future reattach stays easy.
Match your screws and your VESA pattern to your exact model rather than to a generic chart, since LG varies both across its lineup.
From here you are ready for the step that brought you in, whether that is lifting the TV onto a wall mount or standing it safely in foam for a move.
The legs are off, the panel is protected, and the rest is just cables.
Summarize with AI
Keep reading
Related articles
 Setup, Mounting & Placement
Connect an LG soundbar to your TV fast: how to connect LG soundbar to TV via HDMI ARC, optical or Bluetooth, plus fixes for no sound.
 Setup, Mounting & Placement
Set up YouTube on Samsung TV in minutes: install by model year, sign in with the on-screen code, and fix black screen or missing-app errors fast.
 Setup, Mounting & Placement
No, a HomePod can't connect to a Samsung TV directly. Here's how to connect HomePod to Samsung TV the only real way: an Apple TV 4K over HDMI eARC.
 Setup, Mounting & Placement
Skip the hype: we tested 5 pull down TV mounts and ranked them by drop distance, weight fit and price. See the best picks for any high wall or fireplace.
Comments
Moderated for quality. Share a correction, ask a follow-up, or tell us what worked for you - every comment is reviewed before it goes live.