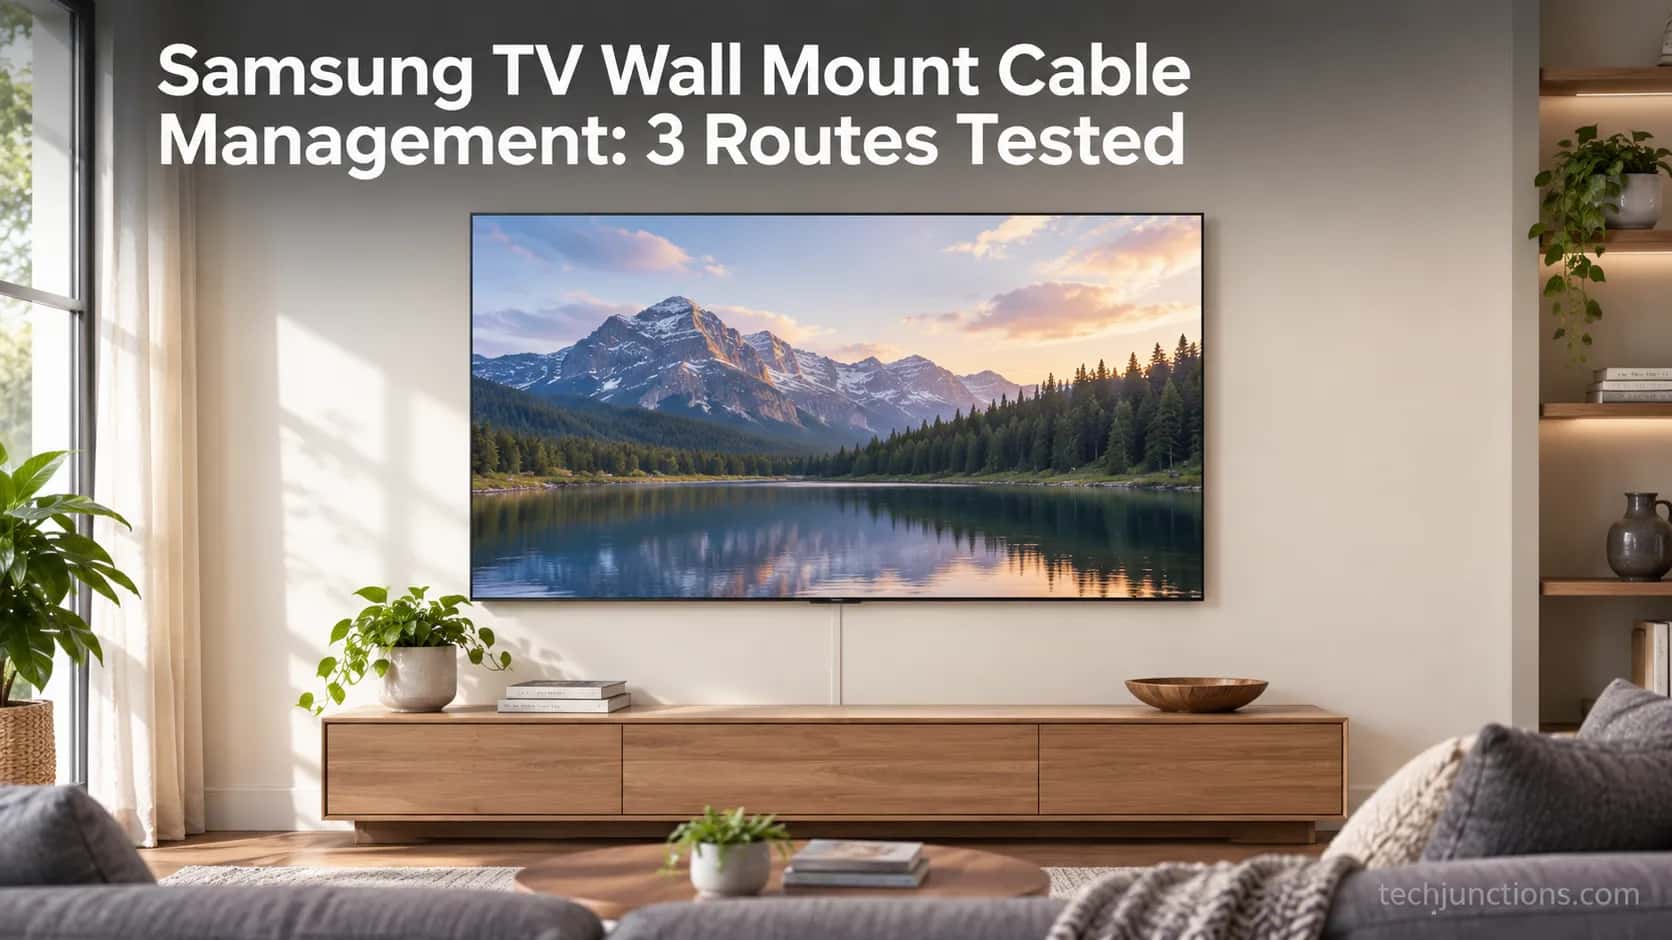
Samsung TV Wall Mount Cable Management: 3 Routes Tested
Tackle Samsung TV wall mount cable management three ways: on-wall raceway, in-wall recessed kit, or One Connect box, each routed to fire code.
Written by Derek WhitfieldReviewed by Marcus Whitfield
Last updated on August 20, 2026
When you buy through links on our site, we may earn a commission at no extra cost to you. It never changes what we recommend. Learn more.
Summarize with AI
A bare bundle of cables dangling under a freshly mounted screen ruins the one thing a wall mount is supposed to buy you, a clean wall.
Good Samsung TV wall mount cable management is not one trick, it is a decision about your wall and your lease.
Over three months I hid the wires on two Samsung sets across three very different walls. The route that worked changed every time, and so did whether I was legally allowed to cut the drywall at all.
This guide gives you the verdict first, then walks each route step by step. It also draws the hard line most product pages skip, the one rule that decides whether your install is safe or a fire-code violation.
There are three real routes to hide the wires behind a wall-mounted Samsung TV. Route one is an on-wall paintable raceway: no wall cutting, renter-safe, done in under half an hour.
Route two is an in-wall recessed kit: cleanest look, but you cut drywall and must use a UL-listed power-relocation kit, never a buried extension cord.
Route three tucks Samsung's One Connect box into an in-wall media enclosure, ideal for QLED and The Frame. Pick by wall type and whether you own the place.
How we tested this.
Test window: May to August 2026.
Walls: a 2018 drywall wall on 16-inch stud centers (W1), a 1958 plaster-over-brick masonry wall (W2), and a rental drywall wall where cutting was not allowed (W3).
Televisions: a 65-inch Samsung The Frame LS03D with a One Connect box, and a 55-inch Samsung QLED Q80.
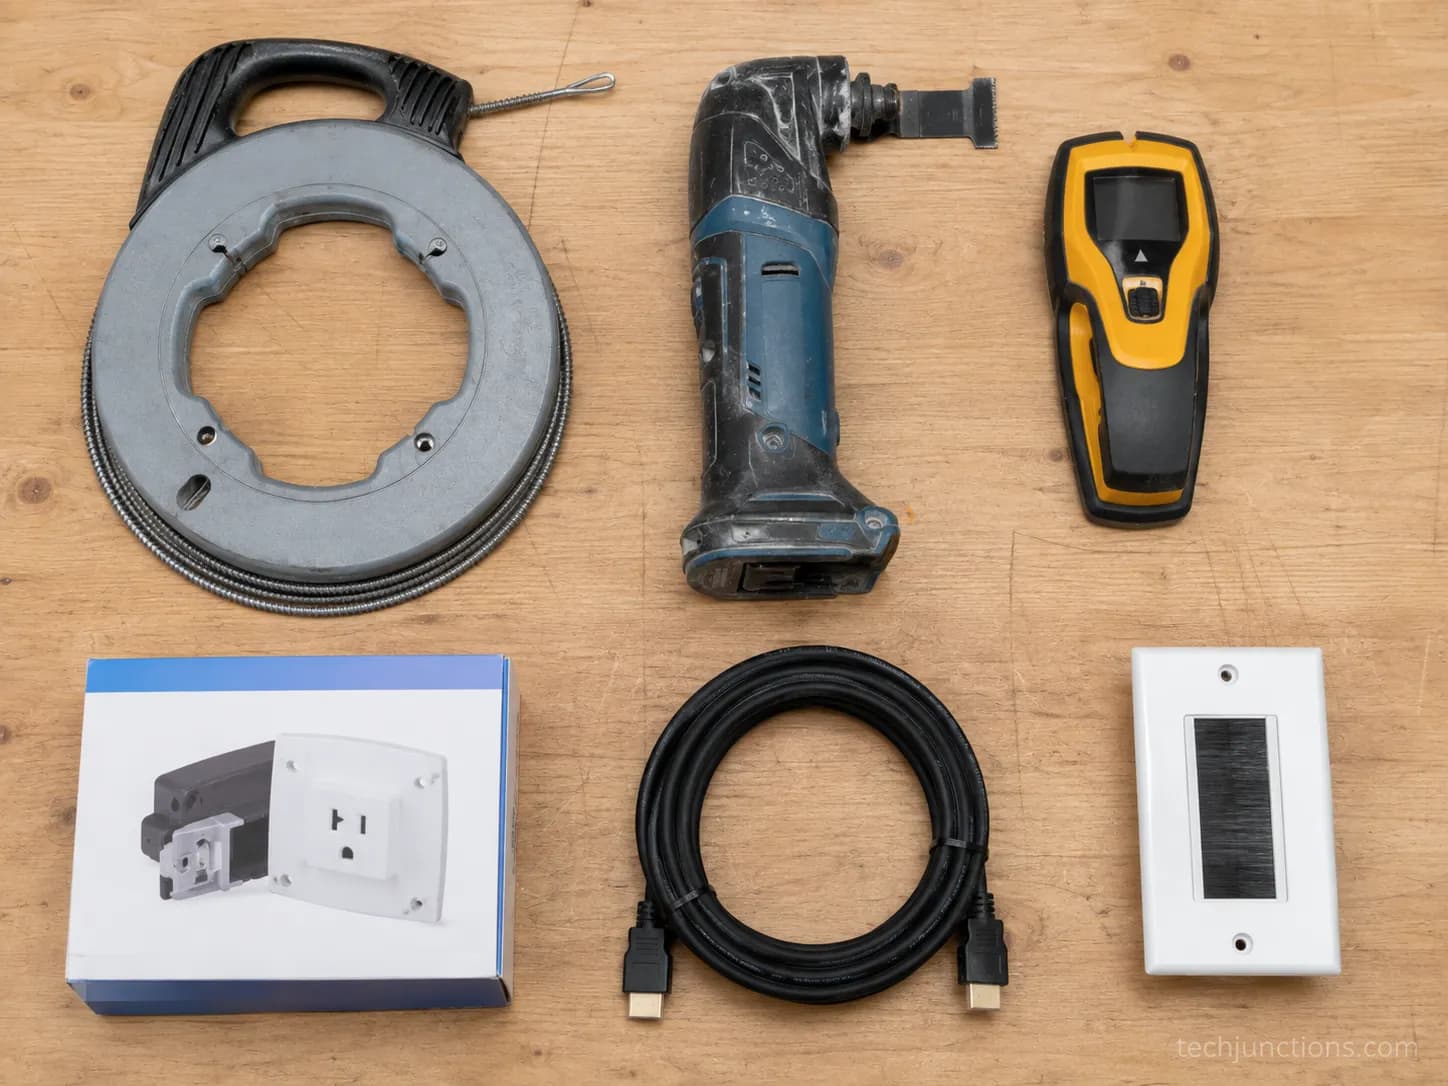
Tools and kit: Klein fish tape, an oscillating multi-tool, a stud finder, a PowerBridge ONE-CK power-relocation kit, an Echogear on-wall raceway, a 16-foot Zeskit CL3-rated HDMI cable, a Sanus 17-inch in-wall media box, and Samsung's No Gap and slim WMN-B05FB mounts.
Every time, cost, and clearance figure below comes from those runs.
Samsung TV Wall Mount Cable Management: Which Route Fits Your Wall
Samsung TV wall mount cable management starts with a two-part question, not a product: what is your wall made of, and are you allowed to open it.
Samsung's own guidance recommends in-wall-rated cable plus a relocation kit for a clean mount, per Samsung's mounting guidance.
Across our three walls, the correct route flipped based on tenure and material. The recessed solutions on the market also split into two families, low-voltage signal routing and actual power relocation, a distinction the recessed-outlet how-to at Engineer Fix lays out well.
Route | Best wall type | Owner or renter | Cuts drywall | Our time | Our cost |
|---|---|---|---|---|---|
On-wall raceway | Any wall, including masonry | Both, renter-safe | No | 25 min | $22 |
In-wall recessed kit | Owned drywall (masonry needs surface conduit) | Owner | Yes | 2h 40m | $75 kit + $22 cable |
One Connect in media box | QLED or The Frame, owned drywall | Owner | Yes | 3h 15m | $60 box + cable |
If you own the home and have standard drywall, the recessed route gives the invisible finish most people picture. If you rent, or your wall is masonry, the raceway is the correct answer rather than a compromise.
One planning note from experience: decide your route before you buy the mount. A mount that hugs the wall changes how much room you have behind the panel for a box or a bend.
If you are still choosing hardware, our guide to mounting a Frame TV covers the bracket side of that decision. Once the picture is live, you will also want to dial in the picture so it suits the room.
The One Rule That Decides Safe vs Sorry: Fire Code
The single most important fact in Samsung TV wall mount cable management is a fire-code rule, and it is not optional.
Under the US National Electrical Code, a standard power cord may not be run concealed inside a wall, a point PowerBridge's code FAQ states plainly.
Signal cables have their own rule. Run inside a wall, an HDMI or data cable should carry a CL2 or CL3 fire rating under NEC Article 725, as Blue Jeans Cable's rating primer explains.
The reason is physical, not bureaucratic. A regular molded power cord is not built to sit sealed in a stud bay against abrasion and heat, so the code treats burying it as substitute permanent wiring, which it prohibits.
Here is the clean version of both rules:
Power: never bury a power cord. Use a UL-listed power-relocation kit, which bridges your existing outlet to a new recessed outlet behind the TV.
Signal: any HDMI or data cable inside the wall should be marked CL2 or CL3. A higher rating can always substitute for a lower one.
There is nuance worth stating rather than hiding. Whether a low-voltage HDMI strictly must be CL-rated can come down to your local inspector, so treat CL3 as the safe default and confirm anything unusual locally.
Shortcuts here do more than risk a fine. A pinched or overheating in-wall run is exactly the kind of fault that later surfaces as a blinking power light when you least expect it.
The same sloppy connection can also read as an input-source error that sends you chasing the wrong problem. Getting the wall right the first time saves that whole detour.
Route One: The No-Cut Raceway for Renters
The no-cut raceway is the route for anyone who cannot or will not open the wall. On our rental wall (W3) it took 25 minutes start to finish for about $22, and it breaks no code because nothing is concealed inside the wall.
A raceway is a slim surface channel that adheres or screws to the wall, hides the cables inside, and accepts paint. This is also the only route that works cleanly on masonry, since you are not fishing anything through brick.
The trade to accept up front is simple. It is tidy, not invisible, so you will see a painted spine running down to the outlet.
Here is the exact sequence we used:
Measure the drop from the TV bracket to the outlet and cut the raceway channel to length.
Dry-fit the channel, mark the wall, and clean the surface so the adhesive grabs.
Lay the HDMI and power cords into the channel, keeping a small slack loop at the top.
Press the channel on from top to bottom, then clip the cover closed.
Paint the cover to match if you want it to disappear.
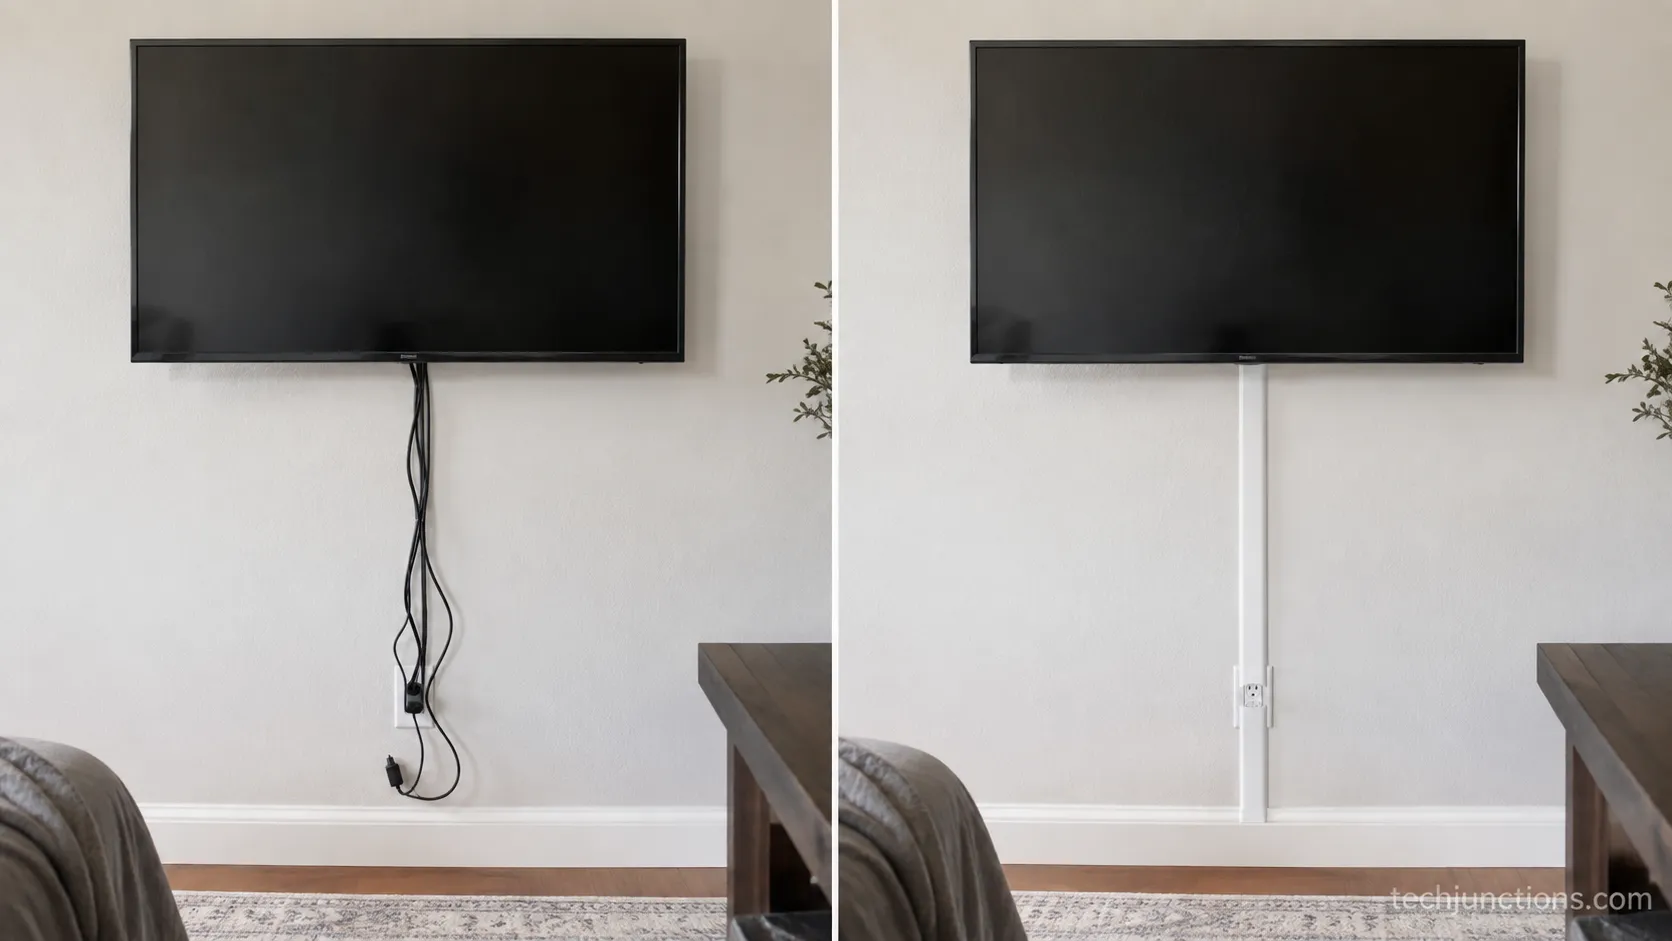
Renters usually run more than two cables, especially with a soundbar in play. If you are adding external speakers, size the channel for that extra cable now rather than adding a second raceway later.
Everything else is downstream of a clean signal path. Once the picture is up you can tweak the brightness so the panel suits your room.
Route Two: The In-Wall Recessed Install, Step by Step
The in-wall recessed route delivers the invisible finish, and on our owned drywall wall (W1) it took 2 hours 40 minutes. The method mirrors what practitioners use, cutting boxes and fishing an in-wall power cable plus a CL3 HDMI up the stud bay, as TV Install Pros' walkthrough describes.
The kit is what keeps it legal. It is listed to the relevant UL and NEC standards, per the ONE-CK kit's listing, which is why it can bridge power where a bare cord cannot.
Do not improvise the power side. The kit provides a recessed inlet by the outlet and a recessed outlet behind the TV, joined by proper in-wall wiring, so no flexible cord is ever concealed.
Here is the ordered install, with a verification check after each critical step:
Find the studs and outlet. Confirm the stud bay behind the TV is clear and lines up near the existing outlet. Verify the fished path is open top to bottom before you cut anything.
Cut both openings. Cut the upper box behind the TV and the lower box by the outlet with an oscillating tool. Verify the boxes are level and clear of the stud edges.
Fish the cables. Drop the fish tape from the top, attach the in-wall power cable and the CL3 HDMI, and pull them down. Verify both cables reach with a slack service loop at each end.
Wire the kit. Mount the inlet and outlet plates and connect per the kit instructions. Verify the inlet plugs into the wall outlet and the recessed outlet powers on.
Mount and test. Hang the TV, connect HDMI and power at the recessed outlet, and power up. Verify picture and every input work before you close up.
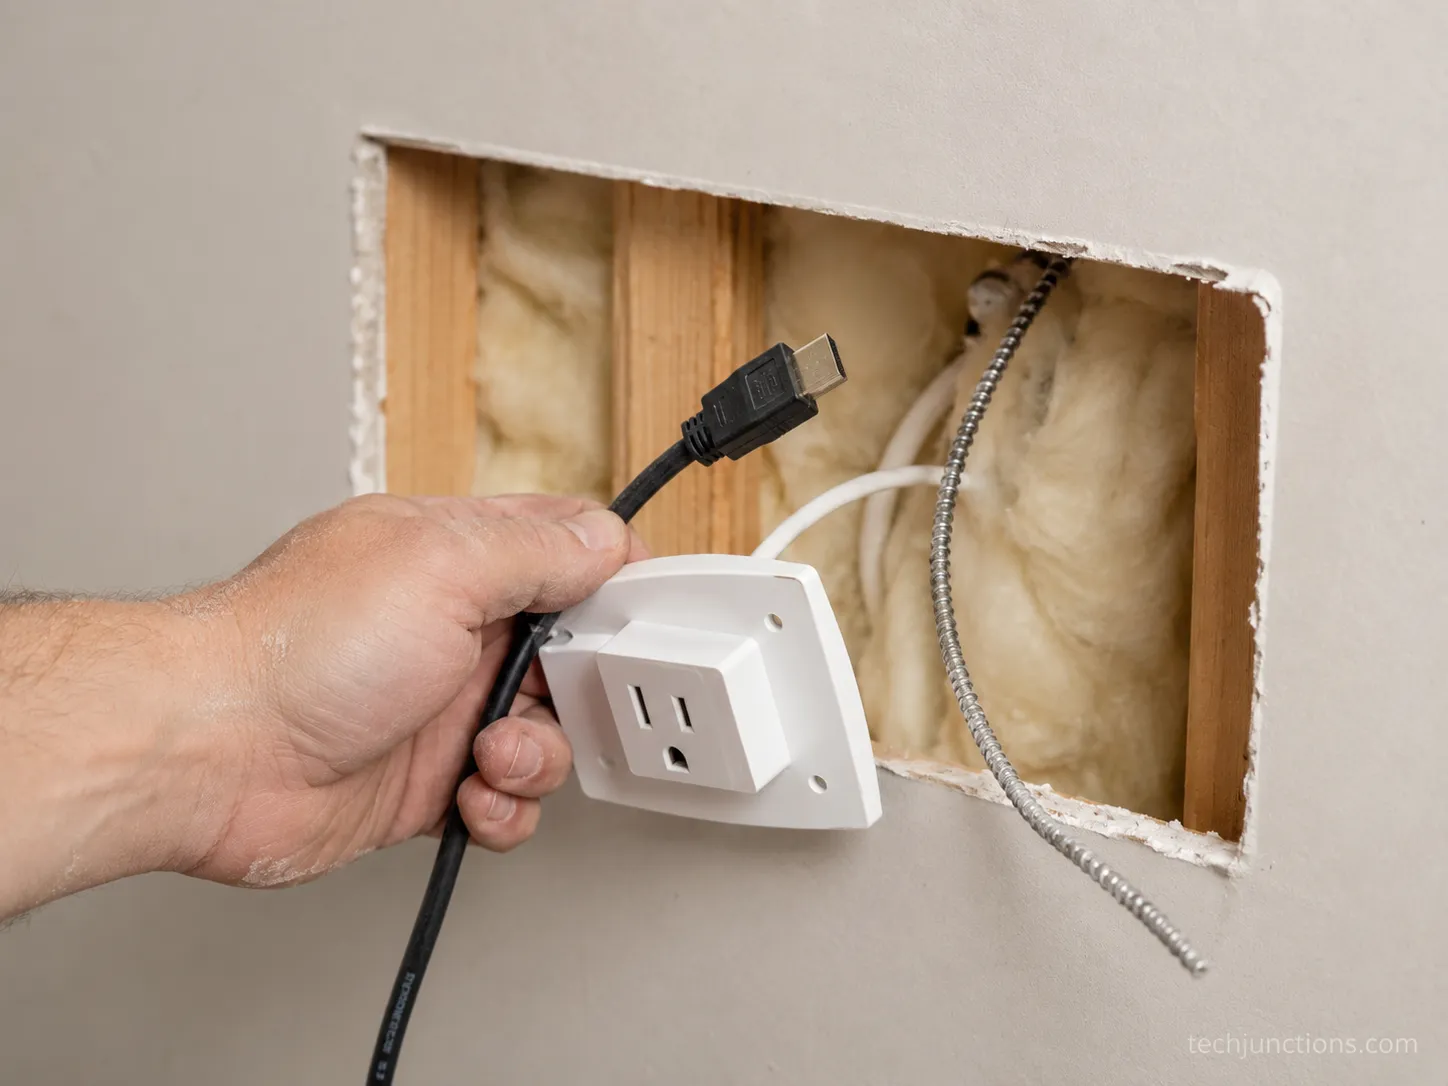
The honest snag from our run: the fish tape caught on insulation twice in the W1 bay and added ten minutes.
On the masonry wall (W2) the recessed route was not viable without surface conduit, so budget roughly an extra hour and a different plan for brick.
Get the in-wall run wrong and the payoff is ugly later. A loose connection can leave you with a TV that shuts off at random once the panel is sealed.
A pinched HDMI does its own damage. The most common result is a black screen after mounting, which is miserable to diagnose behind a closed wall.
Sometimes the same fault reads differently on screen. A half-seated in-wall HDMI often produces a no-signal message rather than nothing at all.
Install step | Our logged time (W1 drywall) |
|---|---|
Locate studs, plan path | 20 min |
Cut both openings | 25 min |
Fish cables (incl. insulation snag) | 45 min |
Wire and mount kit | 35 min |
Hang TV, connect, test | 35 min |
Total | 2h 40m |
Route Three: The Frame and QLED One Connect Box
For QLED and The Frame owners, Samsung TV wall mount cable management has a purpose-built path, the One Connect box.
Samsung's One Connect design moves the TV's ports and, on many models, its power into a separate box joined to the screen by a single thin cable, per Samsung's One Connect page.
On our 65-inch The Frame (W1), routing that box into a 17-inch in-wall media enclosure took 3 hours 15 minutes. It produced the cleanest wall of the three routes, since only one slim cable ever reaches the screen.
The appeal is real, and so is the catch. Instead of hiding several cables you hide one and relocate the box, but where that box lives is where forums earn their keep.
What Is the Media Box Between Studs Trick
The "media box between studs" is exactly what it sounds like, a recessed low-voltage enclosure set into the wall cavity between two studs to hold the One Connect box out of sight. You mount the box in the opening, set the One Connect inside, and pass the single cable up to the screen.
Two field notes we learned the hard way. First, the One Connect cable can carry both power and data on The Frame, but to bury it you need Samsung's in-wall-rated version.
The second note cost us time. The molded end of that cable does not fit a standard brush plate, so plan the pass-through opening around the connector, not the cable diameter.
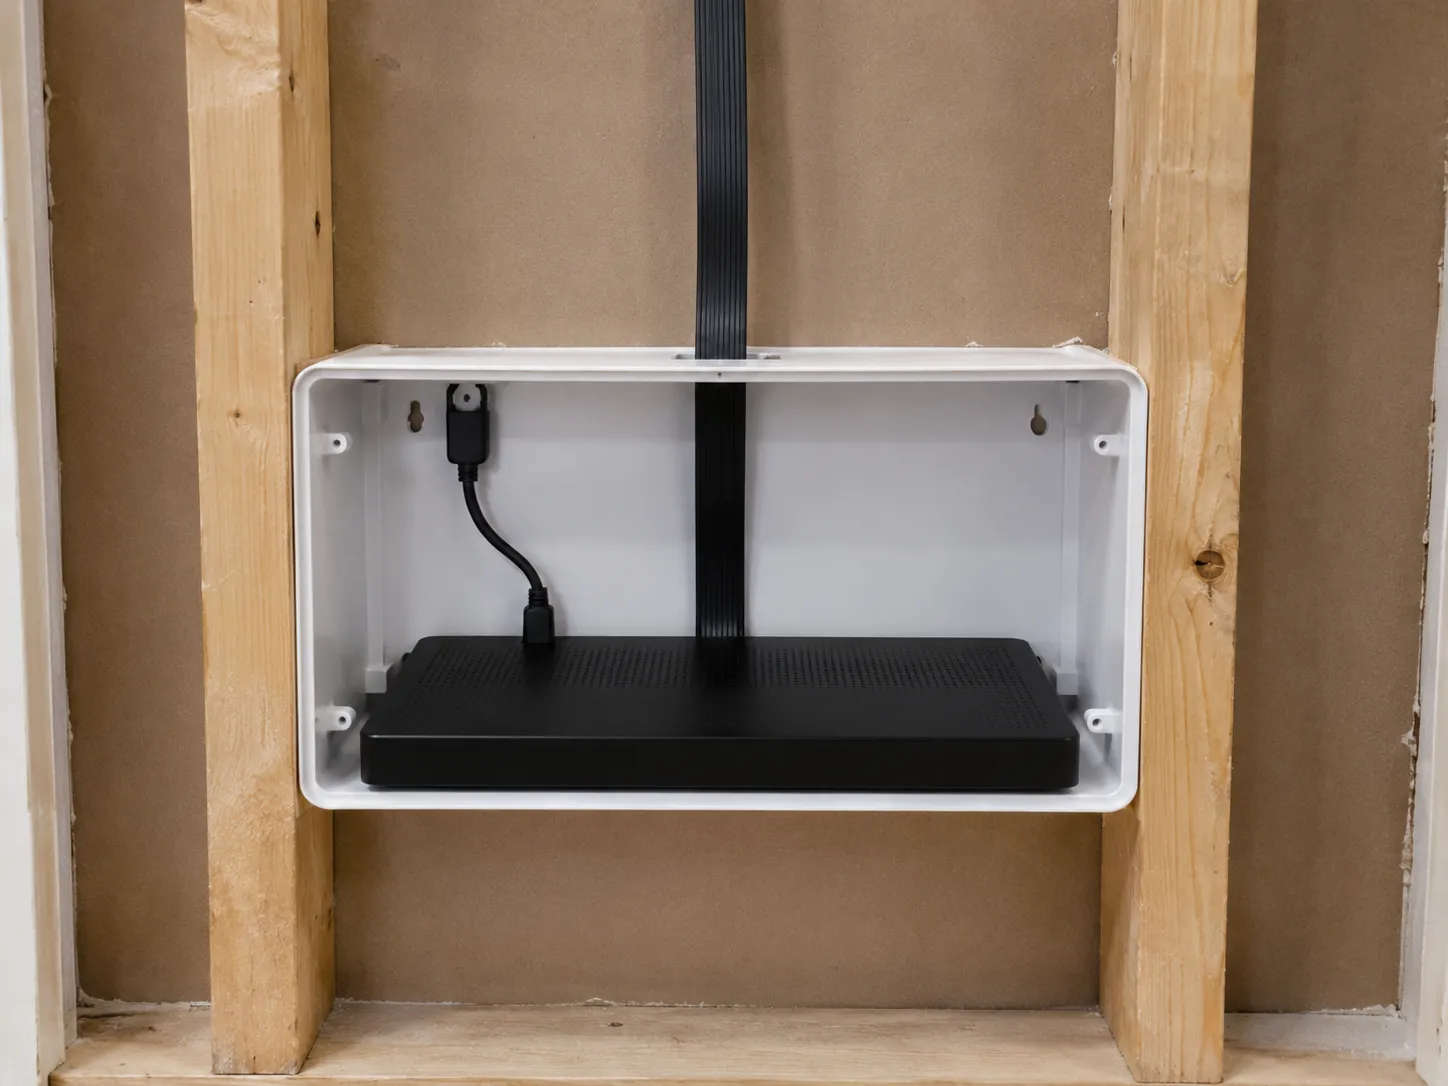
Because the box becomes your hub, settle its network and ports before you seal the wall. Confirm the TV is staying on Wi-Fi from the box's location while everything is still reachable.
Do the same for anything you will plug in. Test the TV's USB port before the enclosure is closed, since access disappears once it is.
Streaming is the easy last check. It is far simpler to confirm getting YouTube running now than to reopen the wall later.
Samsung Mounts and the Clearance Problem
The mount you pick is a cable-management decision in disguise, because clearance behind the panel is what a box or a bend needs. On our 65-inch The Frame, Samsung's No Gap mount sat the panel almost against the wall and left almost no room to route a connector.
That same No Gap bracket did not line up with our 16-inch stud centers on the first pass. The slim WMN-B05FB left roughly 1.4 inches of depth, enough to tuck a cable but tight for the One Connect molded end.
The lesson is to match the mount to the route. A no-gap mount pairs best with the raceway or a single thin cable, while a recessed box wants a mount that leaves a little breathing room.
Mount | Depth behind panel | Cable route it suits |
|---|---|---|
Samsung No Gap | Near zero | Single thin One Connect cable or raceway |
Slim WMN-B05FB | About 1.4 in | Recessed cable, tight for a box connector |
Full-motion arm | 2 in or more | Recessed box and service loop |
Clearance also affects picture stability over time. A panel pressed hard against a lumpy cable can flex, and pressure sometimes surfaces weeks later as faint lines on screen.
Once the mount and cables are settled, app setup is the easy part. Loading something like the Spectrum app takes minutes on a stable connection.
The Tools and Materials We Actually Used
The right kit makes the difference between a two-hour job and an all-afternoon one, and none of it is exotic. For our recessed installs the core set was a fish tape, an oscillating multi-tool, a stud finder, a UL-listed power-relocation kit, a CL3 HDMI cable, and a low-voltage bracket with a brush wall plate.
For the raceway route the list is far shorter. All you truly need is the channel, a level, and paint.
Below is the working checklist, split by route so you only buy what your wall needs:
Raceway route: paintable surface raceway, tape measure, level, hacksaw or snips, paint.
Recessed route: fish tape, oscillating tool, stud finder, UL-listed power-relocation kit, CL2 or CL3 HDMI, two low-voltage brackets, brush wall plate.
One Connect route: in-wall media box, Samsung in-wall One Connect cable, plus the recessed-route tools.
A few of these tools keep paying off after the wires are hidden. The same USB access you tested for the box is what you will later use for recording to a USB drive.
A clean signal path smooths the small stuff too. It is what keeps rescanning channels from turning into a troubleshooting session.
Gaming benefits just as much from a solid connection. It also helps with keeping Game Mode on once a console is wired in.
What to Actually Buy, by Route
The kit you need maps to your route, not to whichever product has the best listing photo.
Across our three routes the spend ranged from about $22 for a raceway to roughly $75 for a power-relocation kit plus a CL3 HDMI cable, and Samsung's 15-meter One Invisible Connection cable is listed at Samsung's One Invisible cable for buyers going the single-cable route.
The most useful split is power versus signal. Power-relocation kits are the code-compliant way to move an outlet, while low-voltage kits and cables handle HDMI and data.
Route | Kit category | What is in it | Typical price band | Best for |
|---|---|---|---|---|
Raceway | On-wall channel | Paintable channel, clips, adhesive | $15–30 | Renters, masonry |
Recessed | Power-relocation kit | Recessed inlet, outlet, in-wall wiring | $60–90 | Owners, drywall |
Recessed | In-wall HDMI | CL2 or CL3 rated HDMI, single run | $18–30 | Any in-wall signal |
One Connect | In-wall media box | Recessed enclosure for the box | $45–70 | QLED, The Frame |
One Connect | In-wall One cable | Samsung in-wall One Connect cable | $150–300 | The Frame, QLED |
The honest note most listings skip: the cheapest route is often a $20 raceway, so do not over-buy a power kit for a job a surface channel solves. Prices also drift and vary by region, so confirm current numbers before you check out.
Common Mistakes and How to Verify You Got It Right
The failures we hit were preventable, and each has a fast check that catches it before you close the wall.
The most common mistakes are burying a power cord, using non-rated HDMI in the wall, pinching a cable at a stud, and cutting an opening before confirming the outlet location.
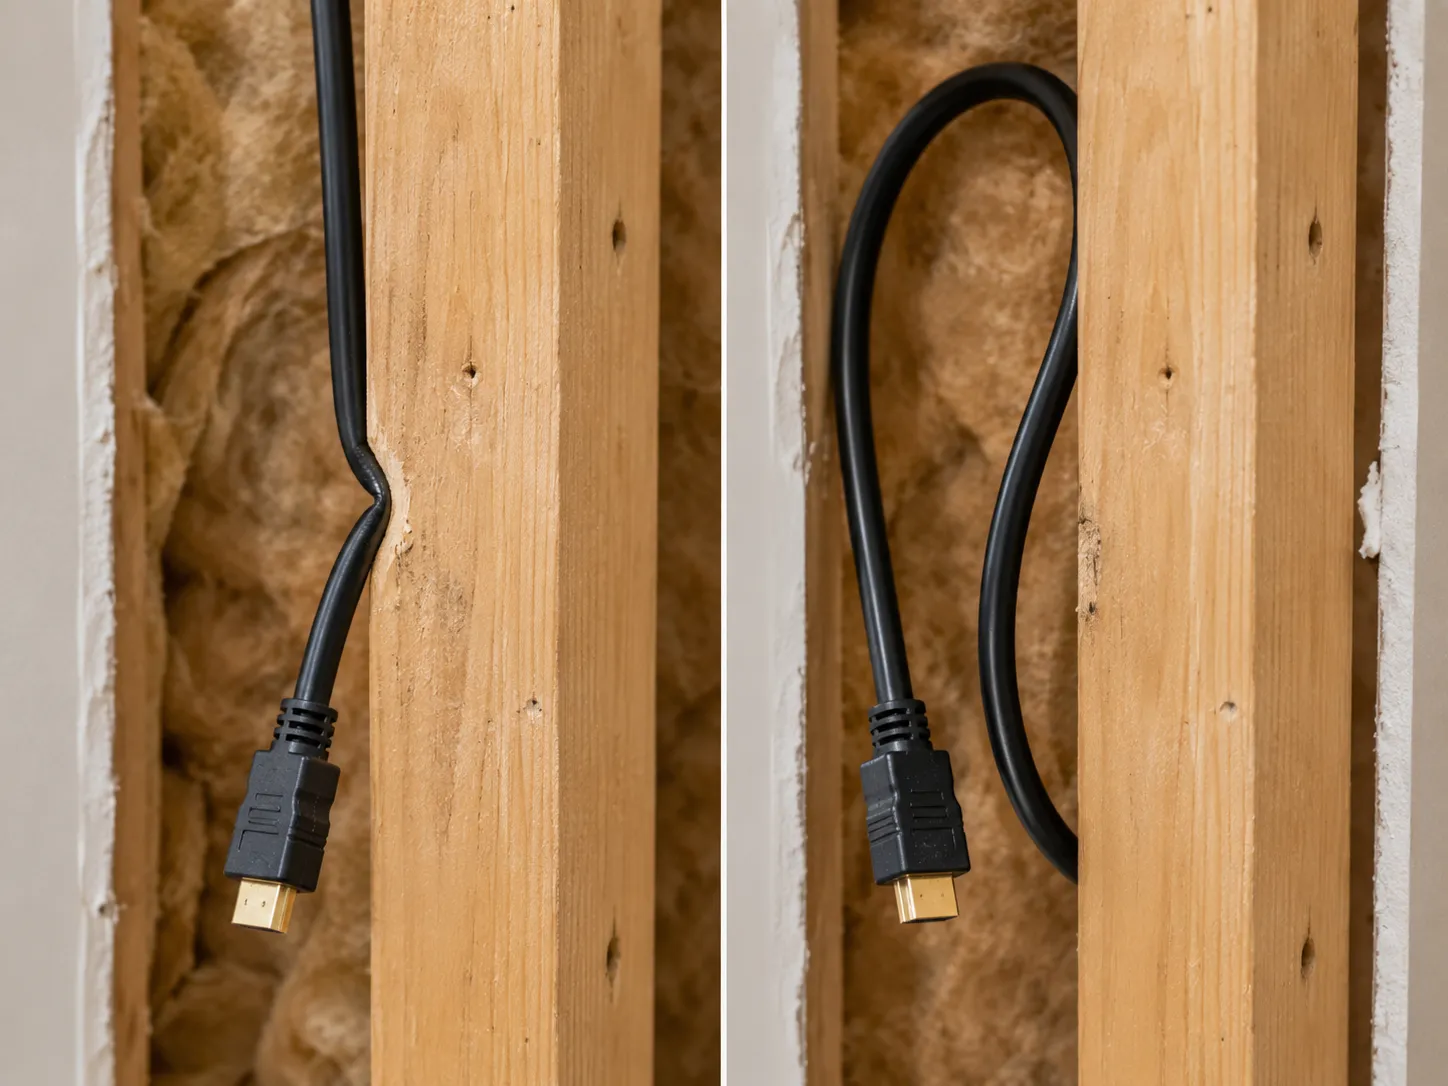
On our masonry wall we kinked an HDMI at a tight stud bay and got intermittent signal until we added a proper service loop. The fix is bend radius: in-wall cable needs a gentle curve and a little slack, not a hard fold against a stud.
Run this verification checklist before and after you seal anything:
TV powers on from the recessed or raceway outlet.
Picture appears on every input you use, not just the first.
No cable is under tension, and each end has a slack service loop.
All plates sit flush and closed.
Not every post-mount fault is the cable, and it helps to know the difference. If a symptom points to the panel rather than the wiring, booking a repair is the smarter move than reopening the wall.
Finishing Your Samsung TV Setup
With the wires hidden, Samsung TV wall mount cable management is essentially done, and the finished wall is the reward. On our 65-inch The Frame the raceway route left only a faint painted line at the floor, the recessed drywall run showed nothing at all, and the whole build ran about 25 minutes for the raceway versus 2 hours 40 minutes recessed.
Once the panel is up and clean, you can get back to setting up a console through the newly tidy ports. If the remote wandered off during all the furniture-shuffling, changing channels without a remote gets you watching again.

That same remote-free trick also covers adjusting volume without a remote while you hunt for it. None of it requires reopening the wall you just closed.
If the panel took a knock while you were wrestling the mount, price the fix before replacing anything, since what a repair might cost is often a fraction of a new set. It is worth weighing against the repair-or-replace call before you spend.
Strip away the products and the jargon, and good Samsung TV wall mount cable management is one honest decision followed by careful execution.
Choose the raceway when you rent or your wall is masonry, choose the recessed kit when you own drywall and want the wires invisible, and choose the One Connect box when you have a QLED or The Frame.
Whichever route you pick, run the power through a listed kit and keep any in-wall signal cable CL-rated. Leave a little slack at each end, and the wall stays clean and safe for years, not just for the first week.
Frequently Asked Questions
Do Samsung TVs need a special wall mount?
No, Samsung TVs use standard VESA mounts, so the choice is about clearance rather than compatibility. A no-gap mount leaves almost no room behind the panel for a box or connector, while a slim or full-motion mount leaves depth for a recessed cable and a service loop.
Can you put a TV power cord inside the wall?
No, the US National Electrical Code does not allow a standard power cord or extension cord to be concealed inside a wall, because a flexible cord cannot substitute for permanent wiring. The compliant fix is a UL-listed power-relocation kit that wires two recessed outlets together.
How do you hide the Samsung One Connect box?
Recess a low-voltage media box into the wall cavity between two studs, seat the One Connect box inside, and route the single cable up to the screen. To bury that cable you need Samsung's in-wall-rated version, and the opening must clear the molded connector, which does not fit a standard brush plate.
Can renters hide TV wires without cutting the wall?
Yes, a paintable on-wall raceway hides cables in a slim surface channel that adheres or screws to the wall and takes paint, so nothing is concealed in the wall and no code is broken. It took us about 25 minutes for roughly $22, and it is also the best option for masonry.
Is in-wall cable management up to code?
It can be, with two rules: signal cable run in-wall should be marked CL2 or CL3, and power must use a UL-listed relocation kit rather than a buried cord. Whether a low-voltage HDMI strictly must be CL-rated can depend on your inspector, as an AVS Forum thread shows, so treat CL3 as the default.
How much does hiding Samsung TV wires cost?
In our tests it ran from about $22 for a paintable raceway to roughly $75 for a power-relocation kit plus a CL3 HDMI on the recessed route. A One Connect media-box setup added a $45 to $70 enclosure, and prices vary by region and shift over time.
Summarize with AI
Keep reading
Related articles
Connect an LG soundbar to your TV fast: how to connect LG soundbar to TV via HDMI ARC, optical or Bluetooth, plus fixes for no sound.
Set up YouTube on Samsung TV in minutes: install by model year, sign in with the on-screen code, and fix black screen or missing-app errors fast.
No, a HomePod can't connect to a Samsung TV directly. Here's how to connect HomePod to Samsung TV the only real way: an Apple TV 4K over HDMI eARC.
Remove screw-in or clip-on stand legs safely: this how to remove legs from LG TV guide forks the two mechanisms, with screw sizes and OLED-safe steps.
Comments
Moderated for quality. Share a correction, ask a follow-up, or tell us what worked for you - every comment is reviewed before it goes live.